
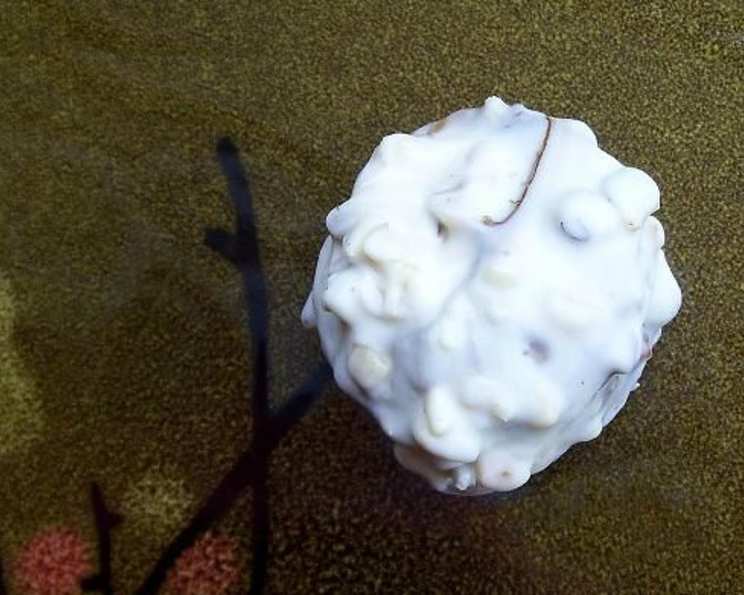
Homemade Ferrero Rocher Candies: An Irresistible Delight
As a child, the arrival of Ferrero Rocher candies was synonymous with special occasions. The crinkle of the gold foil, the delicate, nutty aroma, and the symphony of textures in each bite – it was pure magic. I remember meticulously unwrapping each one, savoring the moment before indulging in that perfect combination of chocolate, hazelnut, and crispy wafer. Years later, that memory is what inspired me to recreate that experience at home.
Recipe Overview
- Prep Time: 20 minutes
- Total Time: 30 minutes
- Yields: 12 Candies
- Dietary Type: Vegetarian
Ingredients
- 12 ice cream cones
- ½ cup (approximately) Nutella
- ¼ cup hazelnuts, coarsely chopped
- ⅓ cup hazelnuts, finely chopped
- 8 ounces chocolate
Equipment Needed
- Parchment paper
- Microwave-safe bowl
- Spoon
Instructions
-
Begin by preparing the ice cream cones. Carefully cut off approximately 1 inch from the base of each ice cream cone. This will create a stable base for your homemade Ferrero Rocher.
-
Next, spread a generous layer of Nutella on the freshly cut side of each cone. This will act as the “glue” and the first layer of that delicious hazelnut flavor.
-
Now, for a burst of texture, press about 1 teaspoon of the coarsely chopped hazelnuts into the Nutella on the inside slots of each ice cream cone. This adds a delightful crunch that complements the smoothness of the Nutella.
-
Spread a thin, even layer of Nutella completely around the exterior of each cone, covering it entirely. This will serve as an adhesive for the finely chopped hazelnuts later on.
-
Once the cones are coated in Nutella and coarsely chopped hazelnuts, place them on a sheet of parchment paper. Transfer the parchment paper with the cones to the freezer. Freeze for approximately 15 minutes. This will help the Nutella set and make the cones easier to handle when dipping them in chocolate.
-
While the cones are chilling, prepare the chocolate coating. In a microwave-safe bowl, melt the chocolate in 30-second intervals, stirring well in between each interval. This prevents the chocolate from burning. Continue until the chocolate is completely melted and smooth.
-
Stir in the finely chopped hazelnuts into the melted chocolate. This creates a rich, nutty chocolate coating that perfectly mimics the flavor of Ferrero Rocher.
-
Remove the chilled cones from the freezer. Working quickly and carefully, use a spoon to roll each cone in the melted chocolate mixture, ensuring it’s evenly coated. Gently shake off any excess chocolate to avoid a thick, uneven coating.
-
Place the chocolate-covered cones back on the parchment paper and return them to the freezer. Freeze until the chocolate is completely set, about 10-15 minutes.
-
Once the chocolate has hardened, your homemade Ferrero Rocher candies are ready to enjoy!
Expert Tips & Tricks
- For a smoother chocolate coating, consider using tempered chocolate. This will give your candies a professional, glossy finish. Tempering chocolate involves carefully heating and cooling it to stabilize the cocoa butter crystals, resulting in a snap and shine.
- If you find the Nutella is too thick to spread easily, gently warm it in the microwave for a few seconds. Be careful not to overheat it.
- Don’t discard the cone tops that you cut off! They can be repurposed for a fun dessert. Serve ice cream in a bowl and use the cone tops, placed upside down, as a quirky garnish.
- To prevent the chocolate from seizing while you’re working, keep the bowl warm by placing it over a pot of simmering water (double boiler method). Be sure the bottom of the bowl doesn’t touch the water.
- If you want to add an extra layer of texture and flavor, consider adding a thin layer of crushed wafers to the outside of the chocolate-covered cones.
Serving & Storage Suggestions
Serve your homemade Ferrero Rocher candies chilled directly from the freezer. They make a delightful treat for parties, a sweet ending to a meal, or a thoughtful homemade gift.
Store any leftover candies in an airtight container in the freezer. They will keep for up to a month. While they can be stored in the refrigerator, the chocolate may become slightly soft. They are best enjoyed frozen.
Nutritional Information
| Nutrient | Amount per Serving | % Daily Value |
|---|---|---|
| Calories | 219 kcal | N/A |
| Fat | 17.8g | 27% |
| Saturated Fat | 10g | 49% |
| Cholesterol | 0mg | 0% |
| Sodium | 19.8mg | 0% |
| Carbohydrate | 17.6g | 5% |
| Fiber | 4.6g | 18% |
| Sugars | 7.4g | 29% |
| Protein | 4.4g | 8% |
Note: Nutritional information is an estimate and may vary based on specific ingredients used.
Variations & Substitutions
- Dairy-Free Option: Use dairy-free chocolate and a dairy-free hazelnut spread alternative to Nutella.
- Different Nuts: Experiment with other nuts, such as almonds, walnuts, or pecans, instead of hazelnuts. Adjust the chopping sizes to your preference.
- Chocolate Variations: Try using dark chocolate, white chocolate, or a combination of both for dipping.
- Peanut Butter Cups: Use peanut butter instead of Nutella for a peanut butter and chocolate version.
FAQs (Frequently Asked Questions)
Q: Why do I need to freeze the cones before dipping them in chocolate?
A: Freezing the cones helps the Nutella set, making them easier to handle and preventing the Nutella from melting into the chocolate when you dip them.
Q: Can I use a different type of chocolate for the coating?
A: Absolutely! Feel free to use your favorite type of chocolate, such as dark chocolate, milk chocolate, or white chocolate. Adjust the sweetness according to your preference.
Q: What if my chocolate seizes while I’m melting it?
A: If your chocolate seizes, try adding a teaspoon of vegetable oil or shortening and stirring vigorously. This can sometimes help to smooth out the chocolate. Otherwise, start again to prevent a grainy texture.
Q: How can I make these candies look more like the store-bought version?
A: While the cone shape is unique to this recipe, you can try using a small spoon or piping bag to create a more rounded shape with the chocolate coating.
Q: Can I make these ahead of time?
A: Yes, you can make these candies ahead of time and store them in the freezer until you’re ready to serve them. They’re a great make-ahead dessert option for parties or gatherings.
Final Thoughts
These homemade Ferrero Rocher candies are a fun and surprisingly easy way to recreate a classic treat. While they may not be perfectly round like the originals, the irresistible combination of chocolate, hazelnut, and crispy texture is spot on. Gather your ingredients, enlist the help of little ones (it’s a fun, albeit slightly messy, activity!), and prepare to be transported back to childhood memories with every delicious bite. Don’t hesitate to experiment with different variations and make this recipe your own. Enjoy!