
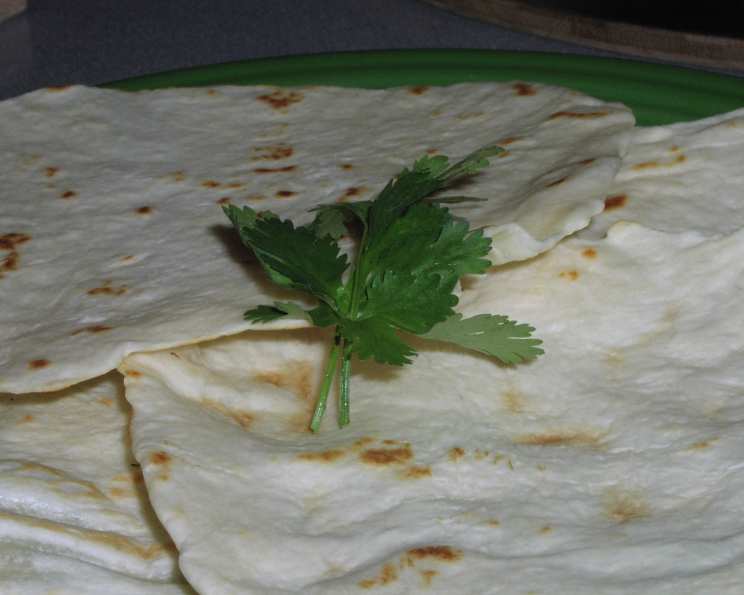
Homemade Flour Tortillas: A Lighter Take on a Classic (2 or 3 WW Points)
I remember summers spent at my grandmother’s house in Texas, the air thick with the scent of sizzling peppers and warm tortillas. She’d stand by her well-worn comal, expertly flipping these thin circles of dough, her hands moving with a speed and grace that always mesmerized me. The taste of those freshly made tortillas, still warm from the pan, was pure comfort, a simple pleasure that connected me to my heritage and her unwavering love. Now, I’ve adapted a lighter version of her recipe, so I can still enjoy the tradition without the guilt.
Recipe Overview:
- Prep Time: 15 minutes
- Cook Time: 20 minutes
- Total Time: 35 minutes
- Servings: 6
- Yield: 6 tortillas
- Dietary Type: Vegetarian
Ingredients:
- 1 cup all-purpose flour
- 2 tablespoons vegetable shortening
- ½ teaspoon baking powder
- ½ teaspoon salt
- 6 tablespoons warm water
Equipment Needed:
- Food processor
- Plastic wrap
- Nonstick skillet
- Clean kitchen towel
Instructions:
-
In a food processor, combine the flour, shortening, baking powder, and salt.
-
With the machine running, gradually add the warm water through the feed tube. Process until a soft dough forms. Be careful not to over-process; you want the dough to just come together.
-
Turn the dough out onto a lightly floured surface. Divide the dough into 6 equal pieces and shape each piece into a smooth ball. This is a crucial step for ensuring even cooking and texture.
-
Place each dough ball between two sheets of plastic wrap.
-
Using a rolling pin, roll each ball out into a thin, approximately 6-inch round. Aim for a uniform thickness to prevent some parts of the tortilla from cooking faster than others. Peel off the top layer of plastic wrap carefully.
-
Set a medium nonstick skillet over medium heat. Heat the skillet until a drop of water sizzles and evaporates almost immediately, indicating it’s hot enough. Reduce the heat slightly to medium-low. If the skillet is too hot, the tortillas will burn before they cook through.
-
Carefully peel the tortilla off the bottom layer of plastic wrap and place it in the hot skillet.
-
Cook the tortilla until it begins to bubble slightly and is speckled with light golden-brown spots, about 1 ½ minutes on each side. Watch closely to prevent burning. The tortilla should puff up slightly as it cooks.
-
Transfer the cooked tortilla to a plate lined with a clean kitchen towel.
-
Fold the towel over the tortilla to keep it warm and pliable while you cook the remaining tortillas. Stacking the tortillas in a towel helps them steam and stay soft.
-
Repeat steps 7-10 with the remaining dough rounds until you have a stack of six warm tortillas.
-
To reheat the tortillas, wrap each one in a separate paper towel or napkin and microwave on High until heated through, about 5 seconds for each tortilla. Alternatively, you can reheat them in a dry skillet over medium heat for a few seconds per side.
Expert Tips & Tricks:
- Don’t Overwork the Dough: Overmixing the dough will develop the gluten too much, resulting in tough tortillas. Mix just until the dough comes together.
- Rest the Dough: Allowing the dough to rest for at least 15 minutes after mixing will relax the gluten, making it easier to roll out.
- Hot Skillet is Key: A hot skillet is crucial for achieving the right texture and browning on the tortillas. Make sure the skillet is heated evenly before adding the tortillas.
- Use a Comal (If You Have One): A comal, a traditional Mexican griddle, is ideal for cooking tortillas. Its even heat distribution ensures consistent results.
- Adjust Water as Needed: The amount of water may vary slightly depending on the humidity and the type of flour you use. Add more water, a tablespoon at a time, if the dough is too dry.
- Use a Tortilla Press: For perfectly even tortillas, consider investing in a tortilla press.
- Flavor Infusion: Experiment with adding herbs or spices to the dough for extra flavor. Chili powder, cumin, or garlic powder are all great options.
Serving & Storage Suggestions:
Serve these homemade tortillas warm with your favorite fillings, such as grilled chicken, carne asada, fish tacos, or vegetarian bean fillings. They are also delicious served simply with butter or dipped in salsa, guacamole, or sour cream.
- Storage: Leftover tortillas can be stored in an airtight container at room temperature for up to 2 days, in the refrigerator for up to 5 days, or in the freezer for up to 2 months.
- Freezing: To freeze tortillas, stack them between sheets of parchment paper to prevent them from sticking together. Place the stack in a freezer-safe bag or container.
- Reheating: Reheat tortillas in a microwave, dry skillet, or oven. For the microwave, wrap them in a damp paper towel. For the skillet, heat them over medium heat for a few seconds per side. For the oven, wrap them in foil and heat at 350°F (175°C) for 10-15 minutes.
Nutritional Information:
| Nutrient | Amount per Serving | % Daily Value* |
|---|---|---|
| Calories | 114 kcal | 6% |
| Total Fat | 4.5 g | 6% |
| Saturated Fat | 1.3 g | 7% |
| Cholesterol | 0 mg | 0% |
| Sodium | 225 mg | 10% |
| Total Carbohydrate | 16 g | 6% |
| Dietary Fiber | 0.6 g | 2% |
| Sugars | 0.1 g | 0% |
| Protein | 2.1 g | 4% |
* Percent Daily Values are based on a 2,000 calorie diet.
Variations & Substitutions:
- Whole Wheat Tortillas: Substitute half of the all-purpose flour with whole wheat flour for a nuttier flavor and added fiber.
- Gluten-Free Tortillas: Use a gluten-free flour blend specifically designed for baking. You may need to adjust the amount of water to achieve the right consistency.
- Corn Tortillas: For a traditional Mexican option, make corn tortillas using masa harina (corn flour).
- Spiced Tortillas: Add spices such as chili powder, cumin, or garlic powder to the dough for a flavorful twist.
- Herb Tortillas: Incorporate fresh herbs like cilantro or parsley into the dough for a vibrant flavor and aroma.
- Low-Fat Tortillas: Reduce the amount of vegetable shortening or substitute it with applesauce for a lower-fat option.
FAQs (Frequently Asked Questions):
Q: Can I make the dough ahead of time?
A: Yes, you can make the dough ahead of time and store it in the refrigerator for up to 24 hours. Bring it to room temperature before rolling it out.
Q: Why are my tortillas tough?
A: Overworking the dough or using too much flour when rolling it out can result in tough tortillas. Be gentle with the dough and use only a light dusting of flour.
Q: How do I keep the tortillas from sticking together?
A: Stacking the cooked tortillas in a towel helps to keep them warm and prevent them from sticking together. You can also place a sheet of parchment paper between each tortilla.
Q: Can I use olive oil instead of vegetable shortening?
A: While you can use olive oil, vegetable shortening creates a more tender and pliable tortilla. The flavor will be slightly different.
Q: My tortillas are tearing when I roll them out. What am I doing wrong?
A: Your dough may be too dry. Try adding a little more water, a teaspoon at a time, until the dough is more pliable. Also, make sure the dough has rested sufficiently before rolling.
Final Thoughts:
There’s a special kind of satisfaction in making something from scratch, especially when it’s a staple as versatile and comforting as a flour tortilla. Don’t be intimidated – this recipe is surprisingly simple, and the reward of warm, homemade tortillas is well worth the effort. Gather your ingredients, dust off your rolling pin, and bring a little bit of sunshine into your kitchen. I hope you enjoy sharing these tortillas with friends and family. Let me know how they turn out, and what fillings you decide to use!