
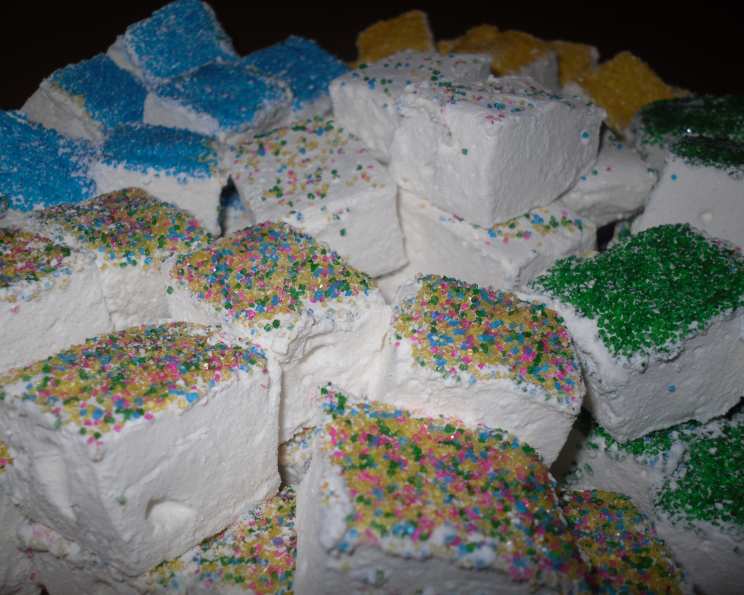
Homemade Fluffy Marshmallows: A Sweet Childhood Dream Come True
I remember being a little girl, mesmerized by the towering bags of marshmallows at the grocery store. They seemed so impossibly soft and fluffy, like little clouds of sugar. Of course, the store-bought kind never quite lived up to the dream. They were often dry, a little too firm, and lacking that melt-in-your-mouth quality. That’s why I started making my own marshmallows, and let me tell you, the difference is night and day. The satisfaction of biting into a homemade marshmallow – a pillowy, vanilla-scented delight – is unparalleled. It’s a simple pleasure that brings back all those sweet childhood memories.
Recipe Overview
- Prep Time: 15 minutes
- Cook Time: 5 minutes
- Total Time: 11 hours 20 minutes (includes setting time)
- Yields: Approximately 32 marshmallows
- Dietary Type: Not Vegan, Not Gluten-Free, Dairy-Free
Ingredients
- 3 (1/4 ounce) packages unflavored gelatin
- 1 1/2 cups white sugar
- 1/2 cup cold water
- 1 cup light corn syrup
- 1/4 teaspoon salt
- 1/2 cup water
- 1 tablespoon pure vanilla extract
- Confectioners’ sugar, for dusting
Equipment Needed
- Electric mixer with whisk attachment
- Small saucepan
- Candy thermometer
- 8 x 12 inch non-metal baking dish
- Sieve
- Board
- Knife or pizza cutter
Instructions
-
In the bowl of an electric mixer fitted with the whisk attachment, combine the gelatin and 1/2 cup cold water. Allow this to sit and bloom while you prepare the syrup. This allows the gelatin to properly hydrate, resulting in a smoother final texture.
-
In a small saucepan, combine the white sugar, light corn syrup, salt, and 1/2 cup water. Cook over medium heat, stirring constantly, until the sugar dissolves completely. Ensuring the sugar is fully dissolved at this stage prevents a grainy texture in the final marshmallows.
-
Once the sugar is dissolved, raise the heat to high and cook the syrup, without stirring, until it reaches 240 degrees Fahrenheit on a candy thermometer. This is the “soft-ball” stage and is crucial for the marshmallow’s consistency. Be careful not to let the syrup burn.
-
Remove the saucepan from the heat immediately once it reaches 240°F.
-
With the mixer on low speed, slowly and carefully pour the hot sugar syrup into the bloomed gelatin mixture. Be extremely cautious as the syrup is very hot and can cause burns.
-
Once all the syrup is incorporated, increase the mixer speed to high and whip the mixture until it becomes very thick, glossy, and nearly triples in volume. This will take approximately 15 minutes. The mixture should form stiff peaks when the whisk is lifted.
-
Add the pure vanilla extract and mix thoroughly to incorporate it evenly throughout the marshmallow mixture.
-
Using a sieve, generously dust an 8 x 12 inch non-metal baking dish with confectioners’ sugar. Ensure the entire surface, including the sides, is coated. This prevents the marshmallows from sticking and makes them easier to remove later.
-
Pour the marshmallow mixture into the prepared pan. Use a spatula to smooth the top evenly. Then, dust the top generously with more confectioners’ sugar.
-
Allow the marshmallows to stand uncovered overnight at room temperature until they are completely dry and set. This crucial resting period allows the marshmallows to firm up properly. Do not refrigerate.
-
The next day, turn the marshmallows out onto a cutting board generously dusted with confectioners’ sugar. Use a sharp knife or pizza cutter, also dusted with confectioners’ sugar, to cut the marshmallows into squares.
-
Finally, dust each marshmallow square with more confectioners’ sugar to prevent them from sticking together.
Expert Tips & Tricks
- Use a high-quality vanilla extract: The vanilla flavor really shines in these marshmallows, so opt for the best you can find.
- Don’t rush the whipping process: The 15-minute whipping time is essential for achieving that light and fluffy texture. Be patient and let the mixer do its work.
- Use a non-metal pan: The marshmallow mixture can react with metal, so stick to glass or ceramic baking dishes.
- Control the stickiness: Coating your hands, knives, and cutting board with confectioners’ sugar is your best friend.
- For flavored marshmallows: Infuse your sugar syrup with citrus zest, spices (like cinnamon or nutmeg), or even coffee beans for a unique twist.
Serving & Storage Suggestions
Homemade marshmallows are delicious on their own, but they truly shine in hot chocolate. They also make a fantastic addition to s’mores or can be used as a topping for ice cream. Store your marshmallows in an airtight container at room temperature for up to 2 weeks. They are best enjoyed within the first week, as they may start to dry out slightly over time. While you can freeze them, the texture may change slightly upon thawing.
Nutritional Information
Note: Nutritional information is an estimate and can vary based on specific ingredients and portion sizes.
| Nutrient | Amount per Serving | % Daily Value |
|---|---|---|
| Calories | ~70 kcal | ~3% |
| Total Fat | 0g | 0% |
| Saturated Fat | 0g | 0% |
| Cholesterol | 0mg | 0% |
| Sodium | 26mg | 1% |
| Total Carbohydrate | 18g | 6% |
| Dietary Fiber | 0g | 0% |
| Sugars | 12g | N/A |
| Protein | 1g | 2% |
Variations & Substitutions
- Peppermint Marshmallows: Add a few drops of peppermint extract along with the vanilla. You can also crush some peppermint candies and sprinkle them on top before the marshmallows set.
- Chocolate Marshmallows: Add 1/4 cup of unsweetened cocoa powder to the sugar mixture in the saucepan.
- Espresso Marshmallows: Add 1-2 teaspoons of instant espresso powder to the sugar mixture.
- Fruit-Flavored Marshmallows: Use fruit puree or juice in place of some of the water for a natural flavor and color. Be sure to reduce the amount of water accordingly to maintain the proper consistency.
- Vegan Marshmallows: While this recipe is not naturally vegan, you could attempt substituting the gelatin with agar-agar, but be warned that the texture will be different.
FAQs (Frequently Asked Questions)
Q: Can I use honey instead of corn syrup?
A: While you can substitute honey, it will affect the flavor and texture of the marshmallows. The corn syrup helps to create a smooth and stable texture.
Q: Why are my marshmallows sticky?
A: Stickiness is usually due to not enough confectioners’ sugar or not allowing the marshmallows to dry out completely overnight. Make sure to coat them generously and let them set fully.
Q: Can I speed up the drying process?
A: It’s best to let the marshmallows dry naturally overnight. Using a fan might help slightly, but avoid using heat, as it can melt them.
Q: What if I don’t have a candy thermometer?
A: While a candy thermometer is highly recommended for accuracy, you can test the syrup by dropping a small amount into a bowl of ice water. If it forms a soft ball that you can pick up with your fingers, it’s ready.
Q: My marshmallows are too hard. What did I do wrong?
A: Overcooking the sugar syrup is the most likely cause of hard marshmallows. Make sure to monitor the temperature carefully and remove the syrup from the heat as soon as it reaches 240°F.
Final Thoughts
Making homemade marshmallows might seem a bit daunting at first, but trust me, it’s absolutely worth the effort. The taste and texture are simply unmatched. Once you’ve mastered the basic recipe, the possibilities for flavor variations are endless. So, gather your ingredients, channel your inner confectioner, and prepare to create some marshmallow magic. And when you do, don’t forget to share your creations and your feedback – I’d love to hear how they turned out! Pair these fluffy delights with a steaming mug of homemade hot chocolate on a cold winter’s evening for the ultimate cozy treat.