
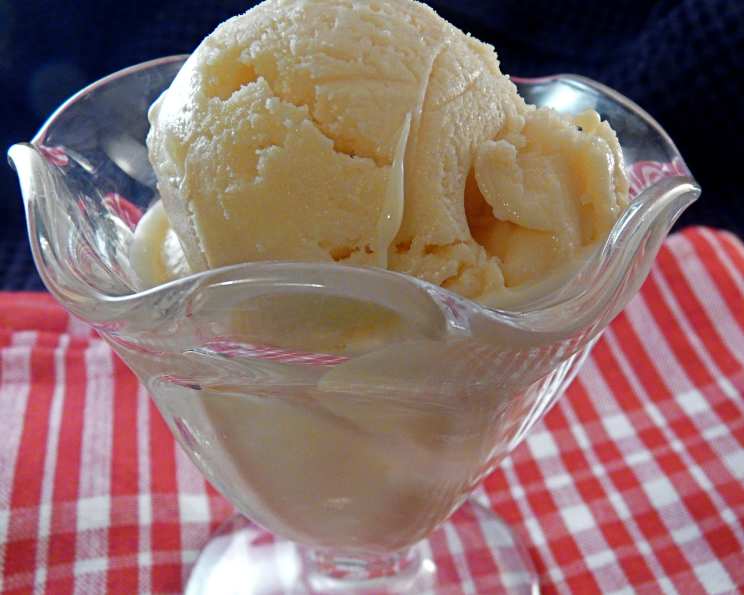
The Creamiest Dream: Mastering Homemade Frozen Custard
I’ll never forget the summer my grandfather surprised us with an old-fashioned, hand-cranked ice cream maker. The anticipation was almost unbearable as we took turns churning, the rhythmic whoosh and grind a constant reminder of the frozen treasure to come. The reward, of course, was a simple vanilla custard, impossibly rich and smooth, a far cry from the watery stuff in the supermarket. That memory, and that taste, are what inspired me to perfect this homemade frozen custard recipe – a recipe that brings back the joy of simple, delicious indulgence.
Recipe Overview
- Prep Time: 20 minutes
- Cook Time: 8 minutes
- Chill Time: 3-4 hours
- Freeze Time: According to ice cream maker instructions
- Yields: 1 1/2 quarts
- Serves: 4
Ingredients
- 4 cups milk
- 4 eggs
- 1 1/4 cups sugar
- 1/3 cup cornstarch
- 1/8 teaspoon salt
- 1 (14 ounce) can sweetened condensed milk
- 2 tablespoons pure vanilla extract
Equipment Needed
- Large heavy saucepan
- Whisk
- Measuring cups and spoons
- Ice cream freezer/maker
Instructions
- In a large, heavy-bottomed saucepan, gently bring the milk to a boil over medium heat. Keep a close eye on it to prevent scorching.
- While the milk is heating, in a separate bowl, beat the eggs until light and frothy. This helps create a smooth custard.
- Add the sugar, cornstarch, and salt to the beaten eggs. Whisk vigorously until the mixture is well combined and smooth. Ensure there are no lumps of cornstarch remaining.
- Gradually add a small amount of the hot milk to the egg mixture, whisking constantly. This process, called tempering, slowly raises the temperature of the eggs to prevent them from scrambling when added to the hot milk.
- Pour the tempered egg mixture back into the saucepan with the remaining hot milk.
- Cook and stir the mixture constantly over medium heat for 6-8 minutes, or until the custard thickens and coats the back of a spoon. Use a wooden spoon or spatula and scrape the bottom and sides of the pan to prevent sticking and scorching. The custard is ready when you can run your finger across the back of the spoon and the line remains distinct.
- Remove the saucepan from the heat and gradually stir in the sweetened condensed milk and vanilla extract. Mix well until everything is fully incorporated. The sweetened condensed milk adds a lovely richness and sweetness to the custard.
- Pour the custard mixture into a bowl or container, cover with plastic wrap, pressing the wrap directly onto the surface of the custard to prevent a skin from forming.
- Chill the custard in the refrigerator for 3-4 hours, or until it is completely cold. This step is crucial for proper freezing.
- Once chilled, pour the custard into your ice cream freezer.
- Freeze according to the manufacturer’s directions for your specific machine. Freezing times vary depending on the type of ice cream maker you are using.
- Once the frozen custard has reached your desired consistency, transfer it to an airtight container and store in the freezer until ready to serve.
Expert Tips & Tricks
- Tempering is key: Don’t skip the step of tempering the eggs. Adding the eggs directly to the hot milk will result in scrambled eggs instead of a smooth custard.
- Watch the heat: Keep the heat at medium and stir constantly to prevent scorching. Burnt custard is no good.
- Don’t overcook: Overcooking can lead to a grainy texture. As soon as the custard coats the back of a spoon, remove it from the heat.
- Infuse the milk: For extra flavor, try infusing the milk with spices like cinnamon, cardamom, or even Earl Grey tea before bringing it to a boil. Remove the spices before proceeding with the recipe.
- Salt is your friend: Don’t be tempted to skip the salt. It enhances the sweetness and balances the flavors.
- Get creative with mix-ins: Once the custard is partially frozen, you can add mix-ins like chocolate chips, chopped nuts, fruit pieces, or cookie crumbles.
Serving & Storage Suggestions
Serve your homemade frozen custard immediately after churning for the softest texture. For a firmer consistency, place it in the freezer for a few more hours. Scoop into bowls or cones and enjoy! You can also use it to make milkshakes, sundaes, or affogatos.
Store leftover frozen custard in an airtight container in the freezer. It will last for up to 2 weeks, but the texture may change slightly over time. To soften before serving, let it sit at room temperature for a few minutes or microwave it in short bursts.
Nutritional Information
(Estimated values, may vary based on specific ingredients)
| Nutrient | Amount per Serving | % Daily Value |
|---|---|---|
| Calories | 847 kcal | 42% |
| Total Fat | 22.3 g | 34% |
| Saturated Fat | 12.6 g | 62% |
| Cholesterol | 253.9 mg | 84% |
| Sodium | 391.4 mg | 16% |
| Total Carbohydrate | 138.7 g | 46% |
| Dietary Fiber | 0.1 g | 0% |
| Sugars | 117.4 g | 469% |
| Protein | 22.2 g | 44% |
Variations & Substitutions
- Dairy-Free: Substitute the milk with your favorite non-dairy milk (almond, soy, or oat). Use a plant-based condensed milk alternative.
- Chocolate: Add 1/2 cup of cocoa powder to the dry ingredients (sugar, cornstarch, salt).
- Coffee: Add 2 tablespoons of instant coffee powder to the dry ingredients, or infuse the milk with coffee beans.
- Fruit Flavors: Puree your favorite fruits (strawberries, raspberries, mango) and swirl them into the custard just before freezing. Adjust sugar as needed depending on the sweetness of the fruit.
- Peanut Butter: Swirl in peanut butter after churning for a classic combination.
FAQs (Frequently Asked Questions)
Q: Why is my custard grainy?
A: Grainy custard can be caused by overcooking, insufficient chilling, or using too much cornstarch. Be sure to follow the recipe carefully and chill the custard thoroughly before freezing.
Q: Can I use regular evaporated milk instead of sweetened condensed milk?
A: No, sweetened condensed milk is crucial for the sweetness and richness of the custard. Evaporated milk will not provide the same result.
Q: My ice cream maker isn’t freezing the custard properly. What could be wrong?
A: Make sure your ice cream maker’s bowl is completely frozen before adding the custard. Also, ensure the mixture is properly chilled. If your machine is old, it may not be as efficient.
Q: Can I make this without an ice cream maker?
A: While an ice cream maker is ideal, you can try the “no-churn” method. Pour the chilled custard into a freezer-safe container and freeze for 2-3 hours. Then, use an electric mixer to beat the mixture until smooth. Repeat this process every 30 minutes for 2-3 hours to break up the ice crystals.
Q: How can I prevent ice crystals from forming?
A: Ensuring the custard is properly chilled and using an ice cream maker will help minimize ice crystal formation. Storing the frozen custard in an airtight container also helps.
Final Thoughts
Homemade frozen custard is a delightful treat that’s worth the effort. The rich, creamy texture and customizable flavors make it a perfect dessert for any occasion. Don’t be intimidated by the process – with a little patience and attention to detail, you can create a truly unforgettable frozen delight. So go ahead, gather your ingredients, dust off your ice cream maker, and prepare to indulge in the creamiest, dreamiest frozen custard you’ve ever tasted. I can’t wait to hear what variations you come up with!