
The Ultimate Homemade Gel Pack: Soothing Relief from Your Freezer
I’ll never forget the summer I spent volunteering at a local animal shelter. One particularly hot day, a playful puppy, overflowing with energy, tripped and bumped its head. As I rushed to grab a cold compress from the first-aid kit, I realized we were out! Desperate, I soaked a towel in cold water, but it warmed up almost instantly. From that day on, I vowed to always have a reliable cold pack on hand, and that’s when I discovered the magic of homemade gel packs. Simple, effective, and endlessly customizable, these little lifesavers have become a staple in my home, ready to soothe bumps, bruises, and even keep my picnic lunch perfectly chilled.
Recipe Overview
- Prep Time: 5 minutes
- Total Time: 4+ hours (freezing time)
- Yields: 1 Large Gel Pack
- Dietary Type: Non-Edible
Ingredients
- 3 cups water
- 1 cup rubbing alcohol
Equipment Needed
- Freezer bag (gallon-sized recommended)
- Second freezer bag (gallon-sized recommended)
Instructions
-
In a large bowl or pitcher, thoroughly mix together the water and rubbing alcohol. Stir until the mixture is homogenous.
-
Carefully pour the water and alcohol mixture into a freezer bag. Seal the bag tightly, making sure to remove as much air as possible. This is crucial to prevent leaks.
-
To further safeguard against leaks, encase the filled bag inside a second freezer bag. Again, seal tightly, removing excess air. Double-bagging ensures that even if the first bag springs a leak, the contents are still contained.
-
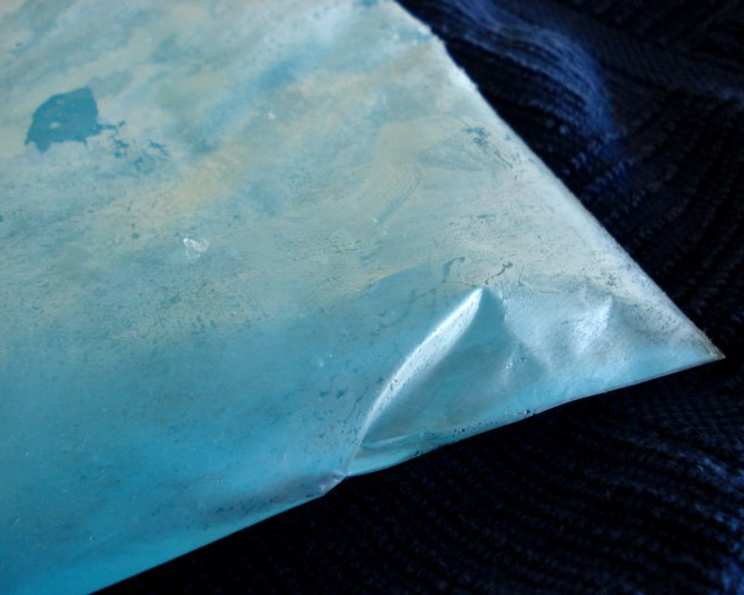
Place the double-bagged mixture flat in the freezer. Allow it to freeze completely, which will take at least 4 hours, or preferably overnight. The mixture will not freeze solid due to the alcohol content, but will form a slushy, pliable gel.
-
Remove the gel pack from the freezer when needed.
Expert Tips & Tricks
-
Alcohol Ratio is Key: The ratio of water to rubbing alcohol is important. The more alcohol you use, the softer and more pliable the gel pack will be. This makes it gentler on injuries, as it conforms better to the body’s contours compared to a hard ice pack. However, using too much alcohol can make it too slushy and less effective at holding its temperature. Experiment to find the perfect balance for your needs.
-
Bag Quality Matters: Use high-quality, heavy-duty freezer bags. Cheaper, thinner bags are more prone to leaks, which can be messy and render the gel pack useless.
-
Add Color (Optional): If you want to add a bit of fun, you can add a few drops of food coloring to the water before mixing. This won’t affect the performance of the gel pack, but it can make it more appealing, especially for children.
-
Leak Prevention: Before freezing, turn the filled and sealed bags upside down over the sink for a few minutes to check for any leaks. If you spot a leak, transfer the mixture to new bags immediately.
-
Custom Sizes: For smaller areas, consider dividing the mixture into smaller freezer bags to create smaller gel packs. This can be helpful for treating fingers, toes, or other small areas.
Serving & Storage Suggestions
This homemade gel pack is designed for external use only.
-
Serving: Apply the gel pack directly to the affected area. To prevent frostbite or skin irritation, always wrap the gel pack in a thin towel or cloth before applying it to the skin. Use for 15-20 minutes at a time, several times a day, as needed.
-
Storage: Store the gel pack in the freezer when not in use. It will remain pliable and ready for use at any time. There is no expiration date, as the mixture will remain stable indefinitely in the freezer.
-
Important Note: Do not ingest the contents of the gel pack. Keep out of reach of children and pets. If the bag leaks, discard the contents immediately.
Nutritional Information
As this is not an edible item, there is no nutritional value.
| Nutrient | Amount per Serving | % Daily Value |
|---|---|---|
| Calories | 0 kcal | 0% |
| Total Fat | 0g | 0% |
| Saturated Fat | 0g | 0% |
| Cholesterol | 0mg | 0% |
| Sodium | 0mg | 0% |
| Total Carbohydrate | 0g | 0% |
| Dietary Fiber | 0g | 0% |
| Sugars | 0g | 0% |
| Protein | 0g | 0% |
Variations & Substitutions
-
Scented Gel Pack: Add a few drops of essential oil (such as lavender or eucalyptus) to the water before mixing for a soothing aromatherapy experience. Be sure to use skin-safe essential oils and avoid direct contact with the skin.
-
No-Rubbing Alcohol Version (Less Effective): While the rubbing alcohol helps keep the gel pack pliable, you can technically make one with just water. However, it will freeze solid and be less comfortable to use. If you choose this option, consider adding a tablespoon of salt to the water, which can help lower the freezing point slightly.
-
Corn Syrup Alternative (Avoid if Possible): Some recipes call for corn syrup as a way to achieve a gel-like consistency. While this can work, it’s stickier and potentially messy if the bag leaks. Rubbing alcohol is generally a better option.
FAQs (Frequently Asked Questions):
Q: How long will the gel pack stay cold?
A: The gel pack will typically stay cold for 20-40 minutes, depending on the ambient temperature and how it’s used. Wrapping it in a towel will help prolong the cooling effect.
Q: Can I reuse the gel pack?
A: Absolutely! The gel pack is designed to be reusable. Simply return it to the freezer after each use to re-chill.
Q: What if the gel pack freezes solid?
A: If the gel pack freezes solid, it likely means there isn’t enough rubbing alcohol in the mixture. Allow it to thaw slightly until it becomes pliable again.
Q: Is rubbing alcohol safe to use in a gel pack?
A: Yes, rubbing alcohol is safe as long as it’s contained within the sealed bags. Avoid direct contact with the skin. Do not ingest.
Q: Can I use this gel pack to keep food cold?
A: Yes, this gel pack can be used to keep food cold in lunch boxes or coolers. Just ensure the bag is sealed tightly to prevent any leaks.
Final Thoughts
Creating your own homemade gel pack is not only incredibly simple, but also empowering. Knowing you have a readily available, customizable solution for minor injuries or keeping your drinks cool on a hot day is a great feeling. I encourage you to try this recipe and adapt it to your specific needs and preferences. Feel free to experiment with different ratios of water to rubbing alcohol, add essential oils for aromatherapy, or even create smaller gel packs for targeted relief. Let me know how it works for you! Share your experiences and any creative variations you come up with. Happy chilling!