
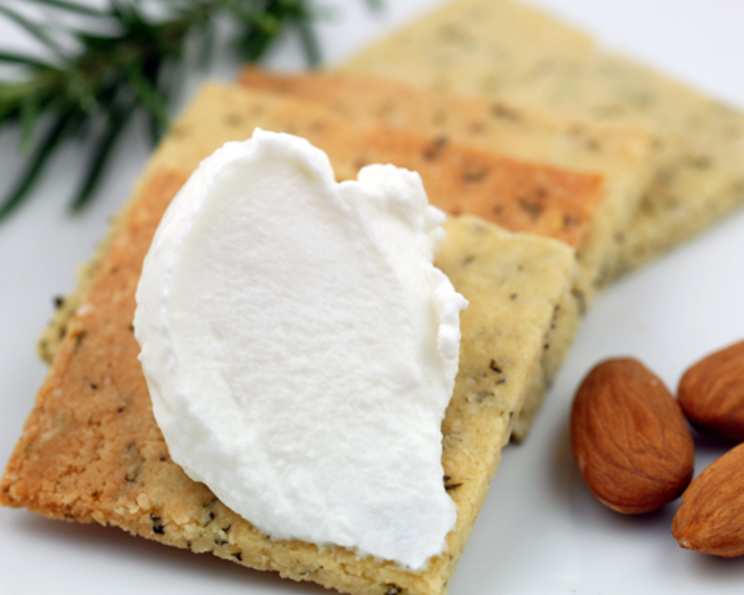
From Pasture to Plate: Crafting Your Own Luxurious Homemade Goat Cheese
Goat cheese has always held a special place in my heart, evoking memories of sun-drenched afternoons spent on my grandfather’s farm. As a child, the tangy, slightly earthy flavor was a fascinating contrast to the sweeter, milder cheeses I was accustomed to. I remember watching my grandfather meticulously tend to his small herd, knowing the love and care he poured into those animals would ultimately translate into the delicious, creamy cheese we savored as a family. That connection, from the animal to the land to the table, made goat cheese more than just food; it was a story of dedication and flavor I cherish to this day.
Recipe Overview
- Prep Time: 20 minutes
- Cook Time: 12 hours + 8 hours draining
- Total Time: 20 hours
- Servings: 4-6
- Yield: 2 cups
- Dietary Type: Gluten-Free, Vegetarian
Ingredients
- ½ gallon goat’s milk (preferably raw)
- 2 (10 g) packages yogourmet yogurt starter
Equipment Needed
- Large saucepan
- Cooking thermometer
- Blender
- Yogurt maker
- Colander
- Cheesecloth
- Bowl
- 2-cup mason jar
Instructions
-
In a large saucepan, gently heat the goat’s milk to 110°F (43°C), stirring constantly to prevent scorching. Use a cooking thermometer to ensure accuracy. This precise temperature is crucial for activating the yogurt starter without damaging it.
-
Carefully pour the heated milk into a blender. Add the two packages of yogourmet yogurt starter.
-
Blend on high speed for approximately 10 seconds. This step is vital for evenly distributing the starter and breaking up any potential clumps, ensuring a smooth and consistent final product.
-
Transfer the blended milk mixture into your yogurt maker. Turn the machine on according to the manufacturer’s instructions.
-
Allow the yogurt to incubate in the yogurt maker for 12 hours. While 12 hours is the minimum, you can leave it for a slightly longer period, up to 14 hours, if you prefer a tangier flavor profile. Monitor the consistency; it should resemble a thick, slightly wobbly yogurt.
-
Line a colander with several layers of cheesecloth. Ensure the cheesecloth extends generously beyond the edges of the colander.
-
Place the cheesecloth-lined colander over a bowl to catch the whey (the watery liquid that will drain from the yogurt).
-
Gently pour the yogurt into the cheesecloth-lined colander.
-
Fold the overhanging edges of the cheesecloth over the yogurt to create a sealed bundle.
-
Place the colander and bowl assembly in the refrigerator and allow the goat cheese to drain for 8 hours. The longer it drains, the firmer the cheese will become. Adjust the draining time based on your desired consistency. For a softer, spreadable cheese, 8 hours is sufficient. For a firmer, more sliceable cheese, you can drain it for up to 12 hours.
-
After draining, carefully lift the cheesecloth bundle out of the colander.
-
Gently unwrap the cheesecloth and scrape the creamy goat cheese from the cheesecloth onto a plate using a spatula or spoon.
-
Transfer the freshly made goat cheese into a clean, 2-cup mason jar for storage.
-
Serve and enjoy!
Expert Tips & Tricks
-
Raw Milk Matters: Using raw goat’s milk, if you can source it safely, will result in a cheese with a richer, more complex flavor. However, ensure you are familiar with the regulations regarding raw milk in your area. Pasteurized goat’s milk will still produce delicious cheese.
-
Temperature Control: Maintaining the correct temperature during the initial heating phase is paramount. Overheating the milk can kill the beneficial bacteria in the yogurt starter.
-
Whey is Wonderful: Don’t discard the whey that drains off during the cheesemaking process! It’s packed with nutrients and can be used in smoothies, soups, or even as a substitute for water when baking bread.
-
Flavor Infusions: Get creative with your goat cheese! Before draining, you can stir in fresh herbs like thyme, rosemary, or chives. You can also add roasted garlic, sun-dried tomatoes, or a drizzle of honey for a touch of sweetness.
-
Adjusting Texture: To make the cheese even creamier, try adding a tablespoon or two of heavy cream or crème fraîche after draining.
Serving & Storage Suggestions
This homemade goat cheese is incredibly versatile. Serve it spread on crusty bread or crackers, crumble it over salads, or use it as a filling for ravioli or omelets. It pairs beautifully with fresh fruit, such as figs, grapes, and berries.
Store the goat cheese in a sealed container in the refrigerator for up to one week. While it’s best enjoyed fresh, you can also freeze it for longer storage. However, be aware that freezing may slightly alter the texture, making it a bit more crumbly upon thawing.
Nutritional Information
| Nutrient | Amount per Serving | % Daily Value |
|---|---|---|
| Calories | 224 kcal | 11% |
| Total Fat | 12.8 g | 20% |
| Saturated Fat | 8.7 g | 44% |
| Cholesterol | 35.8 mg | 12% |
| Sodium | 163 mg | 7% |
| Total Carbohydrate | 14.5 g | 5% |
| Dietary Fiber | 0 g | 0% |
| Sugars | 14.5 g | N/A |
| Protein | 11.6 g | 23% |
Note: Nutritional information is an estimate and may vary based on specific ingredients and portion sizes.
Variations & Substitutions
-
Herb-Infused Goat Cheese: As mentioned above, experiment with different herbs. Dill, parsley, and oregano are also excellent choices.
-
Spicy Goat Cheese: Add a pinch of red pepper flakes or a finely diced jalapeño to the milk mixture before blending for a spicy kick.
-
Sweet Goat Cheese: Drizzle honey or maple syrup over the finished cheese, or stir in chopped dried fruit like cranberries or apricots.
-
Vegan “Goat Cheese”: While this recipe relies on goat’s milk, you can explore vegan alternatives using cashews or almonds as a base, cultured with vegan yogurt starter.
FAQs (Frequently Asked Questions)
Q: Can I use store-bought goat’s milk instead of raw milk?
A: Yes, absolutely! While raw milk offers a unique flavor profile, pasteurized goat’s milk will still produce a delicious homemade cheese. Just be sure to use whole goat’s milk for the best results.
Q: What if I don’t have a yogurt maker?
A: You can still make goat cheese without a yogurt maker! Preheat your oven to the lowest setting, then turn it off. Place the milk mixture in an oven-safe container, cover it loosely, and place it in the warm oven for 12-14 hours. The residual heat should be sufficient to incubate the yogurt.
Q: How do I know when the yogurt is ready to be drained?
A: The yogurt is ready when it has thickened and has a slightly wobbly consistency. It should resemble a thick yogurt. If it’s still very liquid, let it incubate for a bit longer.
Q: Can I freeze the goat cheese?
A: Yes, you can freeze goat cheese, but the texture may change slightly, becoming a bit more crumbly upon thawing. Wrap it tightly in plastic wrap and then place it in a freezer bag for best results.
Q: My goat cheese tastes too tangy. What did I do wrong?
A: The tanginess of goat cheese increases with the length of incubation and draining time. Try reducing both slightly in your next batch.
Final Thoughts
Embarking on the journey of making your own goat cheese is a rewarding experience that connects you to the origins of your food. Don’t be intimidated by the process; with a little patience and attention to detail, you’ll be savoring the creamy, tangy goodness of homemade goat cheese in no time. So gather your ingredients, embrace the process, and share your creations with friends and family. I’d love to hear about your own unique twists and flavor combinations!