
Homemade Granola Bars: Fuel Your Day the Delicious Way
I can still remember the scent of toasted oats and honey wafting from my grandmother’s kitchen. She always had a batch of homemade granola bars ready for us, perfect for a quick after-school snack or a hiking adventure. Each bite was a little burst of love and energy, fueling our childhood explorations. To this day, that comforting aroma instantly transports me back to her warm kitchen, reminding me of the simple joys of homemade goodness.
Recipe Overview
- Prep Time: 25 minutes
- Cook Time: 10-15 minutes
- Total Time: 2 hours 35-40 minutes (includes cooling)
- Yields: 16 bars
- Serves: 16
- Dietary Type: Vegetarian (can be easily adapted to vegan – see substitutions below)
Ingredients
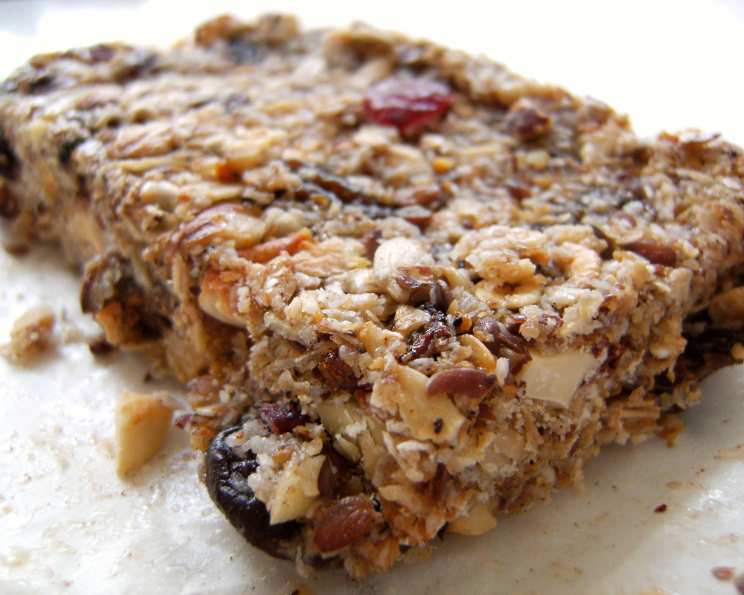
- 2 ½ cups rolled oats
- ½ cup wheat germ
- ¼ cup flax seed
- ¼ cup sesame seeds
- 1 cup almonds, sliced (or other chopped nuts like cashews, walnuts, peanuts, macadamias or pecans)
- ½ cup shredded coconut
- 1 teaspoon sea salt or 1 teaspoon kosher salt
- 1 teaspoon cinnamon
- 2 teaspoons vanilla
- ½ cup honey
- 4 tablespoons butter
- ¼ cup brown sugar
- 1 cup dried cranberries (or other chopped dried fruit like raisins, pineapple, apricots, cherries, papaya, prunes, white or chocolate chips)
Equipment Needed
- Rimmed baking sheet
- Parchment paper or foil
- Large bowl
- Large measuring cup
- Microwave oven
- 9” x 13” baking pan
- Waxed paper
- Wooden spoon
- Large knife
Instructions
-
Preheat your oven to 325°F (160°C). Line a rimmed baking sheet with parchment paper or foil. This will prevent the oats and nuts from sticking during toasting.
-
Combine the rolled oats, wheat germ, flax seeds, sesame seeds, and sliced almonds in a bowl. Spread the mixture out evenly on the prepared baking sheet.
-
Toast the oat mixture in the preheated oven for approximately 10 to 15 minutes, until golden. Stir occasionally and watch carefully to prevent burning. The toasting process is key to developing a rich, nutty flavor in your granola bars.
-
While the oat mixture is toasting, prepare the rest of the ingredients. In a large bowl, combine the salt, shredded coconut, cinnamon, and dried cranberries. Set aside.
-
In a large measuring cup, place the vanilla, honey, butter, and brown sugar.
-
Microwave the honey mixture for approximately 2 minutes. The mixture will foam and bubble as it heats. Watch closely so that it doesn’t overflow.
-
Stir the honey mixture thoroughly until the brown sugar is completely dissolved. This ensures a smooth and even distribution of sweetness throughout the granola bars.
-
Once the oat mixture is done toasting, immediately transfer it to the large bowl with the coconut and cranberry mixture. Stir well to combine.
-
Add the honey mixture to the oat and nut mixture. Stir thoroughly to incorporate all the ingredients. Ensure everything is evenly coated with the honey mixture, as this acts as the binding agent for the bars.
-
Line a 9” x 13” baking pan with waxed paper. Make sure the waxed paper extends up the sides of the pan to make removing the finished bars easier.
-
Spread the granola mixture into the prepared pan. Use the back of a wooden spoon to press the mixture down firmly, creating a smooth, even surface.
-
Place another piece of waxed paper over the top of the granola mixture. Press down firmly to evenly compact the mixture. This step is crucial to prevent the bars from crumbling when cut. A suggestion is to place another pan of the same size within the other and press down to even out the mixture.
-
Refrigerate the granola mixture for at least 2 hours to allow it to cool completely and firm up. This chilling time is essential for achieving a clean cut.
-
Once the granola mixture is thoroughly chilled, firmly press down with a large knife to cut it into bars. Avoid sawing, as this can cause the bars to crumble. Use a sharp knife and a decisive downward motion.
-
Wrap each granola bar individually in waxed paper. This helps to prevent them from sticking together and keeps them fresh.
-
Store the wrapped granola bars in the refrigerator or freezer.
Expert Tips & Tricks
- Don’t skip the toasting: Toasting the oats and nuts intensifies their flavor and provides a satisfying crunch.
- Customize your mix-ins: Feel free to substitute your favorite nuts, seeds, and dried fruits. Chocolate chips, shredded coconut, or even a sprinkle of spices like nutmeg or cardamom can add a unique twist.
- Press firmly: Compacting the granola mixture tightly is key to preventing the bars from falling apart. Use the bottom of a measuring cup or another pan to ensure even pressure.
- Adjust sweetness to taste: If you prefer a less sweet granola bar, reduce the amount of honey or brown sugar slightly.
- For chewier bars: Slightly underbake the oat mixture during the toasting process.
- Vegan Variation: Replace butter with coconut oil or vegan butter spread.
Serving & Storage Suggestions
These homemade granola bars are perfect for on-the-go breakfasts, afternoon snacks, or pre- or post-workout fuel. Serve them as is, or pair them with a glass of milk or yogurt for a more substantial meal.
Store the wrapped granola bars in an airtight container in the refrigerator for up to 1 week, or in the freezer for up to 2 months. To thaw, simply remove from the freezer and let sit at room temperature for a few minutes.
Nutritional Information
| Nutrient | Amount per Serving | % Daily Value |
|---|---|---|
| Calories | 229.2 kcal | N/A |
| Calories from Fat | 106 g | 46% |
| Total Fat | 11.8 g | 18% |
| Saturated Fat | 3.5 g | 17% |
| Cholesterol | 7.6 mg | 2% |
| Sodium | 211.3 mg | 8% |
| Total Carbohydrate | 28 g | 9% |
| Dietary Fiber | 4.2 g | 16% |
| Sugars | 14.2 g | 56% |
| Protein | 5.4 g | 10% |
Note: Nutritional information is an estimate and may vary based on specific ingredients and portion sizes.
Variations & Substitutions
- Vegan Granola Bars: Replace the butter with coconut oil or vegan butter spread.
- Gluten-Free Granola Bars: Ensure that the rolled oats are certified gluten-free.
- Nut-Free Granola Bars: Omit the almonds and substitute with sunflower seeds, pumpkin seeds, or more seeds.
- Chocolate Chip Granola Bars: Add 1 cup of your favorite chocolate chips to the mixture before pressing it into the pan.
- Tropical Granola Bars: Use dried mango, pineapple, and macadamia nuts for a tropical twist.
- Spice it up: Add a pinch of ground ginger, cardamom, or cloves to the oat mixture for a warm and aromatic flavor.
FAQs (Frequently Asked Questions)
Q: Why are my granola bars crumbly?
A: The most common reason for crumbly granola bars is that they weren’t pressed firmly enough into the pan. Be sure to compact the mixture tightly using the back of a wooden spoon or another pan.
Q: Can I use quick oats instead of rolled oats?
A: Rolled oats are recommended for a chewier texture and better structure. Quick oats may result in a softer and more crumbly bar.
Q: How can I make these bars less sweet?
A: Reduce the amount of honey or brown sugar in the recipe. You can also add a squeeze of lemon juice to balance the sweetness.
Q: Can I freeze these granola bars?
A: Yes, these granola bars freeze very well. Wrap them individually in waxed paper and store them in an airtight container in the freezer for up to 2 months.
Q: What other dried fruits can I use?
A: Feel free to experiment with your favorite dried fruits, such as raisins, apricots, cherries, blueberries, or even candied ginger. Just be sure to chop larger fruits into smaller pieces.
Final Thoughts
There’s something incredibly satisfying about creating your own granola bars from scratch. Not only can you control the ingredients and customize the flavors to your liking, but you also get to enjoy the simple pleasure of homemade goodness. So, gather your ingredients, preheat your oven, and embark on a culinary adventure that will fuel your body and nourish your soul. I encourage you to try this recipe, experiment with different variations, and share your creations with friends and family. Happy baking!