
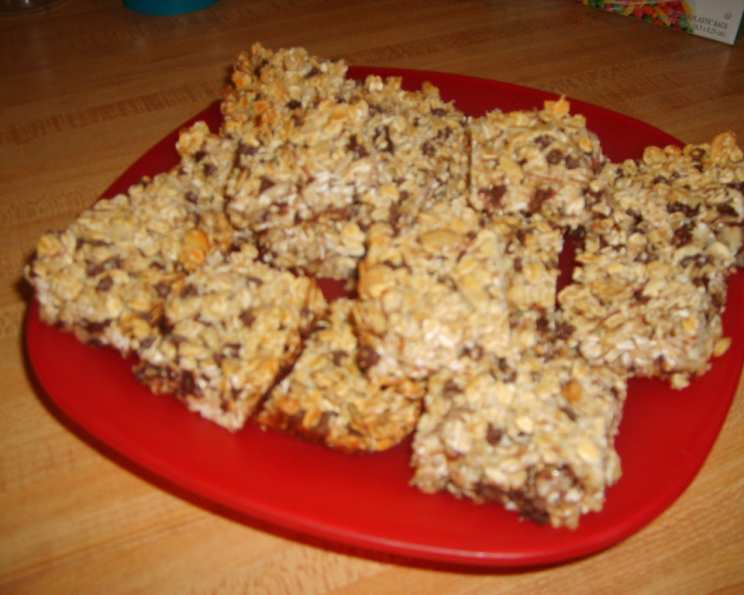
Homemade Granola Bars: A Recipe for On-the-Go Goodness
The scent of warm oats and toasted nuts still takes me back to my college days. Late nights studying fueled by coffee and, more often than not, a hastily grabbed granola bar. Back then, they were a store-bought convenience, but I always dreamed of making my own – healthier, tastier, and packed with exactly what I craved. After years of experimentation, I’ve perfected a recipe that’s not only incredibly simple but also delivers a chewy, crunchy, and utterly satisfying granola bar experience.
Recipe Overview
- Prep Time: 15 minutes
- Cook Time: 25-45 minutes
- Total Time: 40-60 minutes
- Servings: 18
- Yield: 18 granola bars
- Dietary Type: Vegetarian (can be made vegan with margarine)
Ingredients
- 3 cups rolled oats
- 1 cup sliced almonds
- 1 cup sunflower seeds
- 1 cup raisins
- 1 cup craisins (optional)
- 1 cup chocolate chips (optional)
- ½ cup sesame seeds
- ½ cup unsweetened coconut
- ¼ cup butter or ¼ cup margarine, melted
- 1 (14 ounce) can sweetened condensed milk
Equipment Needed
- Large bowl
- Baking sheet
- Waxed paper or parchment paper
Instructions
-
Begin by preheating your oven to 325°F (160°C). Proper oven temperature is key for even baking and perfectly textured granola bars.
-
Next, prepare your baking sheet. Grease it well to prevent the granola bars from sticking. Alternatively, line the baking sheet with parchment paper for easy removal and cleanup. Parchment paper is my preferred method.
-
In a large bowl, combine all the dry ingredients: the rolled oats, sliced almonds, sunflower seeds, raisins, craisins (if using), chocolate chips (if using), sesame seeds, and unsweetened coconut. Ensure everything is evenly distributed.
-
Now, add the wet ingredients. Pour the melted butter (or margarine) and the sweetened condensed milk into the bowl with the dry ingredients.
-
Thoroughly stir all the ingredients together until they are well combined. The mixture should be evenly coated with the sweetened condensed milk and butter, forming a slightly sticky consistency.
-
Pour the granola mixture onto the prepared baking sheet.
-
Use your hands (or the back of a spatula) to press down evenly on the mixture, creating a compact and uniform layer. To prevent sticking, place a sheet of waxed paper over the mixture before pressing down. This ensures a smooth and even surface.
-
Bake in the preheated oven for 25-30 minutes, or until the granola bars are golden brown. The exact baking time may vary depending on your oven and desired level of crunchiness. For a crispier bar, you can bake them for up to 40-45 minutes. Keep a close eye on them to prevent burning.
-
Once baked, remove the baking sheet from the oven and let the granola bars cool for 15 minutes before cutting. This allows them to firm up slightly, making them easier to handle.
-
Using a sharp knife, cut the granola slab into individual bars. The size and shape are entirely up to you.
-
Let the cut granola bars cool completely on the baking sheet before transferring them to an airtight container for storage.
-
Enjoy your homemade granola bars! They are perfect for breakfast, snacks, or on-the-go energy.
Expert Tips & Tricks
- Toast the oats and nuts: For a deeper, more complex flavor, lightly toast the oats and nuts in a dry pan before adding them to the mix. This enhances their natural sweetness and adds a satisfying crunch.
- Control the sweetness: If you prefer less sweet granola bars, you can reduce the amount of sweetened condensed milk slightly. You might need to add a touch of honey or maple syrup to help bind the ingredients.
- Customize your additions: Feel free to experiment with different dried fruits, nuts, and seeds. Dried cranberries, chopped dates, walnuts, pecans, and chia seeds all make excellent additions.
- Prevent sticking: If you find the granola bars are sticking to the baking sheet, even with greasing or parchment paper, try chilling the mixture in the refrigerator for 30 minutes before baking. This helps the ingredients bind together better.
- For chewier bars: Bake for a shorter time.
- For crispier bars: Bake for a longer time.
- Press firmly: Pressing firmly is crucial for bars that hold their shape. Don’t be afraid to really pack the mixture down.
Serving & Storage Suggestions
Serve these homemade granola bars as a quick and easy breakfast, a healthy snack between meals, or a convenient energy boost during outdoor activities. They pair well with a glass of milk, yogurt, or a cup of coffee or tea.
Store the granola bars in an airtight container at room temperature for up to 1 week. For longer storage, you can freeze them for up to 2 months. To freeze, wrap each bar individually in plastic wrap and then place them in a freezer-safe bag or container. Thaw at room temperature for about 30 minutes before enjoying.
Nutritional Information
Please note that these values are estimates and may vary based on specific ingredient brands and quantities used.
| Nutrient | Amount per Serving | % Daily Value |
|---|---|---|
| Calories | 309 kcal | N/A |
| Calories from Fat | 161 kcal | N/A |
| Total Fat | 18 g | 27% |
| Saturated Fat | 7.5 g | 37% |
| Cholesterol | 14.3 mg | 4% |
| Sodium | 50.6 mg | 2% |
| Total Carbohydrate | 32.4 g | 10% |
| Dietary Fiber | 4.6 g | 18% |
| Sugars | 17.9 g | 71% |
| Protein | 8.2 g | 16% |
Variations & Substitutions
- Vegan Granola Bars: Substitute the butter with margarine to make this recipe vegan-friendly. Ensure your chocolate chips are also dairy-free.
- Gluten-Free Granola Bars: While oats are naturally gluten-free, it’s essential to use certified gluten-free oats to avoid cross-contamination.
- Nut-Free Granola Bars: Replace the almonds with more sunflower seeds, pumpkin seeds, or other seed combinations.
- Chocolate Lover’s Granola Bars: Increase the amount of chocolate chips or add a drizzle of melted chocolate on top after baking. You could also add cocoa powder to the dry ingredients for a richer chocolate flavor.
- Spice it Up: Add a teaspoon of cinnamon, nutmeg, or ginger to the dry ingredients for a warm and comforting flavor.
FAQs (Frequently Asked Questions)
Q: Why are my granola bars falling apart?
A: This is often due to not pressing the mixture firmly enough onto the baking sheet. Make sure to use waxed paper and apply consistent pressure to create a compact layer.
Q: Can I use quick oats instead of rolled oats?
A: While you can, rolled oats provide a better texture and structure to the granola bars. Quick oats will result in a finer, less chewy bar.
Q: How do I prevent the bottom of the granola bars from burning?
A: Ensure your oven temperature is accurate and that the baking sheet is placed in the center of the oven. You can also try using a double baking sheet for extra insulation.
Q: Can I add protein powder to this recipe?
A: Yes, you can add about ¼ cup of protein powder to the dry ingredients. This will slightly alter the texture and moisture, so you may need to adjust the amount of sweetened condensed milk.
Q: How do I make the granola bars less sticky?
A: Reduce the amount of sweetened condensed milk slightly or bake the bars for a longer time to dry them out a bit more.
Final Thoughts
These homemade granola bars are so much more than just a convenient snack; they are a testament to the simple joy of creating something delicious and nourishing with your own hands. Don’t be intimidated by the process. Embrace the opportunity to experiment with different flavors and ingredients to create your perfect granola bar. Once you try this recipe, you’ll never go back to store-bought again! Share your creations with friends and family, and don’t hesitate to let me know how they turn out. Happy baking!