
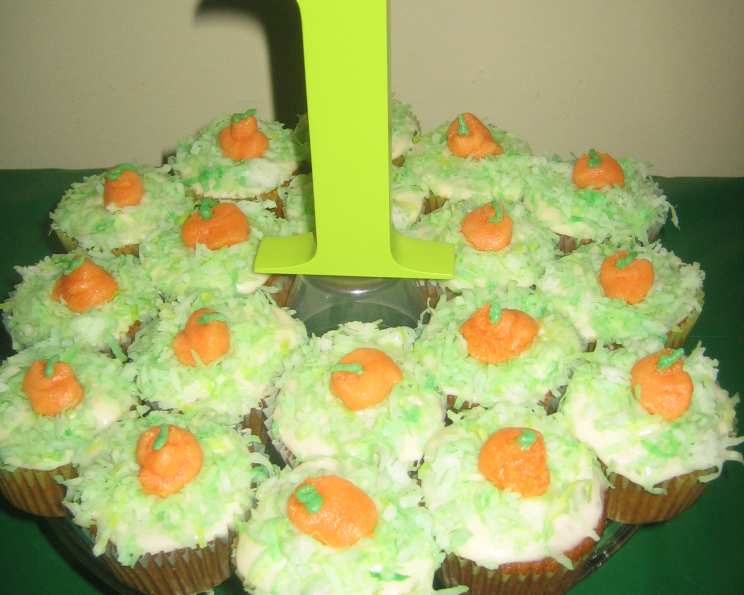
The Sweetest Symphony: Mastering Homemade Icing
I still remember the sheer delight of sneaking a fingerful of icing from my grandmother’s mixing bowl. The electric mixer whirred, creating a sugary cloud that filled her sunny kitchen. It wasn’t just about the sweetness; it was the anticipation of the cake it would adorn, the celebrations it heralded, and the warmth of her love baked into every bite. That simple, homemade icing was the final, perfect note in her culinary symphony, a note I’ve been chasing ever since.
Recipe Overview
- Prep Time: 2 minutes
- Servings: 1
Ingredients
- 2 cups powdered sugar
- 1/2 cup butter, softened
- 1 tablespoon milk
Equipment Needed
- Electric mixer
- Mixing bowl
- Spatula
Instructions
- In a mixing bowl, combine the softened butter and powdered sugar.
- Using an electric mixer, blend the ingredients together on low speed until just combined. Be careful not to create a cloud of powdered sugar!
- Add the milk to the mixture.
- Increase the mixer speed to medium-high and continue to blend until the icing is smooth and creamy, about 1-2 minutes. Ensure all the powdered sugar is incorporated.
- If the icing is too thick, add a tiny bit more milk, 1/2 teaspoon at a time, until desired consistency is reached. If it’s too thin, add a little more powdered sugar, 1 tablespoon at a time.
- Place in the refrigerator until ready to put on any cake desired. This will help the icing firm up slightly and make it easier to spread.
Expert Tips & Tricks
- Soften the Butter Properly: Ensure your butter is truly softened, not melted. If it’s melted, the icing can become too thin and greasy. The ideal consistency is when you can easily press a fingerprint into it.
- Sift the Powdered Sugar: Sifting the powdered sugar before adding it to the butter will help prevent lumps and create a smoother icing.
- Achieving the Perfect Consistency: Consistency is key. For a thinner glaze-like icing, add more milk. For a thicker frosting, add more powdered sugar. Remember to add liquids and solids incrementally for the best results.
- Flavor Infusion: Experiment with different extracts to create unique icing flavors. Vanilla extract is classic, but almond, lemon, or even peppermint extract can add a delightful twist. A pinch of salt can also enhance the sweetness.
- Coloring Your Icing: Gel food coloring is preferred over liquid food coloring, as it’s more concentrated and won’t thin out the icing as much. Add color gradually until you achieve the desired shade.
- Preventing a Crust: To prevent a crust from forming on the icing while it’s chilling in the refrigerator, cover the bowl tightly with plastic wrap, pressing it directly onto the surface of the icing.
Serving & Storage Suggestions
This icing is incredibly versatile and can be used on a variety of baked goods, including cakes, cupcakes, cookies, and brownies.
- Serving: For a smooth, professional finish, use an offset spatula to apply the icing evenly. You can also pipe the icing onto cupcakes using a piping bag and various tips for decorative effects. Let the cake cool completely before frosting to prevent the icing from melting.
- Storage: Store leftover icing in an airtight container in the refrigerator for up to 5 days. Before using, let it come to room temperature and re-whip with an electric mixer to restore its creamy texture.
- Freezing: You can also freeze this icing for longer storage. Transfer it to a freezer-safe container and freeze for up to 2 months. Thaw it in the refrigerator overnight and re-whip before using. It’s best to freeze without any coloring.
- Room Temperature: Icing can be left at room temperature for 2-3 hours if the kitchen is not too warm or humid.
Nutritional Information
| Nutrient | Amount per Serving | % Daily Value |
|---|---|---|
| Calories | 1757.2 kcal | N/A |
| Calories from Fat | N/A | 47% |
| Total Fat | 92.6 g | 142% |
| Saturated Fat | 58.6 g | 293% |
| Cholesterol | 246.2 mg | 82% |
| Sodium | 822.7 mg | 34% |
| Total Carbohydrate | 240.2 g | 80% |
| Dietary Fiber | 0 g | 0% |
| Sugars | 234.8 g | 939% |
| Protein | 1.5 g | 2% |
Note: Nutritional information is an estimate and may vary based on specific ingredients and portion sizes.
Variations & Substitutions
- Chocolate Icing: Add 1/4 cup of unsweetened cocoa powder to the basic icing recipe for a rich chocolate flavor. You may need to add a little more milk to compensate for the added dryness.
- Lemon Icing: Substitute 1-2 tablespoons of lemon juice for the milk and add 1 teaspoon of lemon zest for a bright, citrusy icing.
- Cream Cheese Icing: Substitute 4 ounces of softened cream cheese for half of the butter for a tangy and decadent icing.
- Maple Icing: Replace the milk with maple syrup for a warm and comforting flavor.
- Brown Butter Icing: Brown the butter first before making the icing for a nutty, caramelly flavor. Be sure to let the butter cool slightly before adding the powdered sugar. This adds a depth of flavor that is hard to resist.
- Vegan Icing: Use vegan butter alternative and plant-based milk (such as almond, soy, or oat milk) to make this icing vegan.
FAQs (Frequently Asked Questions)
Q: Can I use salted butter instead of unsalted?
A: Yes, but omit a pinch of salt from the recipe to balance the flavor. Unsalted butter gives you more control over the final saltiness of the icing.
Q: My icing is too thick. How do I fix it?
A: Add a small amount of milk, 1/2 teaspoon at a time, until the desired consistency is reached. Mix well after each addition.
Q: My icing is too thin. How do I fix it?
A: Add a tablespoon of powdered sugar at a time, mixing well after each addition, until the icing thickens to your liking.
Q: Can I make this icing ahead of time?
A: Yes, you can make the icing a day or two in advance and store it in an airtight container in the refrigerator. Let it come to room temperature and re-whip before using.
Q: Why is my icing grainy?
A: This is usually due to the powdered sugar not being fully incorporated. Make sure to mix the icing well, and if necessary, add a tiny bit more milk to help dissolve the sugar.
Final Thoughts
Homemade icing is more than just a sweet topping; it’s a canvas for creativity, a finishing touch that transforms a simple cake into something truly special. Don’t be afraid to experiment with flavors and colors to create your own signature icing. I hope you enjoy creating memories in your kitchen, one delicious bite at a time. I encourage you to make this a family recipe, pass it down, and make memories like I did with my grandmother. And please, share your creations with me – I’d love to see what you come up with!