
Mastering Homemade Italian Bread: A Baker’s Journey
The aroma of baking bread has always been my happy place, transporting me back to my Nonna’s kitchen. She’d be there, flour dusting her apron, humming Italian tunes as she kneaded dough with the kind of practiced ease only decades of baking can bring. Her Italian bread was legendary – a crusty, golden masterpiece with a soft, airy interior, perfect for soaking up Sunday gravy or simply slathering with butter. Today, I’m sharing a recipe that captures that same magic, bringing a taste of Italy to your own home.
Recipe Overview
- Prep Time: 1 hour 30 minutes
- Cook Time: 40 minutes
- Total Time: 2 hours 10 minutes
- Yields: 2 loaves
- Dietary Type: Vegetarian
Ingredients
- 7 1/4 – 7 3/4 cups all-purpose flour
- 2 packages fast-rising active dry yeast
- 2 1/2 cups water (110 degrees F)
- 1 tablespoon salt
- Yellow cornmeal
- 1 egg white, slightly beaten
Equipment Needed
- Large mixer bowl
- Stand mixer or hand mixer
- Measuring cups and spoons
- Lightly oiled bowl
- Lightly floured surface
- Two baking sheets
- Pastry brush
- Wire rack
Instructions
- In a large mixer bowl, combine 3 cups of the all-purpose flour and the fast-rising active dry yeast.
- Combine the water (heated to 110 degrees F – use a thermometer for accuracy!) and salt.
- Add the water mixture to the dry mixture.
- Beat at low speed for 30 seconds, scraping the sides of the bowl constantly to ensure everything is well incorporated.
- Beat at high speed for 3 minutes. This develops the gluten and creates a strong dough structure.
- By hand, stir in enough of the remaining flour to make a very stiff dough. You may not need to use all of the remaining flour; add it gradually until the dough pulls away from the sides of the bowl.
- Turn the dough out onto a lightly floured surface and knead until smooth and very elastic. This will take approximately 15-25 minutes. The dough should be supple and spring back when pressed.
- Shape the dough into a ball.
- Place the dough in a lightly oiled bowl, turning it once to coat the entire surface. This prevents the dough from drying out as it rises.
- Cover the bowl and let the dough rise in a warm place until it has doubled in size (about 1 hour). The warmth encourages the yeast to work its magic.
- Punch the dough down to release the air.
- Turn the dough out onto a lightly floured surface.
- Divide the dough in half.
- Cover each half with a bowl and let rest for 10 minutes. This allows the gluten to relax, making it easier to shape the loaves.
- Roll each half into a 15×12 inch rectangle.
- Beginning at the long side of the rectangle, roll the dough up tightly, sealing the seam as you roll. This creates a tight spiral within the loaf, contributing to its structure.
- Taper the ends of the loaf to create a classic Italian bread shape.
- Grease two baking sheets and sprinkle them generously with yellow cornmeal. The cornmeal prevents the loaves from sticking and adds a delightful textural contrast to the crust.
- Place each loaf diagonally, seam side down, on the prepared baking sheets.
- Make diagonal cuts 2 ½ inches apart (1/8 to ¼ inch deep) on the tops of the loaves. These slashes allow the bread to expand during baking and create an attractive, rustic appearance.
- Add a tablespoon of water to the slightly beaten egg white and brush the mixture over the top and sides of the loaves. This creates a beautiful, glossy crust.
- Cover the loaves and let them rise in a warm place until doubled in size (about 20-45 minutes).
- When ready to bake, preheat your oven to 375°F (190°C). Place a large, shallow pan on the lower rack of the oven and fill it with boiling water. The steam created by the water helps to create a crisp, chewy crust.
- Bake at 375°F (190°C) for 20 minutes. Then, brush the loaves again with the egg white mixture.
- Bake for another 20 minutes, or until the loaves are golden brown and sound hollow when tapped on the bottom.
- Cool the bread completely on a wire rack before slicing and serving. This prevents the bread from becoming soggy.
Expert Tips & Tricks
- Temperature is Key: Use a thermometer to ensure the water is exactly 110°F (43°C). Too cold, and the yeast won’t activate; too hot, and you’ll kill it.
- The Knead for Success: Kneading develops the gluten, which gives the bread its structure. Don’t skimp on the kneading time! If you’re using a stand mixer, it might take slightly less time, but still ensure the dough is smooth and elastic.
- Raising the Stakes: A warm, draft-free environment is essential for proper rising. If your kitchen is cold, try placing the dough in a cold oven with a pan of hot water on the rack below.
- Crispy Crust Secrets: The steam bath created by the boiling water in the oven is crucial for a beautifully crisp crust. Don’t skip this step!
Serving & Storage Suggestions
Serve your homemade Italian bread warm, sliced, and with a drizzle of olive oil and a sprinkle of herbs. It’s also fantastic for sandwiches, bruschetta, or as an accompaniment to soups and stews.
To store, wrap the cooled bread tightly in plastic wrap or place it in a bread bag at room temperature. It will stay fresh for 2-3 days. For longer storage, slice the bread and freeze it in a freezer-safe bag for up to 2 months. Reheat frozen bread in the oven or toaster oven for a few minutes until warmed through.
Nutritional Information
| Nutrient | Amount per Serving | % Daily Value |
|---|---|---|
| Calories | 840.7 kcal | N/A |
| Calories from Fat | 22.5 kcal | N/A |
| Total Fat | 2.5g | 3% |
| Saturated Fat | 0.4g | 2% |
| Cholesterol | 0mg | 0% |
| Sodium | 1768.6mg | 74% |
| Total Carbohydrate | 174.5g | 58% |
| Dietary Fiber | 7.1g | 28% |
| Sugars | 0.7g | N/A |
| Protein | 25.8g | 52% |
Note: Nutritional information is an estimate and may vary based on specific ingredients and portion sizes.
Variations & Substitutions
- Whole Wheat Italian Bread: Substitute up to half of the all-purpose flour with whole wheat flour for a nuttier flavor and added fiber.
- Herb-Infused Bread: Add dried herbs like rosemary, thyme, or oregano to the dough during the kneading process for an aromatic twist.
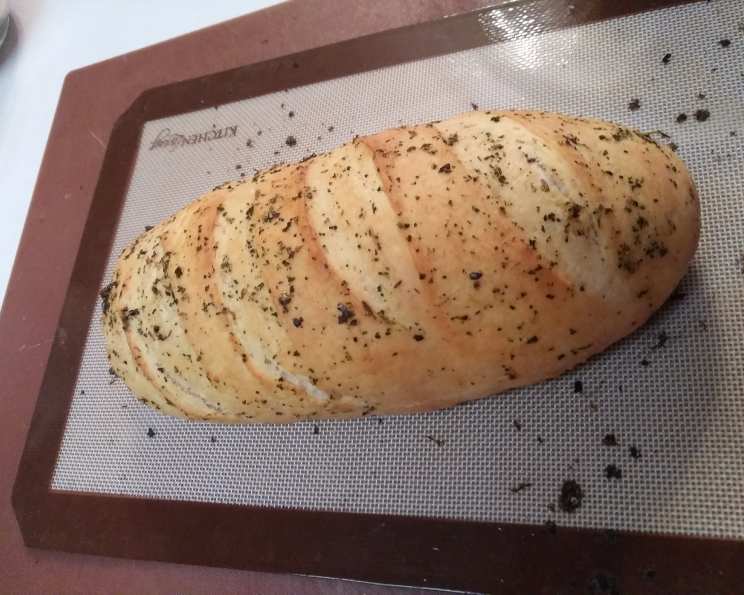
- Garlic Italian Bread: Brush the baked bread with garlic-infused olive oil for a flavorful appetizer.
- Gluten-Free Italian Bread: Replace the all-purpose flour with a gluten-free bread flour blend, following the package instructions for yeast bread.
FAQs (Frequently Asked Questions)
Q: Can I use active dry yeast instead of fast-rising yeast?
A: Yes, you can. You’ll need to proof the active dry yeast in warm water for about 5-10 minutes before adding it to the flour. Also, the rising time may be slightly longer.
Q: What if my dough doesn’t rise?
A: Make sure your yeast is fresh and the water isn’t too hot or too cold. Also, ensure the rising environment is warm and draft-free.
Q: Can I make this bread ahead of time?
A: Yes, you can prepare the dough up to the shaping stage, then refrigerate it overnight. Let it come to room temperature for about 30 minutes before shaping and baking.
Q: How do I get a really crispy crust?
A: The steam from the boiling water is essential, and make sure your oven is preheated to the correct temperature. Also, avoid opening the oven door too frequently during baking.
Q: My bread is browning too quickly. What should I do?
A: Tent the loaves loosely with aluminum foil during the last 10-15 minutes of baking to prevent them from over-browning.
Final Thoughts
There’s something truly special about baking your own bread, and this Italian bread recipe is a fantastic place to start. The aroma alone is enough to fill your home with warmth and comfort. Don’t be intimidated by the process; with a little patience and practice, you’ll be creating loaves that rival your favorite bakery in no time. So, roll up your sleeves, dust off your apron, and get ready to experience the joy of homemade Italian bread. Buon appetito!