
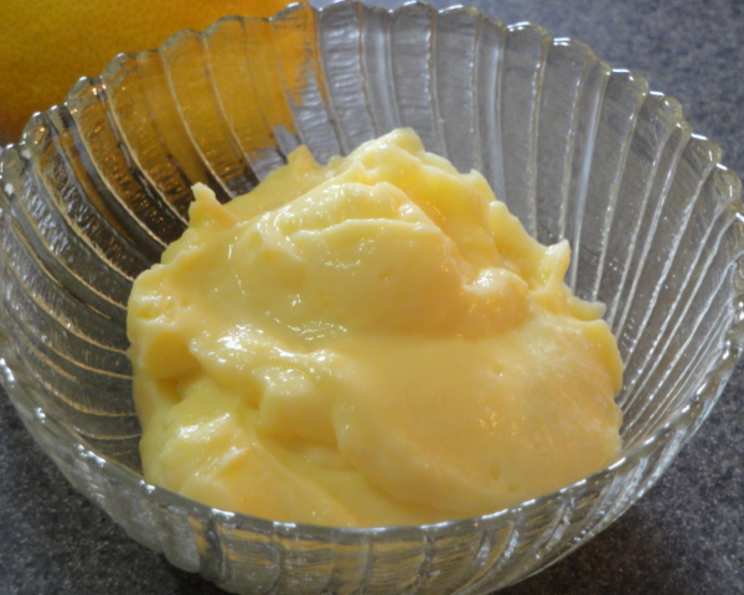
Homemade Lemon Curd: Sunshine in a Jar
I can still vividly recall the scent that would waft from my grandmother’s kitchen every spring – bright, zesty, and utterly intoxicating. It was the unmistakable aroma of her famous lemon curd, a recipe passed down through generations. As a child, I’d sneak spoonfuls straight from the jar, the sweet-tart flavor exploding on my tongue. Now, years later, I find myself recreating that very same magic, a little piece of my grandmother’s love, one batch of lemon curd at a time.
Recipe Overview
- Prep Time: 10 minutes
- Cook Time: 15-20 minutes
- Total Time: 25-30 minutes
- Yield: Approximately 1.5 cups
- Dietary Type: Not Dairy-Free or Gluten-Free
Ingredients
- 5 large eggs
- ¾ cup caster sugar (also known as superfine sugar)
- 1 large lemon, zest finely grated
- ⅔ cup fresh lemon juice (from approximately 3-4 lemons)
- 125g (½ cup + 1 tablespoon) chilled unsalted butter, cut into small cubes
Equipment Needed
- Medium-sized saucepan
- Heatproof bowl (that fits snugly over the saucepan without touching the water)
- Whisk
- Spatula
- Sterilized jars for storing the curd
Instructions
-
In a heatproof bowl, vigorously beat the eggs and caster sugar together until the mixture becomes pale and has roughly doubled in volume. This usually takes about 3-5 minutes of whisking, and incorporating air at this stage is crucial for a smooth curd.
-
Stir in the finely grated lemon zest and the lemon juice into the egg and sugar mixture. Ensure that the zest is finely grated to avoid any bitter pieces in your final curd.
-
Partially fill a saucepan with water, ensuring that the water level is below the bottom of the heatproof bowl when placed on top. Bring the water to a gentle simmer over medium heat.
-
Place the bowl with the lemon mixture over the pan of simmering water, creating a double boiler (bain-marie). The key here is to ensure the bowl doesn’t touch the water, as direct heat can cause the eggs to scramble.
-
Add the chilled butter, a few cubes at a time, to the lemon mixture. Whisk constantly as the butter melts, ensuring that each addition is fully incorporated before adding the next.
-
Continue whisking constantly over the simmering water until the curd thickens enough to coat the back of a spoon. This process usually takes about 10-15 minutes. It is important to whisk constantly to prevent the eggs from scrambling and to ensure a smooth, even texture.
-
To test for doneness, dip the back of a spoon into the curd and run your finger through it. If the line holds its shape and doesn’t immediately fill in, the curd is ready. Remember that the curd will continue to thicken as it cools.
-
Remove the bowl from the heat and stir the curd vigorously one last time to ensure it is smooth and even.
-
Pour the hot lemon curd into sterilized jars. Allow the jars to cool completely at room temperature before sealing and refrigerating.
Expert Tips & Tricks
- Use fresh lemons: The fresher the lemons, the brighter and more vibrant the flavor of the curd.
- Gentle heat is key: Patience is crucial when making lemon curd. Cooking it over too high a heat can result in a grainy or curdled texture.
- Don’t stop whisking: Constant whisking is essential to prevent the eggs from scrambling and to ensure a smooth, creamy texture.
- Strain for extra smoothness: For an exceptionally smooth curd, strain it through a fine-mesh sieve after cooking to remove any tiny bits of cooked egg.
- Adjust sweetness to your liking: Taste the curd during the cooking process and adjust the amount of sugar to your preference.
- Prevent a skin from forming: To prevent a skin from forming on top of the curd as it cools, press a piece of plastic wrap directly onto the surface.
- Salvaging curdled curd: If your curd does happen to curdle, immediately remove it from the heat. Whisk vigorously, then try whisking in a tablespoon or two of cold water. If that doesn’t work, blend the curd in a blender or food processor until smooth.
Serving & Storage Suggestions
Lemon curd is incredibly versatile and can be enjoyed in countless ways. It’s delicious spread on scones, toast, muffins, or biscuits. Use it as a filling for tarts, cakes, and pastries. Swirl it into yogurt or ice cream for a burst of citrus flavor. Serve it alongside grilled chicken or fish for a tangy counterpoint.
Store the lemon curd in sterilized jars in the refrigerator for up to 2 weeks. Freezing lemon curd is not generally recommended, as it can alter the texture and make it watery upon thawing.
Nutritional Information
Here’s an approximate nutritional breakdown per serving (estimated for 2 tablespoons):
| Nutrient | Amount per Serving | % Daily Value* |
|---|---|---|
| Calories | 120 kcal | 6% |
| Total Fat | 9g | 14% |
| Saturated Fat | 5g | 25% |
| Cholesterol | 85mg | 28% |
| Sodium | 20mg | 1% |
| Total Carbohydrate | 8g | 3% |
| Sugars | 8g | |
| Protein | 2g | 4% |
*Percent Daily Values are based on a 2,000 calorie diet.
Variations & Substitutions
- Lime Curd: Substitute lime juice and zest for the lemon for a tangy twist.
- Orange Curd: Use orange juice and zest for a sweeter, more floral flavor.
- Grapefruit Curd: Grapefruit juice and zest offer a slightly bitter, sophisticated curd.
- Vegan Lemon Curd: Substitute the butter with coconut oil and the eggs with a cornstarch slurry (equal parts cornstarch and water) to create a vegan-friendly version. The texture will be slightly different but still delicious.
- Lower Sugar: Reduce the amount of sugar to ¾ of a cup for a tarter flavor. This may slightly affect the final texture of the curd.
FAQs (Frequently Asked Questions)
Q: Why is my lemon curd lumpy?
A: Lumpy lemon curd is usually caused by cooking it over too high heat or not whisking constantly. This results in the eggs scrambling.
Q: How can I sterilize my jars for storing the lemon curd?
A: Wash the jars and lids in hot, soapy water, then place them on a baking sheet and bake at 250°F (120°C) for 10 minutes. Alternatively, you can boil them in water for 10 minutes.
Q: My lemon curd is too tart. Can I fix it?
A: If your curd is too tart, you can stir in a little more sugar, 1 tablespoon at a time, until you reach the desired sweetness.
Q: How long does homemade lemon curd last?
A: Properly stored in sterilized jars in the refrigerator, homemade lemon curd will last for up to 2 weeks.
Q: Can I use bottled lemon juice?
A: While fresh lemon juice is always preferred for the best flavor, you can use bottled lemon juice in a pinch. However, the flavor won’t be as vibrant.
Final Thoughts
Now that you’re armed with this time-tested recipe, I encourage you to venture into your kitchen and create your own batch of sunshine in a jar. Don’t be intimidated – with a little patience and constant whisking, you’ll be rewarded with a creamy, tangy, and utterly irresistible lemon curd. Share your creations with friends and family, and let them experience the simple joy of homemade goodness. And don’t forget to let me know how it turns out! Pair this delightful curd with a steaming cup of Earl Grey tea for a truly sublime experience.