
Soothe Your Skin: The Easiest Homemade Lotion Recipe
The scent of calendula always transports me back to my grandmother’s garden. Tucked away behind her rambling rose bushes was a small patch dedicated to the sunny orange flowers. She would infuse them in oil for weeks, creating a simple balm that she swore healed everything from sunburns to scrapes. While her recipe was a closely guarded secret, the memory of its gentle, comforting effect inspired me to explore the world of homemade lotions. There’s a special satisfaction in crafting something so nourishing with your own hands, knowing exactly what ingredients are going onto your skin.
Recipe Overview
- Prep Time: 5 minutes
- Cook Time: 0 minutes
- Total Time: 5 minutes
- Yields: 10 uses
- Serves: 10
- Dietary Type: Vegan
Ingredients
- 1 cup water
- 1 cup oil (see notes below)
- 1 tablespoon liquid lecithin
- 5-10 drops essential oils (optional)
- 1 teaspoon tea tree oil (optional)
- 1 teaspoon vitamin E (optional)
Ingredient Notes:
- Oil: Choose a high-quality oil based on your skin type. Almond, olive, and grapeseed oil are all excellent choices. Avoid vegetable oil. You can also use an herbal-infused oil, such as peppermint.
- Essential Oils: Select essential oils that are safe for topical use and complement each other. Lavender, chamomile, and rose are popular choices for their soothing properties.
- Lecithin: Liquid lecithin is crucial for emulsification, ensuring the water and oil combine properly. Powdered lecithin will not work in this recipe.
Equipment Needed
- Blender (a small blender like the Magic Bullet works well)
- Bowl with a lid
Instructions
- Combine the water, oil, and liquid lecithin in a blender.
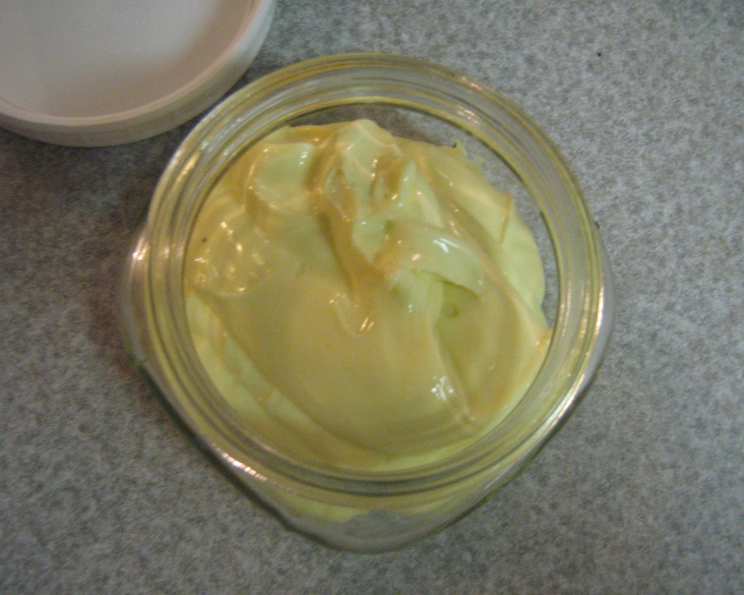
- Turn the blender on to the highest setting. Blend until the mixture thickens into a lotion-like consistency. This may take a minute or two, so be patient. You’re looking for a smooth, creamy texture.
- Spoon the emulsified mixture into a bowl that has a lid.
- At this point, add any optional ingredients, such as essential oils, tea tree oil, or vitamin E. Incorporate them gently with a spoon. Use as much or as little as you prefer. For a lotion targeted at scars, consider adding a larger quantity of vitamin E oil.
- Be mindful of the quantity you are making. This recipe creates a significant amount of lotion. If you don’t plan to use it all within a reasonable timeframe, halve the recipe to avoid waste.
- Securely place the lid on the bowl and store the homemade lotion in the refrigerator. The cool temperature will help prolong its shelf life and prevent spoilage.
- When you are ready to use the lotion, simply take a small amount and warm it up in your hands before applying it to your skin. This will make it easier to spread and more comfortable to use.
Expert Tips & Tricks
- Emulsification is Key: The success of this lotion hinges on proper emulsification. Ensure the lecithin is thoroughly incorporated and blend until the mixture is completely smooth and creamy. If the lotion separates, it means the emulsification wasn’t successful. You can try re-blending it, but it’s best to start with a fresh batch.
- Temperature Matters: While blending, ensure that the ingredients, especially the water, are at room temperature. Very cold water can hinder the emulsification process.
- Additions After Emulsification: For best results, add any additional oils, such as almond or grapeseed, after the lotion has emulsified. Adding them beforehand can interfere with the initial emulsification process.
- Herbal Infusions: To elevate this lotion, consider using an herbal tea instead of plain water. Calendula tea is particularly beneficial for the skin. Steep a strong tea, let it cool completely, and then use it in place of the water in the recipe.
- Trial Size: Always make a small batch first to ensure you like the consistency and scent before making a large quantity. This is especially important when experimenting with different essential oils.
- Texture Adjustment: If you prefer a thicker lotion, you can add a small amount of beeswax (melted and cooled) to the mixture after emulsification. Start with a very small amount (e.g., 1/4 teaspoon) and increase as needed until you achieve the desired consistency.
- Sanitize everything. Before starting, sanitize the blender, bowl, and any utensils you’ll be using. This will help prevent bacteria from growing in your lotion.
Serving & Storage Suggestions
This homemade lotion is best applied after showering or bathing, when your skin is still slightly damp. This helps to lock in moisture.
Store the lotion in an airtight container in the refrigerator. This is crucial for extending its shelf life, as homemade lotions without preservatives are prone to spoilage. When stored properly, the lotion should last for approximately 1-2 weeks.
Because this lotion does not contain preservatives, it’s important to watch for signs of spoilage, such as changes in color, odor, or texture. If you notice any of these signs, discard the lotion immediately.
Nutritional Information
Please note: As this is a topical product, nutritional information is not directly applicable. However, considering the primary ingredients are oils, a general estimate is provided below. Actual values may vary based on the specific type of oil used.
| Nutrient | Amount per Serving | % Daily Value |
|---|---|---|
| Calories | ~350 kcal | ~18% |
| Total Fat | ~40g | ~62% |
| Saturated Fat | ~5g | ~25% |
| Cholesterol | 0mg | 0% |
| Sodium | 0mg | 0% |
| Carbohydrates | 0g | 0% |
| Fiber | 0g | 0% |
| Sugar | 0g | 0% |
| Protein | 0g | 0% |
Note: Percent Daily Values are based on a 2,000 calorie diet. These are estimates and may vary.
Variations & Substitutions
- Herbal Oil Infusion: Infuse your oil with herbs like calendula, lavender, or chamomile for added skin benefits. Gently heat the oil with the dried herbs in a double boiler for a few hours, then strain and cool before using it in the recipe.
- Shea Butter Addition: For a richer, more moisturizing lotion, melt a small amount of shea butter and add it to the mixture after emulsification. Start with about 1 tablespoon and adjust to your preference.
- Cocoa Butter Variation: Similarly, cocoa butter can be used instead of shea butter for a lotion with a pleasant chocolate scent. Be mindful that cocoa butter is harder than shea butter, so it may result in a slightly thicker lotion.
- Essential Oil Blends: Experiment with different essential oil blends to create lotions for various purposes. For example, a blend of lavender and chamomile is excellent for relaxation, while a blend of tea tree and eucalyptus is beneficial for congested skin.
- Goat Milk Lotion: Replace the water with goat milk for a super creamy and moisturizing lotion. Goat milk contains alpha-hydroxy acids that gently exfoliate the skin.
FAQs (Frequently Asked Questions):
Q: Why do I need to refrigerate this lotion?
A: This lotion doesn’t contain preservatives, so refrigeration is necessary to slow down bacterial growth and prevent spoilage, extending its shelf life.
Q: Can I use any type of oil in this recipe?
A: While you can experiment, certain oils like vegetable oil are not recommended. Opt for nourishing oils like almond, olive, or grapeseed that are beneficial for the skin.
Q: What if my lotion separates after blending?
A: Separation indicates the emulsification failed. This can be due to incorrect ingredient ratios or insufficient blending. You can try re-blending, but starting fresh is often more effective.
Q: Can I add fragrance oils instead of essential oils?
A: While possible, essential oils are generally preferred for their therapeutic benefits and natural origin. If using fragrance oils, ensure they are skin-safe and use them sparingly.
Q: How long will this lotion last?
A: When stored properly in the refrigerator, this homemade lotion should last for approximately 1-2 weeks. Always check for signs of spoilage before use.
Final Thoughts
Creating your own lotion is not only easy but incredibly rewarding. It allows you to tailor the ingredients to your specific skin needs and preferences, avoiding harsh chemicals and unnecessary additives. I encourage you to try this recipe and experiment with different oils and essential oils to create a lotion that is perfect for you. Don’t hesitate to share your creations and feedback – happy lotion-making!