
Fluffy Clouds of Joy: Homemade Marshmallows (No Corn Syrup!)
The first time I made marshmallows from scratch, it felt like pure magic. I was a young culinary student, and the idea of transforming simple ingredients like sugar and gelatin into those pillowy squares seemed like something out of a Willy Wonka movie. I remember the sheer excitement as the mixture doubled and tripled in volume, transforming into this glossy, ethereal cloud. The best part? Sharing them with my family, watching their eyes light up with each sweet, airy bite. This recipe, born from a need to avoid corn syrup, rekindles that joy every time.
Recipe Overview
- Prep Time: 20 minutes
- Cook Time: 10 minutes
- Total Time: 2 hours (includes cooling)
- Yields: Approximately 24 (1.5-inch) marshmallows
- Serves: 12
- Dietary Type: Gluten-Free
Ingredients
- 2 tablespoons gelatin (2 envelopes Knox)
- 8 tablespoons cold water (for gelatin)
- 2 cups granulated sugar
- 1/2 cup cold water (for sugar syrup)
- 1/4 teaspoon salt
- 2 teaspoons vanilla extract
- Powdered sugar for dusting (or toasted coconut)
Equipment Needed
- 8- or 9-inch square baking pan
- Small bowl
- Large heavy saucepan
- Large mixing bowl
- Electric mixer (stand mixer or hand mixer)
- Measuring cups and spoons
- Whisk
- Knife or pizza cutter
Instructions
-
Prepare the Pan: Generously dust an 8- or 9-inch square pan with powdered sugar. Ensure the entire bottom and sides are coated evenly to prevent sticking. Set aside.
-
Bloom the Gelatin: In a small bowl, sprinkle the gelatin over 8 tablespoons of cold water. Let it sit for about 5-10 minutes to bloom, meaning the gelatin will absorb the water and become soft and slightly thickened. This step is crucial for achieving the right marshmallow texture.
-
Make the Sugar Syrup: Combine the granulated sugar and 1/2 cup of cold water in a large heavy saucepan. The heavy-bottomed pan will help distribute the heat evenly and prevent the sugar from scorching.
-
Dissolve the Sugar: Cook and stir the sugar mixture over medium heat until the sugar is completely dissolved. Use a whisk to stir constantly, ensuring no sugar crystals remain on the sides of the pan.
-
Incorporate the Gelatin: Add the bloomed gelatin mixture to the saucepan. Stir until the gelatin is fully melted and incorporated into the sugar syrup.
-
Bring to a Boil: Bring the mixture to a boil over medium heat. Watch carefully, as the mixture can bubble up quickly.
-
Cool Slightly: Remove the saucepan from the heat and carefully pour the hot syrup into a large mixing bowl. Allow the mixture to stand for a few minutes until it’s partially cooled. This prevents splattering when you start mixing.
-
Add Flavor: Add the salt and vanilla extract to the mixture in the mixing bowl.
-
Whip to Perfection: Using an electric mixer (either a stand mixer fitted with a whisk attachment or a hand mixer), begin beating the mixture on medium speed. Gradually increase the speed to high. Continue beating until the mixture becomes soft, fluffy, and has doubled in volume. This process typically takes about 10-15 minutes. The mixture should be light and airy, resembling meringue.
-
Pour into Prepared Pan: Carefully pour the whipped marshmallow mixture into the prepared pan, spreading it evenly to a thickness of about 1/2 inch. Use a spatula to smooth the surface.
-
Cool and Set: Allow the marshmallows to cool completely and set at room temperature for at least 2 hours, or preferably overnight. The marshmallows are ready when they are firm to the touch and no longer sticky.
-
Cut and Coat: Once the marshmallows are fully set, loosen the edges of the pan with a knife or spatula. Invert the pan onto a cutting board dusted with powdered sugar. Cut the marshmallows into 1.5-inch squares using a sharp knife or pizza cutter. Dust each square generously with powdered sugar, coating all sides. This prevents them from sticking together.
-
Serve and Enjoy: Serve the freshly made marshmallows immediately, or store them in an airtight container for later.
Expert Tips & Tricks
- Don’t Rush the Whipping: The key to achieving light and fluffy marshmallows is to whip the mixture for the full 10-15 minutes, or even longer if needed. The mixture should significantly increase in volume and become very light.
- Use a Heavy-Bottomed Pan: A heavy-bottomed saucepan helps to distribute heat evenly and prevents the sugar from scorching, which can ruin the flavor of the marshmallows.
- Adjust Sweetness: If you prefer a less sweet marshmallow, you can reduce the amount of sugar slightly, but be mindful that this may affect the texture.
- Gelatin Quality Matters: Use high-quality gelatin for the best results. Knox brand is a reliable choice.
- Dealing with Stickiness: If the marshmallows are too sticky after cutting, dust them with more powdered sugar. You can also use a mixture of powdered sugar and cornstarch to help absorb excess moisture.
- Flavor Infusions: For a deeper flavor, consider infusing the sugar syrup with citrus zest or spices like cinnamon or cardamom while it cooks. Just be sure to strain the syrup before adding the gelatin.
Serving & Storage Suggestions
Homemade marshmallows are a delightful treat on their own, perfect for snacking or adding to hot chocolate. They also make a fantastic addition to s’mores, rice crispy treats, or even as a topping for ice cream.
To store, place the marshmallows in an airtight container at room temperature. They will last for about 1-2 weeks. Avoid storing them in the refrigerator, as this can make them sticky. If you live in a humid climate, consider adding a silica gel packet to the container to absorb excess moisture.
Nutritional Information
(Estimated per serving, based on 24 marshmallows)
| Nutrient | Amount per Serving | % Daily Value |
|---|---|---|
| Calories | 80 kcal | 4% |
| Total Fat | 0g | 0% |
| Saturated Fat | 0g | 0% |
| Cholesterol | 0mg | 0% |
| Sodium | 10mg | 0% |
| Total Carbohydrate | 20g | 7% |
| Dietary Fiber | 0g | 0% |
| Sugars | 20g | – |
| Protein | 1g | 2% |
Variations & Substitutions
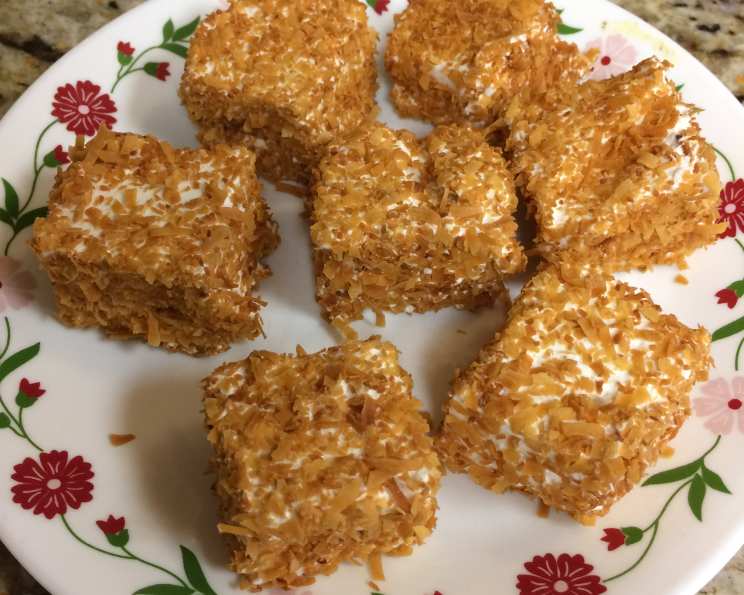
- Toasted Coconut Marshmallows: Instead of dusting with powdered sugar, roll the cut marshmallows in toasted shredded coconut for a tropical twist.
- Peppermint Marshmallows: Add 1/2 teaspoon of peppermint extract along with the vanilla extract for a festive holiday flavor. You can also add a drop or two of red food coloring for a pink hue.
- Citrus Marshmallows: Add the zest of one lemon, orange, or lime to the sugar syrup while it cooks for a bright and zesty flavor.
- Coffee Marshmallows: Dissolve 1 tablespoon of instant coffee granules in the 1/2 cup of cold water used for the sugar syrup for a coffee-flavored marshmallow.
- Maple Marshmallows: Substitute 1/2 cup of the granulated sugar with pure maple syrup for a richer, more complex flavor.
FAQs (Frequently Asked Questions)
Q: Why are my marshmallows sticky?
A: Marshmallows can be sticky if they haven’t been cooled and set completely, or if the humidity is high. Make sure to cool them for at least 2 hours, and dust them generously with powdered sugar to absorb excess moisture.
Q: Can I use honey or maple syrup instead of granulated sugar?
A: While you can substitute some of the granulated sugar with honey or maple syrup, it will affect the texture and flavor of the marshmallows. The marshmallows may be softer and have a more pronounced flavor.
Q: Can I make these marshmallows vegan?
A: No, gelatin is derived from animal collagen. There are vegan marshmallow recipes available using alternative gelling agents like agar-agar or carrageenan.
Q: How do I prevent the sugar from crystallizing while cooking the syrup?
A: Ensure the sugar is fully dissolved before bringing the syrup to a boil. You can also brush down the sides of the pan with a wet pastry brush to dissolve any sugar crystals that may have formed.
Q: My marshmallows didn’t double in volume. What went wrong?
A: The most common reason for marshmallows not doubling in volume is not whipping them for long enough. Make sure to whip the mixture on high speed for the full 10-15 minutes, or until it becomes light, fluffy, and has significantly increased in size. Also, make sure your gelatin is properly bloomed.
Final Thoughts
There’s something undeniably satisfying about creating something so delightfully simple from scratch. These homemade marshmallows, free of corn syrup, are not just a treat, but a testament to the magic that can happen in your own kitchen. I encourage you to try this recipe, experiment with different flavors, and share the joy of homemade marshmallows with your loved ones. And don’t be afraid to get a little messy – after all, that’s part of the fun! Perhaps pair these pillowy sweets with a steaming mug of homemade hot chocolate on a chilly evening. The possibilities are endless!