
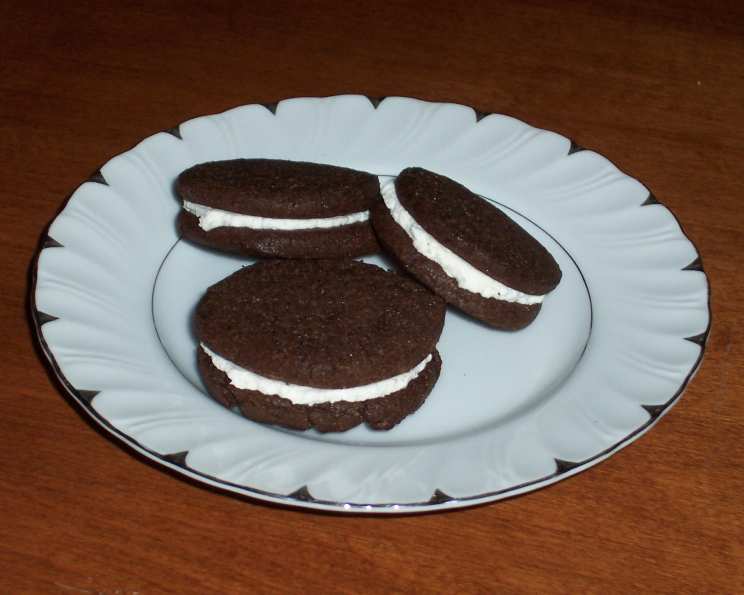
Homemade Oreo Cookies: A Nostalgic Treat
The scent of dark chocolate baking in the oven always transports me back to my childhood kitchen. My grandmother, a woman who could coax magic from simple ingredients, would let me “help” her bake. More often than not, “helping” involved sneaking chocolate chips from the bag, but on special occasions, she’d let me assist with her famous Oreo cookies. These weren’t just cookies; they were tiny discs of pure joy, dark and decadent, sandwiched with a sweet, fluffy cloud of cream. The first bite was always a revelation – a symphony of textures and flavors that I still crave to this day. This recipe is my homage to those cherished memories, a way to share that same joy with you.
Recipe Overview
- Prep Time: 20 minutes
- Cook Time: 9 minutes
- Total Time: 29 minutes
- Yields: 30 cookies
- Serves: 30
- Dietary Type: Vegetarian
Ingredients
For the Chocolate Wafers
- 1 ¼ cups all-purpose flour
- ½ cup unsweetened cocoa
- 1 teaspoon baking soda
- ¼ teaspoon baking powder
- ¼ teaspoon salt
- 1 cup sugar
- ½ cup plus 2 teaspoons butter, room temperature
- 1 egg
For the Filling
- ¼ cup room-temperature unsalted butter
- ¼ cup vegetable shortening
- 2 cups powdered sugar
- 2 teaspoons vanilla extract
Equipment Needed
- Medium-sized bowl
- Baking sheet
- Parchment paper
- Mixing bowl
- Electric mixer
- Pastry bag with a ½ inch round tip (or Ziplock bag)
- Cooling rack
Instructions
Making the Chocolate Wafers:
- Begin by combining the dry ingredients. In a medium-sized bowl, thoroughly mix together the flour, cocoa, baking soda, baking powder, salt, and sugar. Make sure there are no lumps of cocoa remaining.
- In the same bowl, add the softened butter and egg. Using an electric mixer (or a sturdy spoon if you’re feeling ambitious!), beat the ingredients together until a cohesive dough forms. The dough should come together in a mass.
- Preheat your oven to 375°F (190°C). Line a baking sheet with parchment paper. This prevents sticking and makes cleanup a breeze.
- Take rounded teaspoons of the cookie dough and place them on the prepared baking sheet, spacing them approximately 2 inches apart. This allows for some spreading during baking.
- Here’s where you can get creative. Traditionally, Oreo cookies are perfectly round, but don’t be afraid to experiment! With moistened hands (this prevents the dough from sticking), slightly flatten each mound of dough. If you desire that classic Oreo shape, you can use cookie cutters to cut out perfect circles. If you just care about the taste, then there is no need for the cookie cutters. Feel free to use all kinds of cookie cutters and have some fun.
- Bake in the preheated oven for exactly 9 minutes. Keep a close eye on them, as they can burn quickly. The cookies should be set but still slightly soft to the touch.
- Remove the baking sheet from the oven and transfer the cookies to a wire rack to cool completely. This is crucial for preventing them from sticking and ensuring they achieve the proper texture.
Preparing the Filling:
- In a mixing bowl, combine the room-temperature butter and vegetable shortening. The butter should be softened but not melted.
- Using an electric mixer set to low speed, gradually beat in the powdered sugar and vanilla extract. Adding the powdered sugar gradually prevents a cloud of sugary dust from coating your kitchen.
- Once the powdered sugar is incorporated, increase the mixer speed to high and beat for 2-3 minutes, or until the filling is light and fluffy. The mixture should become noticeably paler and increase in volume.
Assembling the Oreo Cookies:
- Once the chocolate wafers have completely cooled, it’s time to assemble the cookies. Transfer the filling to a pastry bag fitted with a ½ inch round tip. If you don’t have a pastry bag, you can use a Ziplock bag with one corner snipped off. A knife or small spatula also works just fine!
- Pipe a generous teaspoon-sized blob of cream filling onto the flat side of one chocolate wafer.
- Top with another chocolate wafer, making sure it’s roughly the same size. Gently press down on the top cookie to spread the filling evenly to the edges. Be careful not to press too hard, or the filling will squish out excessively.
- Repeat the process until all the cookies have been sandwiched with cream filling.
Expert Tips & Tricks
- For the most authentic Oreo flavor, use a high-quality dark cocoa powder. Dutch-processed cocoa powder will give you a deeper, richer chocolate flavor.
- Make sure your butter is at true room temperature before starting. This ensures it creams properly with the sugar, creating a smooth and consistent dough.
- Don’t overbake the cookies! They should be slightly soft when you remove them from the oven. They will firm up as they cool.
- If your filling is too soft, add a tablespoon or two of powdered sugar until it reaches the desired consistency. If it’s too stiff, add a teaspoon of milk or cream.
- For a fun twist, try adding a pinch of espresso powder to the chocolate wafers for a mocha flavor.
Serving & Storage Suggestions
Serve these homemade Oreo cookies as a delightful afternoon treat, a decadent dessert, or a fun addition to a party platter. They pair perfectly with a glass of cold milk, a cup of hot coffee, or even a scoop of vanilla ice cream.
Store leftover cookies in an airtight container at room temperature for up to 3 days. For longer storage, you can freeze the cookies for up to 2 months. Let them thaw at room temperature before serving.
Nutritional Information
| Nutrient | Amount per Serving | % Daily Value |
|---|---|---|
| Calories | 138 kcal | N/A |
| Fat | 6.7g | 10% |
| Saturated Fat | 3.6g | 17% |
| Cholesterol | 18.4mg | 6% |
| Sodium | 94.6mg | 3% |
| Carbohydrate | 19.5g | 6% |
| Fiber | 0.6g | 2% |
| Sugars | 14.6g | N/A |
| Protein | 1.1g | 2% |
Note: Nutritional information is an estimate and may vary based on specific ingredients and portion sizes.
Variations & Substitutions
- Gluten-Free Oreos: Substitute the all-purpose flour with a gluten-free blend. Be sure to choose a blend that contains xanthan gum or add it separately for a better texture.
- Vegan Oreos: Replace the butter with vegan butter alternatives and the egg with a flax egg (1 tablespoon ground flaxseed mixed with 3 tablespoons water). Ensure your sugar is vegan-friendly as some brands use bone char in the refining process.
- Peppermint Oreos: Add a few drops of peppermint extract to the filling for a festive holiday treat. You can also crush peppermint candies and sprinkle them on the filling before adding the top cookie.
- Chocolate Mint Oreos: Add peppermint extract to the filling and use dark chocolate for the cookies.
FAQs (Frequently Asked Questions)
Q: Why are my Oreo cookies dry and crumbly?
A: This could be due to overbaking or using too much flour. Make sure to measure your flour accurately and avoid overbaking. The cookies should be slightly soft when you remove them from the oven.
Q: Can I use margarine instead of butter?
A: While margarine can be used, butter provides a richer flavor and better texture. If you do use margarine, choose one with a high fat content.
Q: My filling is too runny. What can I do?
A: Add powdered sugar, a tablespoon at a time, until it reaches the desired consistency.
Q: Can I make the dough ahead of time?
A: Yes, you can make the dough ahead of time and store it in the refrigerator for up to 2 days. Let it come to room temperature slightly before rolling it out.
Q: Why are my cookies spreading too much during baking?
A: The butter may be too soft. Ensure your butter is softened but not melted. Also, chilling the dough for 30 minutes before baking can help prevent spreading.
Final Thoughts
Baking is about more than just following a recipe; it’s about creating memories and sharing them with loved ones. These homemade Oreo cookies are a testament to that, bringing a touch of nostalgia and a whole lot of deliciousness to any occasion. Don’t be afraid to experiment with variations and make them your own. So go ahead, dust off your baking sheets, gather your ingredients, and embark on this delightful culinary adventure. I guarantee you’ll find yourself transported back to cherished moments with every bite. Share your creations and feedback – I’d love to hear how these cookies bring joy to your kitchen!