
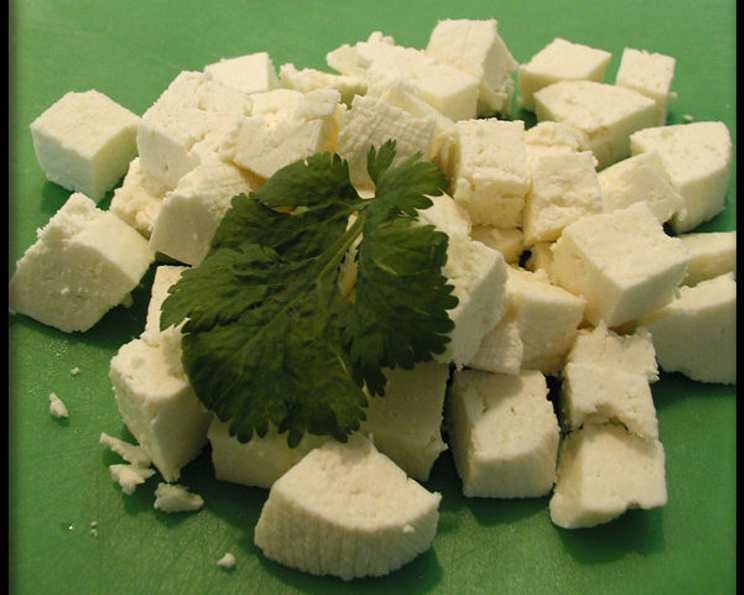
Homemade Paneer: A Culinary Journey to India
My grandmother’s kitchen always held the most incredible aromas, a symphony of spices that transported you to far-off lands. While her repertoire wasn’t strictly Indian, she had a knack for adapting recipes and imbuing them with her unique touch. I vividly remember the first time she made paneer. The gentle simmer of milk, the mysterious addition of yogurt, and then the miraculous transformation into soft, milky curds – it felt like magic. That day, as I savored the fresh, homemade cheese, I knew I was witnessing something special, a connection to a culinary tradition that would stay with me forever.
Recipe Overview
- Prep Time: 15 minutes
- Cook Time: 45 minutes
- Total Time: 1 hour
- Yields: 8 ounces or 2 cups
- Serves: 4
- Dietary Type: Vegetarian, Gluten-Free
Ingredients
- 6 cups whole milk
- 1 1/2 cups plain yogurt (whole-milk, aka full-fat)
Equipment Needed
- Large (at least 3 quart) saucepan
- Colander
- Cheesecloth or clean linen kitchen towel
- Rubber band
- Pie pan or frying pan (two of equal or smaller size)
- Weighty object (e.g., a teapot filled with water, a bottle of wine)
- Container with lid
Instructions
-
Begin by preparing your drainage station. Place a colander in the sink and line it with 4 thicknesses of cheesecloth or a clean linen kitchen towel. Make sure the cloth is large enough to overhang the colander’s edges.
-
In a large saucepan (at least 3 quarts in size to prevent boiling over), pour in the milk. Bring the milk to a boil over high heat. This stage requires constant attention. Stir the milk almost continuously to prevent it from burning on the bottom or boiling over the sides of the pan.
-
As soon as the milk reaches a rolling boil, immediately add the yogurt. Stir gently to incorporate the yogurt into the hot milk.
-
Watch closely as the milk undergoes a transformation. It will initially foam up into soft clouds, then quickly begin to separate into thick curds of cheese floating in a thin, faintly greenish liquid. This liquid is called whey.
-
Remove the saucepan from the heat. Carefully pour the entire contents – both the curds and the whey – into the cheesecloth-lined colander you prepared earlier. Allow the whey to drain away completely into the sink.
-
Once the cheesecloth is cool enough to handle, gather the corners of the cloth together, encasing the cheese curds. Gently squeeze the cheese into a ball, twisting the top portion of the cloth to help force out more of the remaining liquid. Secure the twisted top with a rubber band to maintain the shape.
-
Suspend the cheese from a faucet over the sink and let it hang for about 30 minutes to allow any remaining whey to drain off due to gravity. This step is crucial for achieving the right texture.
-
Now it’s time to press the cheese to make it firm enough to cut. Place the wrapped lump of cheese on its side in a pie pan or frying pan. Place another pie pan or frying pan of equal or smaller size on top of it, or cover the cheese with a plate.
-
Balance a weighty object on top of the pan or plate to compress the cheese. A teapot filled with water or a heavy bottle of wine works perfectly. Press the cheese for an additional 30 minutes. The amount of weight will determine the final firmness of your paneer. More weight yields a firmer paneer.
-
Carefully unwrap the pressed cheese. Use a sharp knife to cut it into ½-inch cubes (or any size you prefer).
-
Transfer the paneer cubes to a container and seal it tightly. Refrigerate until needed.
-
The paneer will keep for 3 to 4 days in the refrigerator and several months in the freezer.
Expert Tips & Tricks
- Don’t skip the stirring: Constant stirring while bringing the milk to a boil is vital to prevent scorching.
- Yogurt quality matters: Use high-quality, full-fat plain yogurt for the best flavor and yield.
- Whey is your friend: Don’t discard the whey! It’s packed with nutrients and can be used in smoothies, soups, or as a liquid in baking.
- Adjust the pressing time: For a softer paneer, reduce the pressing time. For a firmer paneer, increase it.
- Herbed Paneer: Add fresh herbs like cilantro, mint, or dill to the cheesecloth before pressing for a subtle flavor infusion.
Serving & Storage Suggestions
Freshly made paneer is best enjoyed within a few days. Serve it in classic Indian dishes like Palak Paneer, Mattar Paneer, or Paneer Tikka Masala. It also makes a great addition to salads or sandwiches.
To store, keep the paneer in an airtight container in the refrigerator for up to 4 days. For longer storage, freeze the paneer. Thaw it in the refrigerator overnight before using. The texture may change slightly after freezing, but the flavor will remain.
Nutritional Information
| Nutrient | Amount per Serving | % Daily Value |
|---|---|---|
| Calories | 275.6 kcal | N/A |
| Calories from Fat | 133 g | 49% |
| Total Fat | 14.9 g | 22% |
| Saturated Fat | 8.8 g | 43% |
| Cholesterol | 48.5 mg | 16% |
| Sodium | 188.7 mg | 7% |
| Total Carbohydrate | 20.8 g | 6% |
| Dietary Fiber | 0 g | 0% |
| Sugars | 23.5 g | 94% |
| Protein | 15 g | 29% |
Variations & Substitutions
- Spiced Paneer: Add a pinch of turmeric, cumin, or chili powder to the milk while boiling for a subtle spice infusion.
- Vegan Paneer: While traditional paneer requires dairy, you can experiment with using plant-based milk and a vegan yogurt alternative, though the texture and taste will differ significantly.
- Smoked Paneer: After pressing, lightly smoke the paneer for a unique smoky flavor. Use a cold smoker to avoid melting the cheese.
FAQs (Frequently Asked Questions)
Q: Can I use store-bought yogurt?
A: Yes, you can use store-bought plain yogurt, but ensure it’s full-fat for the best results. The higher fat content contributes to a richer, creamier paneer.
Q: What if my milk doesn’t curdle?
A: This can happen if the milk isn’t hot enough or if the yogurt is too old. Try bringing the milk to a slightly higher temperature and ensuring your yogurt is fresh. You can also add a tablespoon of lemon juice to help the process along.
Q: How do I know when the paneer is done pressing?
A: The firmness of the paneer is a matter of personal preference. Check the cheese after 30 minutes. If you want it firmer, continue pressing for another 15-30 minutes.
Q: Can I freeze paneer?
A: Yes, paneer freezes well. Wrap it tightly in plastic wrap and then place it in a freezer bag. When thawing, allow it to thaw slowly in the refrigerator overnight. Be aware that the texture may become slightly more crumbly after freezing.
Q: What can I do with the leftover whey?
A: Don’t throw it away! Whey is incredibly nutritious. Use it as a base for soups, smoothies, or even in baking as a liquid replacement.
Final Thoughts
Making paneer at home is a truly rewarding experience. It’s a simple process that yields a delicious, versatile ingredient that can elevate countless dishes. Don’t be intimidated – with a little patience and attention, you’ll be enjoying fresh, homemade paneer in no time. I encourage you to try this recipe and discover the joy of creating your own cheese from scratch. Feel free to experiment with different variations and share your creations. Pair your homemade paneer with a flavorful saag or a spicy curry for an authentic Indian meal that will delight your senses. Enjoy!