
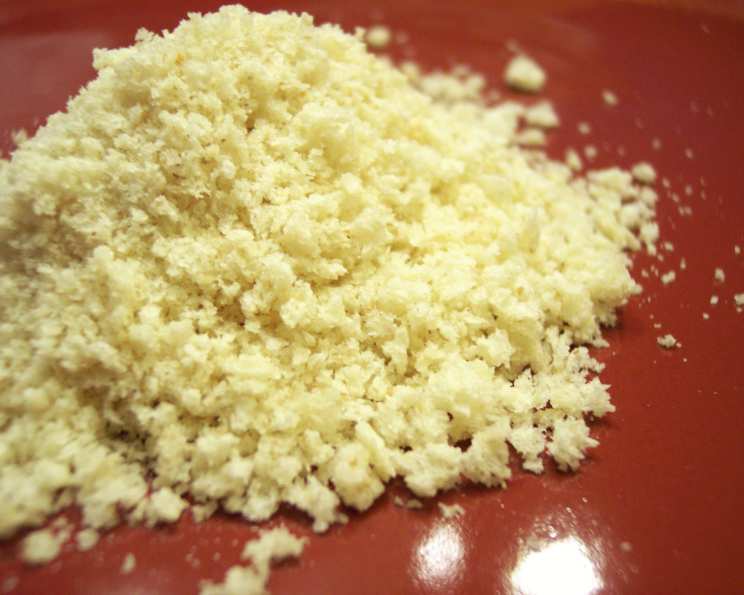
Unleash the Crunch: The Art of Homemade Panko Bread Crumbs
My grandmother, a fiercely independent woman with a penchant for all things homemade, always used to say, “If you want something done right, do it yourself.” That mantra echoed in my ears the first time I tasted the ethereal, crispy texture of authentic Japanese Panko. Store-bought versions paled in comparison to the light, airy crumbs I experienced in Tokyo. Determined to recreate that texture at home, I embarked on a journey to perfect the art of homemade Panko. What I discovered was a surprisingly simple process that elevates any dish to new levels of crunchy perfection.
Recipe Overview
- Prep Time: 5 minutes
- Cook Time: 1-2 hours drying time
- Total Time: Up to 12 hours drying time
- Servings: Varies
- Yield: Varies
- Dietary Type: Vegetarian
Ingredients
- 2 slices fresh white bread
- 1 slice fresh white bread
Equipment Needed
- Counter or safe drying space
Instructions
-
Begin by carefully trimming only the brown crust from the fresh white bread. This step is crucial for achieving the signature light color and delicate texture of Panko. The crust will make the bread crumbs denser and darker.
-
Lay out the crustless bread on the counter, or another safe and clean area, to dry. This step allows the bread to lose moisture, which is essential for creating the desired crumbly texture.
-
Allow the bread to dry for 1-2 hours. However, keep a close eye on it. Depending on the type of bread used and the humidity in your environment, the drying time may vary significantly. Some cooks have reported needing to leave their bread out to dry for much longer, even up to 12 hours. The bread should be completely dry to the touch but not rock hard.
-
Once the bread is adequately dried out, crumble it gently using your fingers. The goal is to create light, airy flakes, not a fine powder. Avoid over-handling the bread at this stage to prevent it from becoming compacted.
-
The homemade Panko is now ready to be used as desired.
Expert Tips & Tricks
- Bread Selection: While any white bread can technically be used, a soft, fluffy loaf will yield the best results. Avoid dense or whole-wheat breads, as they will produce a heavier, less desirable Panko.
- Drying Time: Patience is key! Resist the urge to rush the drying process. Properly dried bread is essential for achieving the signature crispy texture of Panko. If you live in a humid environment, consider using a very low oven (around 170°F or 77°C) to gently dry the bread, checking frequently to prevent browning.
- Crumbling Technique: The crumbling technique greatly affects the final texture. Use your fingertips to gently break the bread apart into irregular flakes. Avoid squeezing or compressing the bread, as this will result in smaller, denser crumbs.
- Flavor Infusion: For a unique twist, consider adding a pinch of dried herbs or spices to the bread before crumbling. Garlic powder, onion powder, or Italian seasoning can add a subtle depth of flavor to your homemade Panko.
- Toasting (Optional): For a richer, nuttier flavor, you can lightly toast the crumbled Panko in a dry skillet over medium heat. Stir constantly to prevent burning, and remove from heat as soon as the crumbs turn golden brown.
Serving & Storage Suggestions
Homemade Panko is incredibly versatile and can be used in a wide range of dishes. It’s perfect for coating fried foods, adding a crispy topping to baked casseroles, or even as a textural element in salads.
- Serving Suggestions: Use immediately for the crispiest results. Sprinkle over macaroni and cheese before baking, use as a coating for chicken cutlets, or bread shrimp for tempura.
- Storage: Store the dried, crumbled Panko in an airtight container at room temperature for up to 2 weeks. For longer storage, you can freeze the Panko in a freezer-safe bag or container for up to 3 months.
- Reheating: If the Panko has softened after storage, you can re-crisp it by toasting it in a dry skillet over medium heat for a few minutes, or by spreading it on a baking sheet and baking at 300°F (150°C) for 5-10 minutes.
Nutritional Information
Please note that nutritional information is an estimate and can vary based on specific ingredients and serving sizes.
| Nutrient | Amount per Serving (estimated) | % Daily Value (estimated) |
|---|---|---|
| Calories | 199.5 kcal | N/A |
| Calories from Fat | 22 g | 11% |
| Total Fat | 2.5 g | 3% |
| Saturated Fat | 0.5 g | 2% |
| Cholesterol | 0 mg | 0% |
| Sodium | 510.8 mg | 21% |
| Total Carbohydrate | 38 g | 12% |
| Dietary Fiber | 1.8 g | 7% |
| Sugars | 3.2 g | N/A |
| Protein | 5.7 g | 11% |
Variations & Substitutions
- Gluten-Free Panko: Use your favorite gluten-free white bread to create gluten-free Panko. The process remains the same, just ensure the bread is completely gluten-free.
- Seasoned Panko: Experiment with different herbs and spices to create custom-flavored Panko. Try adding smoked paprika, chili powder, or dried oregano for a savory kick.
- Garlic Panko: Mince a clove or two of garlic and sauté it in a little olive oil until fragrant. Toss the dried bread crumbs with the garlic-infused oil before crumbling.
- Herb Panko: Finely chop fresh herbs like parsley, chives, or thyme and mix them with the dried bread crumbs before crumbling.
- Spicy Panko: Add a pinch of red pepper flakes or a dash of hot sauce to the dried bread crumbs for a spicy kick.
FAQs (Frequently Asked Questions)
Q: Why is it important to remove the crust from the bread?
A: The crust is denser and darker than the interior of the bread, and it will create a heavier, less appealing Panko with a less desirable color. Removing the crust ensures a light, airy, and uniformly pale crumb.
Q: How do I know when the bread is dry enough?
A: The bread should be completely dry to the touch but not rock hard. It should crumble easily with gentle pressure. If the bread is still soft or pliable, it needs more drying time.
Q: Can I use stale bread to make Panko?
A: While you can technically use stale bread, it’s best to start with fresh white bread for the lightest and airiest Panko. Stale bread may be too dry and brittle, resulting in smaller, denser crumbs.
Q: Can I use a food processor to crumble the bread?
A: It is not recommended to use a food processor, as it will likely result in a fine powder rather than the desired flaky texture. Gently crumbling the bread by hand is the best way to achieve the signature Panko texture.
Q: How long does homemade Panko last?
A: Stored properly in an airtight container at room temperature, homemade Panko can last for up to 2 weeks. For longer storage, you can freeze it for up to 3 months.
Final Thoughts
Don’t underestimate the power of homemade Panko. It’s a simple ingredient that can elevate your cooking to new heights, adding an irresistible crunch and textural complexity to your favorite dishes. So, ditch the store-bought stuff and give this recipe a try. You’ll be amazed at how easy it is to create restaurant-quality Panko right in your own kitchen. Once you’ve mastered the basics, feel free to experiment with different flavors and variations to create your own signature Panko blend. I encourage you to share your creations and experiences – happy cooking!