
Homemade Peanut Butter Cups: A Classic Treat, Elevated
The memory is so vivid: sitting on the floor of my grandmother’s kitchen, the linoleum cool against my legs. She’d be humming some old tune as she carefully unwrapped miniature peanut butter cups, handing them to me with a wink. The combination of rich chocolate and salty peanut butter was pure magic, a perfect little bite of happiness. While store-bought cups always held a special place in my heart, nothing compares to the experience of creating them from scratch, where you can customize every layer to your exact liking. This recipe captures that nostalgia while elevating the flavor profile for a truly unforgettable homemade treat.
Recipe Overview
- Prep Time: 20 minutes
- Cook Time: 5 minutes
- Chill Time: 1 hour
- Total Time: 1 hour 25 minutes
- Servings: 24
- Yield: 24 cups
- Dietary Type: Gluten-Free
Ingredients
- 1 1⁄2 cups semi-sweet chocolate chips (dark chocolate or white chocolate, whatever you prefer. I used a little bit of each kind)
- 1⁄2 cup creamy peanut butter
- 1⁄2 cup crunchy peanut butter
- 1⁄2 cup confectioners’ sugar
- 1⁄2 teaspoon vanilla
- 1 pinch salt
Equipment Needed
- Baking sheet
- 2 dozen mini muffin wrappers
- Microwave-safe bowl
- Spoon
- Small brush
- Small bowl
- Whisk
Instructions
-
Begin by preparing your workspace. Place 2 dozen mini muffin wrappers on a baking sheet. This will make it easy to transfer the peanut butter cups to the refrigerator to chill.
-
Next, melt half of the chocolate chips. Use a microwave-safe bowl and heat in short, 30-second intervals, stirring in between each interval. This prevents the chocolate from burning. Continue until the chocolate is completely smooth and melted.
-
Using a spoon, carefully pour a small amount of the melted chocolate into each muffin wrapper. Then, use a small, clean brush to “paint” the chocolate up the sides of each wrapper, creating a chocolate shell. Be sure to cover the bottom and sides evenly.
-
Once all the cups are coated, place the baking sheet in the refrigerator to chill for 20-30 minutes. This will allow the chocolate to set and harden, creating a sturdy base for the peanut butter filling.
-
While the chocolate is chilling, prepare the peanut butter filling. In a small bowl, whisk together the creamy peanut butter, crunchy peanut butter, confectioners’ sugar, vanilla, and salt. Whisk until well combined.
-
Once the peanut butter mixture has come together, microwave it for about 30 seconds, or until very soft. This step is important as it makes the peanut butter easier to spoon into the chocolate cups. Keep a close eye on it to prevent burning.
-
After the chocolate cups have chilled, remove them from the refrigerator. Spoon generous amounts of the peanut butter mixture into each cup, filling them nearly to the top.
-
Return the filled cups to the refrigerator for another 30 minutes to allow the peanut butter filling to set. This will help prevent the filling from melting when you add the final layer of chocolate.
-
While the peanut butter is chilling, melt the remaining chocolate chips using the same method as before: microwave in 30-second intervals, stirring until smooth.
-
Finally, remove the cups from the refrigerator and spoon the melted chocolate over the peanut butter filling, filling each muffin cup completely.
-
Return the baking sheet to the refrigerator and chill until the chocolate is completely set, usually about 30 minutes to an hour.
-
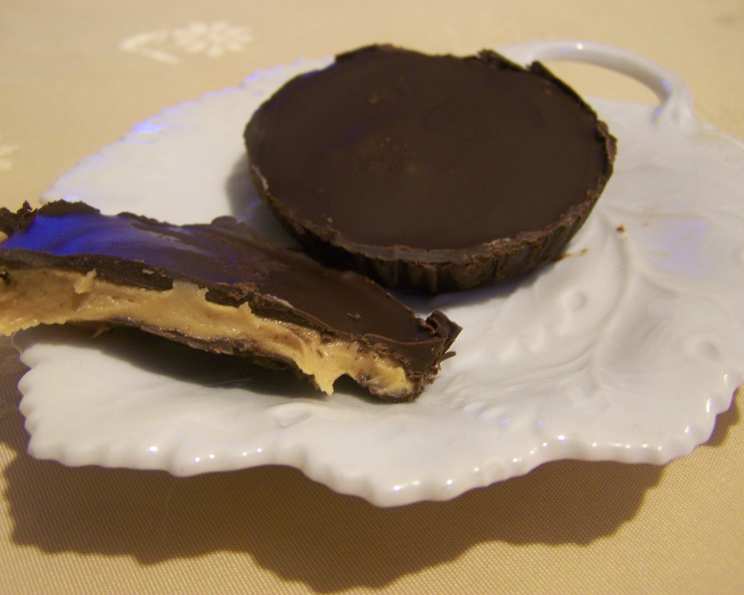
Once the chocolate has set, gently peel away the muffin wrappers and enjoy your homemade peanut butter cups!
Expert Tips & Tricks
- Chocolate Choices: Don’t be afraid to experiment with different types of chocolate! Dark chocolate offers a richer, more intense flavor, while white chocolate provides a sweeter, creamier contrast. A combination of dark and milk chocolate can also be delightful.
- Peanut Butter Preferences: The recipe calls for both creamy and crunchy peanut butter, but you can adjust the ratio to your liking. Using all creamy will result in a smoother filling, while using more crunchy will add a more pronounced texture. Consider using freshly ground peanut butter for an even more intense flavor.
- Melting Chocolate Perfectly: The key to melting chocolate without burning is to use short bursts of heat and stir frequently. If you don’t have a microwave, you can also melt the chocolate in a double boiler over simmering water.
- Preventing Seizing: If your chocolate seizes (becomes thick and grainy), try adding a teaspoon of vegetable oil or shortening. This can help to smooth it out.
Serving & Storage Suggestions
These homemade peanut butter cups are best served chilled. They make a wonderful dessert, a sweet treat to pack in lunchboxes, or a delightful addition to a candy buffet.
- Storage: Store leftover peanut butter cups in an airtight container in the refrigerator for up to a week. You can also freeze them for up to a month. To thaw, simply place them in the refrigerator for a few hours.
- Serving Suggestions: Serve them as is, or sprinkle them with a pinch of sea salt for an extra burst of flavor. They also pair well with a glass of cold milk or a cup of hot coffee.
Nutritional Information
Please note that this is an estimated calculation, and actual values may vary.
| Nutrient | Amount per Serving | % Daily Value |
|---|---|---|
| Calories | 120 kcal | 6% |
| Total Fat | 8g | 10% |
| Saturated Fat | 4g | 20% |
| Cholesterol | 0mg | 0% |
| Sodium | 20mg | 1% |
| Total Carbohydrate | 10g | 4% |
| Dietary Fiber | 1g | 4% |
| Sugars | 8g | – |
| Protein | 2g | 4% |
Variations & Substitutions
- Vegan Peanut Butter Cups: Use vegan chocolate chips and ensure your confectioners’ sugar is vegan-friendly (some brands use bone char in the refining process).
- Dark Chocolate Lovers: Use all dark chocolate for an intense, bittersweet flavor.
- White Chocolate Wonders: Opt for white chocolate chips and add a sprinkle of sea salt to balance the sweetness.
- Nut-Free Option: Substitute sunflower seed butter (sunbutter) for the peanut butter.
- Spice it Up: Add a pinch of chili powder to the peanut butter filling for a spicy kick.
- Maple Sweetened: Substitute the confectioner’s sugar with maple sugar. You may need to adjust the amount of peanut butter to achieve the desired consistency.
- Coconut Flavor: Mix in shredded coconut into the peanut butter filling for a tropical twist.
FAQs (Frequently Asked Questions)
Q: Can I use regular-sized muffin wrappers instead of mini ones?
A: Yes, you can, but you’ll need to adjust the amount of chocolate and peanut butter accordingly. You’ll likely yield fewer cups.
Q: My chocolate is seizing up when I melt it. What am I doing wrong?
A: Chocolate seizes when it comes into contact with even a tiny amount of water. Ensure your bowl and utensils are completely dry. Also, be sure to melt the chocolate in short intervals in the microwave, stirring frequently to prevent overheating.
Q: Can I make these ahead of time?
A: Absolutely! Peanut butter cups are great for making ahead. Store them in an airtight container in the refrigerator for up to a week, or freeze them for longer storage.
Q: My peanut butter filling is too soft. What can I do?
A: If your peanut butter filling is too soft, add a bit more confectioners’ sugar until it reaches the desired consistency. Be sure to chill the filling thoroughly before adding the top layer of chocolate.
Q: The chocolate is cracking when I bite into the peanut butter cup. How can I prevent this?
A: The chocolate might be too cold and brittle. Allow the peanut butter cups to sit at room temperature for a few minutes before serving.
Final Thoughts
There’s a simple pleasure in recreating classic treats at home, and these homemade peanut butter cups are no exception. The ability to customize the chocolate, peanut butter, and even add a touch of your own flair makes this recipe a winner. Don’t hesitate to experiment and make it your own! I encourage you to gather your ingredients, roll up your sleeves, and embark on this delicious adventure. And please, share your creations and feedback – I’d love to hear how they turned out! Perhaps serve these with a scoop of vanilla ice cream, or alongside a rich cup of dark roast coffee for the perfect ending to any meal.