
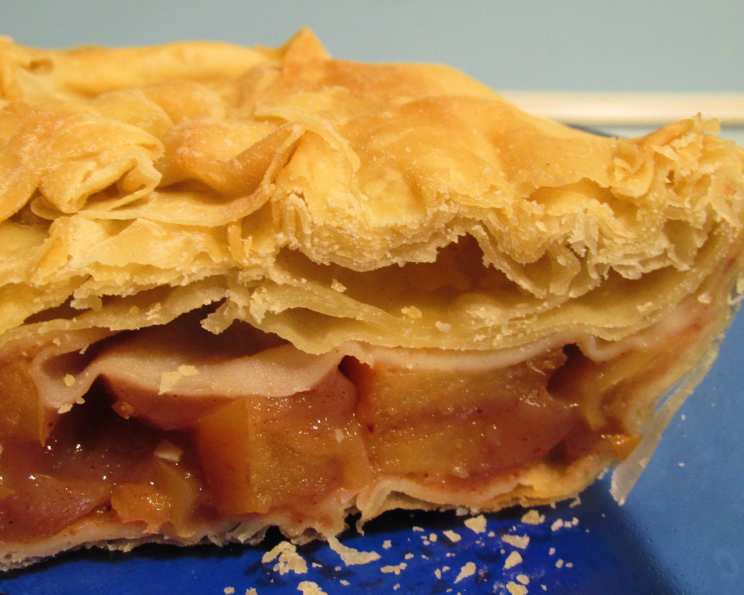
Mastering Homemade Phyllo Pastry: A Culinary Journey
The memory is etched in my mind: the sun-drenched kitchen of a small taverna nestled on a Greek island. The air, thick with the aroma of olive oil and sea salt, was punctuated by the rhythmic thump, thump, thump of Yiayia Eleni’s rolling pin. She, a woman whose hands held the wisdom of generations, was crafting phyllo dough, stretching it to paper-thin perfection. It seemed like magic then, and though the process is meticulous, the reward – a flaky, delicate pastry – is well worth the effort. The taste of that homemade spanakopita, still warm from the oven, remains one of my most treasured culinary memories.
Recipe Overview
- Prep Time: 2 hours (includes resting time)
- Cook Time: Varies depending on the application
- Total Time: 2+ hours
- Servings: 12 sheets
- Yield: About 12 phyllo sheets
- Dietary Type: Vegan
Ingredients
- Dough:
- 4 cups flour (all-purpose, unbleached is best)
- 1 teaspoon salt
- 1 1/3 cups tepid water
- 1/4 cup olive oil
Equipment Needed
- Mixing bowl
- Rolling pin
- Wooden dowel (at least 24 inches long and 3/4 inch diameter)
- Large cloth
- Wax paper
Instructions
-
Begin by sifting together the flour and salt into a large mixing bowl. This ensures a smooth, lump-free dough.
-
Add the tepid water and olive oil to the dry ingredients.
-
Stir the mixture until a soft dough forms. It will seem shaggy at first, don’t worry.
-
Turn the dough out onto a lightly floured surface and knead for about 10 minutes. The dough will initially feel sticky, but as you knead, it will develop into a smooth and satiny texture. Resist the urge to add more flour unless absolutely necessary.
-
Once the dough is well mixed and smooth, wrap it tightly in plastic wrap and let it rest at room temperature for at least one hour. This resting period is crucial; it allows the gluten to relax, making the dough easier to stretch.
-
If you’re not using all the dough immediately, wrap the unused portion and keep it chilled in the fridge for up to a week. Be sure to bring it to room temperature before using.
-
After the dough has rested, divide it into 12 equal portions, shaping them into smooth balls.
-
Cover all the dough balls with a cloth, except for the one you are currently working with. This prevents them from drying out.
-
Take one dough ball and shape it into a square.
-
Place the square on a lightly floured surface and roll it out into a 6-inch square using a rolling pin. Dust again lightly with flour.
-
Take the wooden dowel and place it on one end of the pastry. Roll the pastry neatly onto the dowel, pressing firmly as you do so. Keep your hands on each side of the pastry to guide it.
-
Unroll the pastry and dust the work surface and pastry with a little more flour. Roll the pastry up again from the opposite side, exerting pressure as you go.
-
Unroll the pastry carefully. After this second rolling, the pastry should be about 10×12 inches.
-
Now comes the stretching. Using the back of your hands, place them under the pastry and stretch it gently, moving your hands to keep the stretching even, working toward the edges.
-
The edges can be given a final stretch with your fingertips.
-
You should wind up with a pastry that’s approximately 14×18 inches in size, and incredibly thin.
-
Place the stretched phyllo sheet on a large cloth. Cover it with wax paper and fold the cloth over the top. This prevents the sheets from sticking together and drying out.
-
Repeat the above process with the remaining dough balls, laying each phyllo sheet on top of the previous one with wax paper between them.
-
Use the phyllo pastry soon after making it, as it can go sour if kept too long.
-
If desired, you can roll the phyllo sheets out even more thinly. Repeating the dowel rolling process will result in a thinner sheet each time. The thinner the better!
Expert Tips & Tricks
- The key to great phyllo is patience. Don’t rush the kneading or resting stages.
- Keep the dough well-floured during the rolling and stretching process to prevent sticking. But use it sparingly; too much flour will make the dough tough.
- If the dough tears, don’t panic! Patch it with a small piece of dough. The layers will hide any imperfections.
- Humidity is your enemy. Work in a cool, dry environment. If it’s a humid day, consider adding a tablespoon or two of extra flour to the dough.
- Butter or oil? While this recipe uses olive oil in the dough, brushing each layer with melted butter is common for many recipes. This adds richness and flavor, especially in sweet dishes. Experiment with both to see what you prefer!
- Make-ahead tip: The dough itself can be made a day in advance and stored in the refrigerator. Just be sure to bring it to room temperature before rolling.
- Rolling pin vs. Dowel: Although a rolling pin works for the beginning stages, a dowel is critical for achieving that paper-thin, evenly stretched texture.
- Don’t be afraid to experiment! Phyllo is incredibly versatile.
Serving & Storage Suggestions
Freshly made phyllo is best used immediately. Once baked into a dish, like baklava or spanakopita, it’s best served warm.
- Baked dishes: Store baked phyllo dishes, tightly wrapped, in the refrigerator for up to 3 days. Reheat in a low oven (300°F) to crisp them up.
- Unbaked phyllo: Unused phyllo dough can be stored, tightly wrapped, in the refrigerator for up to a week. You can also freeze it for longer storage, but be sure to thaw it completely in the refrigerator before using it.
- Avoid storing at room temperature as the dough can dry out quickly.
Nutritional Information
Note: Nutritional information is an estimate and may vary based on specific ingredients and portion sizes.
| Nutrient | Amount per Serving | % Daily Value |
|---|---|---|
| Calories | 250 kcal | 13% |
| Total Fat | 7g | 11% |
| Saturated Fat | 1g | 5% |
| Cholesterol | 0mg | 0% |
| Sodium | 150mg | 7% |
| Total Carbohydrate | 40g | 15% |
| Dietary Fiber | 2g | 8% |
| Sugars | 0g | 0% |
| Protein | 5g | 10% |
Variations & Substitutions
- Gluten-Free Phyllo: While challenging, gluten-free phyllo is possible using a blend of gluten-free flours like rice flour, tapioca starch, and potato starch. Be prepared for a more delicate and potentially more difficult dough to work with. You might also need to use a binder like xanthan gum.
- Different Oils: Experiment with different olive oils for varying flavor profiles. A robust extra virgin olive oil will impart a stronger flavor to the pastry.
- Sweet vs. Savory: This recipe works well for both sweet and savory applications. Adjust the fillings accordingly.
FAQs (Frequently Asked Questions)
Q: Is making homemade phyllo really worth the effort?
A: Absolutely! While it requires some patience, the taste and texture of homemade phyllo are far superior to store-bought versions. The freshness and delicate flakiness are unmatched.
Q: My dough keeps tearing. What am I doing wrong?
A: Tearing is often caused by not enough resting time or not enough flour on the work surface. Make sure to let the dough rest for at least an hour, and don’t be afraid to add a little more flour while rolling and stretching.
Q: Can I use a pasta machine to roll out the phyllo?
A: While a pasta machine can help get the dough started, it won’t give you the same thinness and elasticity as the traditional stretching method. The dowel technique is still essential.
Q: How do I prevent the phyllo sheets from drying out while I’m working?
A: The key is to keep the unused phyllo sheets covered with a damp cloth and wax paper. This will prevent them from drying out and becoming brittle.
Q: What are some good fillings for phyllo pastry?
A: The possibilities are endless! For savory dishes, try spinach and feta (spanakopita), meat fillings, or vegetable mixtures. For sweet dishes, consider nuts and honey (baklava), custard fillings, or fruit compotes.
Final Thoughts
Crafting homemade phyllo pastry may seem daunting at first, but trust me, the reward is well worth the effort. With a little patience, practice, and these tips, you’ll be creating paper-thin layers of deliciousness in no time. Imagine the satisfaction of serving a homemade baklava or spanakopita, knowing that you created every flaky layer from scratch. So, gather your ingredients, roll up your sleeves, and embark on this culinary adventure. Share your creations with loved ones, and don’t forget to let me know how it goes! Kali Orexi! (Bon appétit!)