
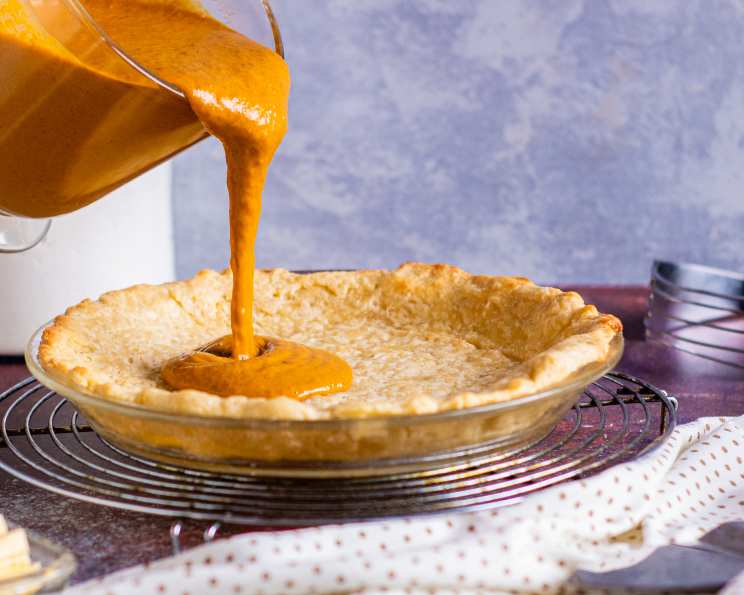
The Soul of a Pie: Mastering Homemade Pie Crust
The scent of pie baking is a time machine. It instantly transports me back to my grandmother’s kitchen, a sun-drenched space filled with the comforting aroma of cinnamon, apples, and, most importantly, her legendary pie crust. I can still picture her weathered hands, deftly working the dough on a well-worn wooden board, a sprinkle of flour dusting her apron. That crust was more than just a base for fillings; it was a symbol of love, tradition, and the simple joy of homemade goodness.
Recipe Overview
- Prep Time: 15 minutes
- Cook Time: 20-30 minutes
- Total Time: 40-45 minutes
- Yields: 2 pie crusts
- Serves: 8
- Dietary Type: Vegetarian
Ingredients
- 2 cups all-purpose flour, sifted
- 1 teaspoon salt
- ⅔ cup (10 tablespoons) butter, cold, cut into cubes OR ⅔ cup shortening, cold
- 5-7 tablespoons cold water
Equipment Needed
- Mixing bowl
- Pastry cutter or food processor
- Measuring cups and spoons
- Rolling pin
- Flat surface (pastry board or clean countertop)
- Pie dish
Instructions
-
Prepare the dry ingredients: In a large mixing bowl, combine the sifted all-purpose flour and salt. Sifting ensures a lighter, more tender crust.
-
Cut in the fat: This is the most crucial step for a flaky crust. Add the cold butter (cut into cubes) or shortening to the flour mixture. Using a pastry cutter, carefully cut the fat into the flour until the mixture resembles coarse crumbs. You can also pulse the ingredients together in a food processor, but be careful not to over-process. The goal is to have small pieces of fat distributed throughout the flour. The cold temperature of the fat is key; it prevents the gluten in the flour from developing too much, which can result in a tough crust.
-
Add the water: Gradually add the cold water, one tablespoon at a time, mixing gently after each addition. Use a fork or your hands to incorporate the water into the dough. Continue adding water until the dough just comes together. Be careful not to overmix; a shaggy dough is preferable to a smooth one at this stage.
-
Form the dough: Divide the dough in half. Gently form each half into a disc. Wrap each disc tightly in plastic wrap and refrigerate for at least 30 minutes, or up to 2 hours. This chilling period allows the gluten to relax and the fat to solidify, making the dough easier to roll out and preventing it from shrinking during baking.
-
Roll out the crust: On a lightly floured surface, roll out one disc of dough into a circle that is slightly larger than your pie dish. Use a rolling pin and apply even pressure to create a uniform thickness. Rotate the dough as you roll to prevent it from sticking.
-
Transfer to the pie dish: Carefully lift the rolled-out dough and transfer it to your pie dish. Gently press the dough into the bottom and up the sides of the dish. Trim any excess dough with a knife or kitchen shears.
-
Crimp the edges: Crimp the edges of the crust to create a decorative border. You can use a fork to press along the edge or use your fingers to create a more elaborate design.
-
Pre-baking (for unfilled pies): If you’re making a pie that requires a pre-baked crust (such as a cream pie), prick the bottom of the crust several times with a fork to prevent it from puffing up during baking. This is called “docking” the crust.
-
Baking: Preheat your oven to 375°F (190°C). Bake the crust for 20-30 minutes, or until golden brown. If the edges of the crust begin to brown too quickly, you can cover them with foil or pie shields.
-
Cooling: Let the baked pie crust cool completely before filling.
Expert Tips & Tricks
- Keep everything cold: The colder the ingredients, the flakier the crust. Use ice water and chill your butter or shortening before using. You can even chill your flour!
- Don’t overmix: Overmixing develops the gluten in the flour, resulting in a tough crust. Mix just until the dough comes together.
- Use a scale: For the most accurate results, use a kitchen scale to measure your ingredients.
- Blind baking: For a pre-baked crust that doesn’t puff up, use pie weights or dried beans to weigh down the crust during baking. Line the crust with parchment paper or foil before adding the weights.
- Egg wash: For a glossy, golden-brown crust, brush the crust with an egg wash (one egg beaten with a tablespoon of water or milk) before baking.
- Make ahead: Pie dough can be made ahead of time and stored in the refrigerator for up to 2 days or in the freezer for up to 2 months. Thaw frozen dough in the refrigerator overnight before using.
- Prevent a soggy bottom: If your pie filling is particularly moist, brush the bottom of the crust with melted chocolate or sprinkle it with a thin layer of ground nuts before adding the filling. This will create a barrier that prevents the crust from becoming soggy.
Serving & Storage Suggestions
Serve your homemade pie fresh out of the oven, or at room temperature. Leftover pie should be stored in the refrigerator, covered, for up to 3 days. If the crust starts to get soggy, you can crisp it up by reheating the pie in a 350°F (175°C) oven for 10-15 minutes. Baked pie crusts (unfilled) can be stored at room temperature, in an airtight container, for up to 2 days. For longer storage, freeze the crust.
Nutritional Information
(Estimates, will vary based on ingredients and serving size)
| Nutrient | Amount per Serving | % Daily Value |
|---|---|---|
| Calories | 250 kcal | 13% |
| Total Fat | 16g | 25% |
| Saturated Fat | 10g | 50% |
| Cholesterol | 40mg | 13% |
| Sodium | 430mg | 18% |
| Total Carbohydrate | 24g | 8% |
| Dietary Fiber | 1g | 4% |
| Sugars | 0g | 0% |
| Protein | 4g | 8% |
Variations & Substitutions
- Gluten-Free Pie Crust: Substitute the all-purpose flour with a gluten-free flour blend designed for baking. You may need to add a binder like xanthan gum to help hold the crust together.
- Whole Wheat Pie Crust: Replace up to half of the all-purpose flour with whole wheat flour for a nuttier flavor and added fiber.
- Vegan Pie Crust: Use a vegan butter substitute or solid coconut oil in place of butter. Ensure the shortening is also plant-based.
- Savory Pie Crust: Add herbs and spices to the dough for a savory pie. Try adding dried thyme, rosemary, or sage. You can also add grated cheese for extra flavor.
- Sweet Pie Crust: Add a tablespoon or two of sugar to the dough for a sweeter crust that complements fruit fillings.
- Lard Pie Crust: Substitute some or all of the butter with lard for an incredibly flaky and flavorful crust.
FAQs (Frequently Asked Questions)
Q: Why is my pie crust tough?
A: Overmixing the dough is the most common cause of a tough pie crust. Also, using too much water or not chilling the dough sufficiently can contribute to toughness.
Q: How can I prevent my pie crust from shrinking during baking?
A: Chill the dough well before rolling it out. Avoid stretching the dough when placing it in the pie dish. Docking the crust and using pie weights can also help.
Q: Can I use a food processor to make pie crust?
A: Yes, a food processor can be a quick and easy way to make pie crust. However, be careful not to over-process the dough, as this can lead to a tough crust. Pulse the ingredients until they just come together.
Q: What’s the best way to roll out pie dough?
A: Use a lightly floured surface and a rolling pin. Apply even pressure and rotate the dough as you roll to prevent it from sticking. Start from the center and work your way out towards the edges.
Q: My pie crust is browning too quickly. What should I do?
A: Cover the edges of the crust with foil or pie shields to prevent them from burning. You can also lower the oven temperature slightly.
Final Thoughts
Making your own pie crust might seem intimidating at first, but with a little practice and patience, you’ll be whipping up flaky, golden-brown masterpieces in no time. Don’t be afraid to experiment with different variations and fillings to create your own signature pies. And remember, the most important ingredient is always love! So, grab your apron, gather your ingredients, and get ready to experience the joy of homemade pie. I encourage you to share your creations and any helpful tips with fellow bakers – happy baking!