
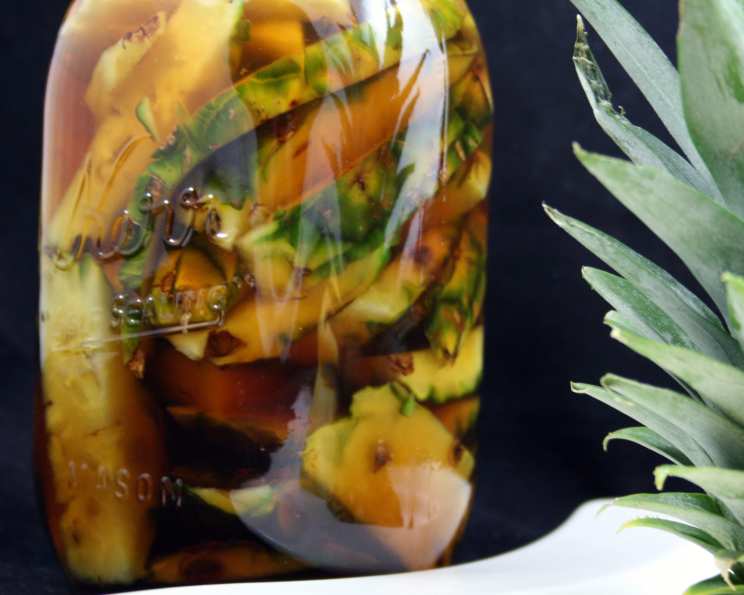
Homemade Pineapple Vinegar (Vinagre De Piña): A Taste of the Tropics
I’ll never forget the first time I tasted pineapple vinegar. It wasn’t in some fancy restaurant, but at my grandmother’s humble kitchen in the Philippines. She always had a jar bubbling away on the countertop, the sweet and tangy aroma a constant backdrop to her cooking. She swore it was the secret to her incredibly flavorful adobo and sinigang. The memory of that sweet, sharp, and subtly fruity flavor is forever etched in my culinary soul, a reminder of home and the resourceful magic of turning kitchen scraps into something extraordinary.
Recipe Overview
- Prep Time: 10 minutes
- Fermentation Time: 4-6 weeks
- Yield: Approximately 1 1/2 quarts
- Dietary Type: Vegan, Gluten-Free
Ingredients
- 1 1/2 quarts water
- 3/4 cup dark brown sugar, packed
- 1 pineapple, chopped (using the peel and trimmings)
- Plastic wrap
- Cheesecloth
Equipment Needed
- Large glass jar with a lid (approximately 2-quart capacity) or two 1-quart jars
- Measuring cups and spoons
- Mixing spoon
- Clean bottles for storing the finished vinegar
Instructions
-
Sanitize the jar and lid: Thoroughly wash the glass jar and its lid with hot, soapy water. Rinse well and allow to air dry completely or sterilize it in boiling water for 10 minutes. This step is crucial to prevent unwanted bacteria from interfering with the fermentation process.
-
Dissolve the sugar: Pour the water into the sanitized jar. Add the dark brown sugar. Stir vigorously until the sugar is completely dissolved. Ensure no sugar granules remain at the bottom of the jar. The dark brown sugar contributes a richer flavor and deeper color to the final vinegar.
-
Add the pineapple: Place the pineapple peel and trimmings into the jar with the sugar water. Stir well to ensure the pineapple is submerged. Try to pack the pineapple down a bit to maximize its contact with the liquid.
-
Cover and seal: Cover the mouth of the jar with a piece of plastic wrap. This will help prevent fruit flies from getting into your vinegar. Secure the lid tightly over the plastic wrap. While sealing, avoid using a metal lid directly against the vinegar during fermentation, as the acidity can react with the metal.
-
Ferment: Set the jar aside in a warm, dark place for 4-6 weeks. Avoid shaking or disturbing the jar during this time. A pantry or cupboard works well. Maintaining a consistent temperature around 70-75°F (21-24°C) will encourage the fermentation process.
-
Monitor and release pressure: The pineapple will release gasses during fermentation. Keep an eye on the jar and carefully loosen the lid periodically to release any pressure that builds up. This will prevent the jar from cracking or bursting.
-
Observe the changes: Over the weeks, the liquid may turn murky and brown. Don’t worry! This is normal. The solids will gradually settle to the bottom, and the liquid will become clearer. This indicates that the fermentation process is progressing.
-
Strain the solids: Once the liquid is clear (after 4-6 weeks), strain out the solids. Line a colander with several layers of cheesecloth. Place the colander over a clean bowl or pitcher. Carefully pour the vinegar mixture through the cheesecloth to remove all the solids.
-
Bottle and store: Transfer the strained vinegar into clean bottles. Store the bottles away from direct light, preferably in a cool, dark place.
-
Mother of Vinegar: During storage, you might notice a gelatinous mass forming in the vinegar. This is called the “mother of vinegar” and is a harmless byproduct of the fermentation process. It’s essentially a colony of acetic acid bacteria. You can use it to help jumpstart future batches of vinegar if you wish.
Expert Tips & Tricks
- Use organic pineapple: Using organic pineapple will minimize the risk of pesticides or chemicals interfering with the fermentation process.
- Don’t overfill the jar: Leave some headspace in the jar to allow for expansion during fermentation.
- Taste test: After 4 weeks, begin taste-testing the vinegar periodically. If it’s not tart enough, allow it to ferment for another week or two.
- Adjust the sugar: If you prefer a sweeter vinegar, you can increase the amount of brown sugar slightly.
- Fruit flies: Fruit flies are attracted to the fermenting vinegar. Make sure the jar is sealed well. Even with a lid, covering the mouth of the jar with a tightly stretched plastic wrap can add extra insurance.
Serving & Storage Suggestions
Homemade pineapple vinegar adds a bright, tangy flavor to a variety of dishes. Use it in salad dressings, marinades, sauces, or as a pickling agent. It’s particularly delicious in Filipino dishes like adobo, sinigang, and kinilaw.
Store the finished vinegar in a cool, dark place for up to a year. The flavor may mellow slightly over time. There’s no need to refrigerate it.
Nutritional Information
Please note that the nutritional information is an estimate and may vary depending on the specific ingredients used.
| Nutrient | Amount per Serving (1 tbsp) | % Daily Value* |
|---|---|---|
| Calories | 15 kcal | 1% |
| Total Fat | 0g | 0% |
| Saturated Fat | 0g | 0% |
| Cholesterol | 0mg | 0% |
| Sodium | 1mg | 0% |
| Total Carbohydrate | 4g | 1% |
| Dietary Fiber | 0g | 0% |
| Sugars | 3g | |
| Protein | 0g | 0% |
*Percent Daily Values are based on a 2,000 calorie diet.
Variations & Substitutions
- Other sugars: Experiment with different types of sugar, such as white sugar, cane sugar, or coconut sugar, to create different flavor profiles.
- Spice it up: Add spices like chilies, peppercorns, or ginger to the jar during fermentation for a spicy kick.
- Herbs: Infuse the vinegar with herbs like rosemary, thyme, or basil for a more complex flavor. Add these during the first stage of fermentation.
- Apple cider vinegar base: For a quicker fermentation, you can add a splash of raw, unfiltered apple cider vinegar to the jar to introduce beneficial bacteria.
FAQs (Frequently Asked Questions)
Q: How do I know when the vinegar is ready?
A: The best way to tell is by taste. The vinegar should have a noticeable tangy, acidic flavor. It should also smell like vinegar. If it still smells strongly of pineapple and isn’t very tart, it needs more time to ferment.
Q: What if mold grows on the pineapple?
A: If you see mold growing on the pineapple, discard the entire batch. This indicates that unwanted bacteria have contaminated the fermentation process.
Q: Can I use other fruit scraps to make vinegar?
A: Yes! You can use the scraps from other fruits, such as apples, pears, or mangoes, to make vinegar. The process is the same.
Q: What is the “mother of vinegar,” and is it safe to consume?
A: The “mother of vinegar” is a cellulose-based substance that forms during vinegar fermentation. It’s a colony of beneficial bacteria and is completely safe to consume. You can strain it out if you prefer, or leave it in.
Q: Can I make a smaller batch of this vinegar?
A: Yes, you can halve or quarter the recipe if you prefer. Just make sure to maintain the same ratios of ingredients.
Final Thoughts
Making your own pineapple vinegar is surprisingly easy and rewarding. Not only does it reduce food waste, but it also allows you to create a uniquely flavored condiment that’s far superior to store-bought versions. Give this recipe a try, and you’ll discover the joy of transforming humble pineapple scraps into a culinary treasure. It’s a taste of the tropics, bottled with patience and a little bit of kitchen magic. I know you’ll find it as rewarding as I have, and who knows, maybe it will become your family’s secret ingredient too!