
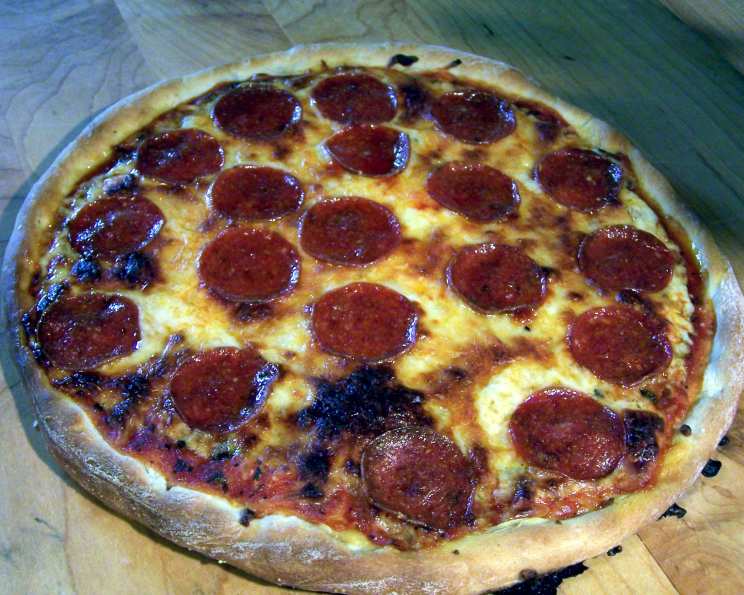
The Ultimate Guide to Homemade Pizza: From Dough to Delicious
There’s nothing quite like the aroma of baking pizza wafting through the house on a Friday night. For me, it’s a sensory time machine, instantly transporting me back to my childhood. I remember huddling around the kitchen island with my siblings, our hands dusted in flour, arguing over who got to arrange the pepperoni slices. The feeling of warm, yeasty dough beneath my fingers, the anticipation of that first cheesy bite – it’s a memory I cherish, and one I’ve happily recreated countless times with my own family. The beauty of homemade pizza lies not just in its unbeatable flavor, but in the joy of creating something together, a simple meal transformed into a special occasion.
Recipe Overview
- Prep Time: 30 minutes
- Cook Time: 20 minutes
- Total Time: 50 minutes
- Servings: 8
- Yield: 2 pizzas
- Dietary Type: Vegetarian (easily adaptable to vegan)
Ingredients
For the Dough:
- 1 cup warm water (105 to 115 degrees)
- 1 teaspoon sugar
- 1 package yeast (about 2 1/4 teaspoons)
- 2 1/2 cups bread flour, plus more for dusting
- 1/2 teaspoon salt
- 2 tablespoons oil (olive oil recommended)
For the Toppings:
- 1 cup Easy Pizza Sauce (store-bought or your favorite homemade recipe)
- 1 cup shredded mozzarella cheese, divided
- 1/4 cup grated parmesan cheese
- Your favorite toppings: pepperoni, mushrooms, bell peppers, onions, olives, etc.
Equipment Needed
- Mixing bowl
- Measuring cups and spoons
- Two greased round pizza pans or cookie sheets
- Oven
Instructions
-
Preheat your oven to 450 degrees Fahrenheit (232 degrees Celsius) and move the oven rack to the lowest position. This ensures the bottom crust gets nice and crispy.
-
In a mixing bowl, dissolve the yeast and sugar in the warm water. It’s crucial that the water is within the specified temperature range. Too cold, and the yeast won’t activate; too hot, and you’ll kill it.
-
Let the mixture sit for 10 minutes, allowing the yeast to foam up or proof. This step confirms that your yeast is alive and well, which is essential for a good rise. If it doesn’t foam, your yeast might be old and you’ll need to start over with fresh yeast.
-
Stir in the oil, bread flour, and salt to the yeast mixture. Use a wooden spoon or your hands to bring the dough together until it forms a shaggy mass.
-
Knead the dough for about 5 minutes. You can do this by hand on a lightly floured surface, or use a stand mixer with a dough hook. The dough should become smooth and elastic. If it’s too sticky, add a little more flour, one tablespoon at a time, until it’s manageable.
-
Place the dough in an oiled bowl, turning it once to coat. This prevents the dough from drying out as it rises.
-
Let the dough rise in a warm place for about 30 minutes, or until it has doubled in size. Cover the bowl with a clean kitchen towel or plastic wrap.
-
Punch down the dough to release the air. This helps to even out the texture and prepare it for shaping.
-
Divide the dough in half. Each half will make one pizza.
-
Pat each half into a greased round pizza pan or cookie sheet, using floured fingers. Work from the center outwards, pressing and stretching the dough to fit the pan. Don’t worry if it’s not perfectly round; rustic is charming!
-
Bake the crusts for 10 minutes, or until they begin to turn golden brown. This pre-baking step helps to prevent a soggy crust, especially if you’re using lots of toppings.
-
Sprinkle 1/2 cup of mozzarella cheese on each crust. This creates a barrier between the crust and the sauce, further preventing sogginess.
-
Top with pizza sauce, parmesan cheese, the remaining mozzarella cheese, and your favorite toppings. Get creative! The possibilities are endless.
-
Bake for about 10 minutes, or until the cheese is melted and bubbly, and the pizza is lightly browned. Keep a close eye on it to prevent burning. The baking time may vary depending on your oven.
-
Remove from the oven and let cool slightly before slicing and serving.
Expert Tips & Tricks
- For a crispier crust: Place a pizza stone in the oven while it preheats. Transfer the pizza (on its pan or a baking sheet) to the hot stone for the last few minutes of baking.
- Make-ahead dough: The pizza dough can be made a day ahead and stored in the refrigerator. Just be sure to bring it to room temperature before shaping.
- Spice it up: Add a pinch of red pepper flakes to the sauce or sprinkle them on top of the pizza for a little heat.
- Fresh herbs: Fresh basil, oregano, or rosemary add a burst of flavor when sprinkled on after baking.
- Don’t overload: Resist the urge to pile on too many toppings. Too much moisture can lead to a soggy pizza.
- Even Cooking: Rotate the pizzas halfway through baking to ensure even browning.
Serving & Storage Suggestions
Serve your homemade pizza immediately, while it’s hot and fresh. A simple green salad makes a great accompaniment.
Leftover pizza can be stored in the refrigerator for up to 3 days. Reheat in the oven at 350 degrees Fahrenheit (175 degrees Celsius) for a few minutes, or in a skillet over medium heat for a crispier crust. You can also microwave it, but the crust will be softer.
For longer storage, wrap individual slices tightly in plastic wrap and freeze them for up to 2 months. Thaw overnight in the refrigerator before reheating.
Nutritional Information
(Estimated per slice, assuming 8 slices per pizza and basic toppings)
| Nutrient | Amount per Serving | % Daily Value |
|---|---|---|
| Calories | 280 kcal | 14% |
| Total Fat | 12g | 18% |
| Saturated Fat | 5g | 25% |
| Cholesterol | 20mg | 7% |
| Sodium | 600mg | 26% |
| Total Carbohydrate | 32g | 12% |
| Dietary Fiber | 2g | 7% |
| Sugars | 4g | |
| Protein | 11g | 22% |
Variations & Substitutions
- Gluten-free: Use a gluten-free pizza crust mix or a pre-made gluten-free crust.
- Vegan: Substitute vegan cheese and ensure your toppings are plant-based. Nutritional yeast can add a cheesy flavor.
- Whole Wheat: Replace half of the bread flour with whole wheat flour for a nuttier flavor and added fiber.
- Different sauces: Try pesto, white garlic sauce, or even BBQ sauce as a base.
- Seasonal toppings: Use seasonal vegetables like roasted butternut squash in the fall or fresh tomatoes and basil in the summer.
- Personal Pizzas: Divide the dough into smaller portions to create individual pizzas. This is a fun way to let everyone customize their own toppings.
FAQs (Frequently Asked Questions)
Q: Why is my pizza crust soggy?
A: Soggy crust can be caused by too much sauce or toppings, or by not pre-baking the crust. Make sure to use a moderate amount of sauce, pre-bake the crust for a few minutes, and add a layer of cheese directly on the crust to create a barrier.
Q: Can I use all-purpose flour instead of bread flour?
A: Bread flour has a higher protein content, which creates a chewier crust. You can use all-purpose flour, but the crust will be slightly less chewy.
Q: How do I prevent the toppings from burning before the crust is cooked?
A: If your toppings are browning too quickly, you can tent the pizza with aluminum foil for the last few minutes of baking.
Q: Can I freeze the baked pizza?
A: Yes, you can freeze baked pizza. Let it cool completely, then wrap it tightly in plastic wrap and foil. Reheat in the oven until warmed through.
Q: What’s the best way to reheat leftover pizza?
A: The best way to reheat pizza is in the oven or a skillet. This will help to crisp up the crust. Microwaving is also an option, but the crust will be softer.
Final Thoughts
Homemade pizza is more than just a meal; it’s an experience. It’s a chance to get creative in the kitchen, to experiment with flavors, and to share something delicious with the people you love. Don’t be intimidated by the process – it’s easier than you might think! So gather your ingredients, preheat your oven, and get ready to create a pizza masterpiece. And please, don’t hesitate to share your experiences and variations with me; I’m always eager to learn new culinary tricks! Perhaps pair your pizza with a crisp Italian salad and a glass of Chianti for the perfect Friday night feast. Enjoy!