
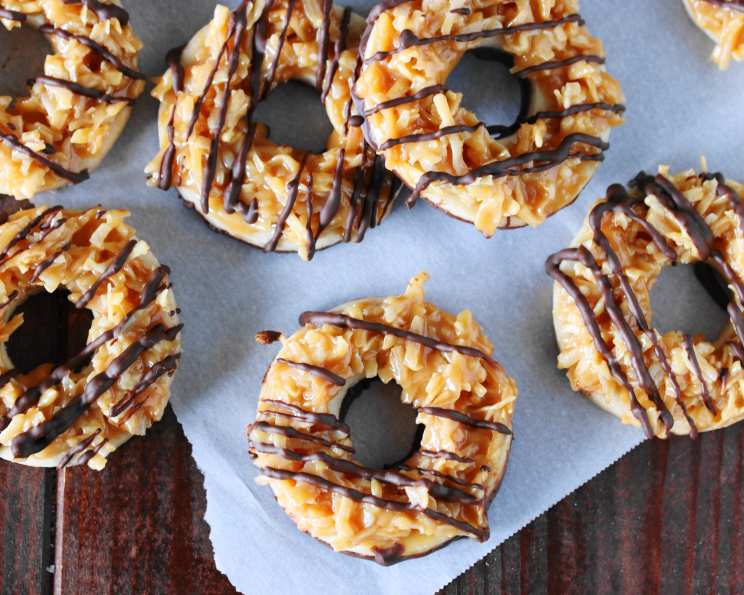
Homemade Samoas: A Culinary Ode to My Childhood
The aroma of toasted coconut and melting caramel still transports me back to my grandmother’s kitchen. Every year, she’d meticulously craft these Samoas-inspired cookies, her wrinkled hands deftly dipping each shortbread round into a decadent pool of dark chocolate. The slightly burnt edges of the coconut, the chewy caramel, and the satisfying snap of the chocolate – it was pure magic. More than just a treat, these cookies were a symbol of love, tradition, and the unwavering warmth of family. Now, armed with her cherished recipe and a dash of my own culinary flair, I’m thrilled to share this timeless treasure with you.
Recipe Overview
- Prep Time: 1 hour 45 minutes (includes chilling time)
- Cook Time: 22-30 minutes
- Total Time: 2 hours 75 minutes
- Yields: About 36 cookies
- Dietary Type: Not specified (contains dairy)
Ingredients
For the Shortbread Cookies:
- 1 cup unsalted butter, at room temperature
- ½ cup granulated sugar
- 2 cups all-purpose flour
- ¼ teaspoon baking powder
- ½ teaspoon salt
- 2 tablespoons milk
- ½ teaspoon vanilla extract
For the Caramel-Coconut Topping:
- 4 cups sweetened flaked coconut (14 oz. package)
- 20 ounces store-bought soft caramels (about 75 candies)
- 4 tablespoons milk
- ¼ teaspoon salt
For the Chocolate Bottoms and Drizzle:
- 8 ounces dark chocolate
- ¼ teaspoon canola oil
Equipment Needed
- Electric mixer
- Mixing bowls
- Plastic wrap
- Rolling pin
- Donut cutter or two round cookie cutters of different sizes
- Small spatula
- Baking sheets
- Parchment paper
- Wire rack
- Double boiler (or heatproof bowl and saucepan)
- Small bowl
- Small spoon or fork
Instructions
-
Cream the Butter and Sugar: In a mixing bowl, beat the butter for about 30 seconds with an electric mixer at medium speed until smooth. Add the sugar and vanilla extract. Beat on medium speed until fluffy, about 1 minute. This step is crucial for creating a tender cookie crumb.
-
Combine Dry Ingredients: In a separate bowl, whisk together the flour, baking powder, and salt. Whisking ensures even distribution of the baking powder and salt.
-
Combine Wet and Dry Ingredients: With the mixer on low speed, gradually add the flour mixture to the butter mixture, beating until just combined. Scrape down the sides of the bowl as needed to ensure all ingredients are incorporated. Add the milk and blend until just combined. Be careful not to overmix, as this can result in a tough cookie.
-
Chill the Dough: Divide the dough into two equal parts and use your hands to form each part into a disc. Wrap in plastic wrap and refrigerate for 1 hour. This chilling time is ESSENTIAL. It allows the gluten to relax, preventing the cookies from spreading too much during baking and making the dough easier to handle.
-
Roll and Cut the Dough: Working with one disc at a time (keep the other refrigerated), remove from the refrigerator and roll to just slightly thicker than 1/8-inch thickness on a lightly floured surface. Use a donut cutter or two round cookie cutters, one smaller than the other, to cut the dough into circles. A 2 1/4-inch round cookie cutter is a good size for the larger circle; a spice bottle cap can work for the inner circle.
-
Transfer to Baking Sheet: Carefully transfer the cut circles to a baking sheet with a small spatula. Re-roll the remaining dough scraps and continue to cut circles until all the dough is used.
-
Bake the Cookies: Bake cookies at 350 degrees F (175 degrees C) for 10-12 minutes until just starting to turn pale golden brown on the edges. Ovens vary, so keep a close eye on them. You want them lightly golden, not browned.
-
Cool the Cookies: Allow the cookies to cool on the baking sheet for 5 minutes, then transfer to a wire rack to cool completely.
-
Toast the Coconut: Spread the sweetened flaked coconut onto a parchment-lined baking sheet. Bake at 350 degrees F (175 degrees C) for 12 to 18 minutes, stirring frequently, until lightly browned. Watch carefully, as coconut burns easily. Remove from the oven and set aside. The toasting brings out the coconut’s flavor and provides a delightful texture.
-
Melt the Caramels: Unwrap the caramels. Place the caramels, milk, and salt in the top of a double boiler. Cook over gently simmering water, stirring frequently, until caramels are fully melted and smooth. Alternatively, you can use a heatproof bowl set over a saucepan of simmering water, ensuring the bowl doesn’t touch the water.
-
Combine Caramel and Coconut: Remove about 1/4 of the melted caramel to a small bowl. Set aside. Add the toasted coconut to the remaining 3/4 of the melted caramel. Stir gently until well combined. Remove from the heat.
-
Apply Caramel Base: Working with one cookie at a time, spread each cookie with a thin layer of the reserved plain caramel. This helps the caramel coconut topping better adhere to the cookie. If the caramel becomes too difficult to spread as it cools, warm it in the microwave for about 5 to 8 seconds until spreadable.
-
Top with Caramel-Coconut Mixture: With a small spoon, press about 1 tablespoon of the caramel-coconut topping onto each cookie. Set aside on a parchment-lined baking sheet. If the caramel-coconut topping becomes too difficult to spread as it cools, place it back over simmering water and warm it until it’s spreadable again.
-
Melt the Chocolate: Coarsely chop the dark chocolate. Place in the top of a double boiler over simmering water. Add the canola oil. Heat, stirring frequently, until chocolate is completely melted and smooth. The canola oil helps to thin the chocolate, making it easier to dip and drizzle.
-
Dip in Chocolate: One at a time, dip the bottom of each cookie in the melted chocolate. Gently shake the cookie a couple of times to allow excess chocolate to drip off. Place the dipped cookies on a baking sheet lined with parchment or waxed paper.
-
Drizzle with Chocolate: Use a fork or small spoon to drizzle chocolate over the tops of the cookies.
-
Set the Chocolate: Let the cookies stand until the chocolate is fully set. This may take 30 minutes to an hour, depending on the room temperature. You can speed up the process by placing the baking sheet in the refrigerator for a few minutes.
-
Store: Store cookies in a covered airtight container at room temperature.
Expert Tips & Tricks
- Room Temperature Butter is Key: Ensure your butter is truly at room temperature – soft enough to easily press a finger into, but not melted. This is essential for achieving the right cookie texture.
- Toast Coconut Evenly: Stir the coconut frequently while toasting to ensure even browning and prevent burning. Burnt coconut tastes bitter.
- Control Caramel Consistency: If the caramel topping becomes too stiff while you’re working with it, gently rewarm it over simmering water. Be careful not to overheat it.
- Use High-Quality Chocolate: The quality of the dark chocolate significantly impacts the final flavor. Opt for a good-quality chocolate with a cocoa content of at least 60%.
- Prevent Chocolate Bloom: Chocolate bloom (the white coating that sometimes appears on chocolate) can be prevented by ensuring the chocolate is melted and cooled slowly. Avoid drastic temperature changes.
Serving & Storage Suggestions
These homemade Samoas are best served at room temperature. They make a delightful treat with a glass of cold milk, a cup of coffee, or a scoop of vanilla ice cream.
Store the cookies in an airtight container at room temperature. They will stay fresh for up to 5 days. You can also freeze the cookies for up to 2 months. To freeze, wrap them individually in plastic wrap and then place them in a freezer-safe container. Thaw at room temperature before serving.
Nutritional Information
| Nutrient | Amount per Serving | % Daily Value |
|---|---|---|
| Calories | 226.8 kcal | N/A |
| Calories from Fat | N/A | N/A |
| Total Fat | 13.6 g | 20% |
| Saturated Fat | 9 g | 44% |
| Cholesterol | 15 mg | 5% |
| Sodium | 120.3 mg | 5% |
| Total Carbohydrate | 27.1 g | 9% |
| Dietary Fiber | 1.7 g | 6% |
| Sugars | 17.6 g | 70% |
| Protein | 2.7 g | 5% |
Note: Nutritional information is an estimate and may vary based on specific ingredients and portion sizes.
Variations & Substitutions
- Gluten-Free: Substitute the all-purpose flour with a gluten-free blend. Be sure to choose a blend that is designed for baking and contains xanthan gum for binding.
- Vegan: Replace the butter with a vegan butter alternative, the milk with a plant-based milk (such as almond or soy milk), and the caramels with a vegan caramel alternative. Use vegan dark chocolate.
- Different Extracts: Experiment with different extracts in the shortbread cookie dough, such as almond extract or coconut extract, to enhance the flavor.
- Nuts: Add chopped nuts, such as pecans or walnuts, to the caramel-coconut topping for added crunch and flavor.
FAQs (Frequently Asked Questions)
Q: Why is it important to chill the dough?
A: Chilling the dough allows the gluten to relax, which prevents the cookies from spreading too much during baking and makes the dough easier to handle.
Q: Can I use pre-shredded coconut instead of flaked coconut?
A: While you can, flaked coconut provides a better texture and visual appeal. If using shredded coconut, watch it closely while toasting, as it burns more easily.
Q: My caramel topping is too hard to spread. What can I do?
A: Gently rewarm the caramel topping over simmering water or in the microwave for a few seconds until it becomes more spreadable.
Q: Can I use milk chocolate instead of dark chocolate?
A: Yes, you can use milk chocolate if you prefer a sweeter flavor. However, dark chocolate provides a nice contrast to the sweetness of the caramel and coconut.
Q: How can I prevent the chocolate from cracking?
A: Avoid drastic temperature changes when melting and setting the chocolate. Melt it slowly over low heat and allow the cookies to set at a moderate temperature.
Final Thoughts
These homemade Samoas cookies are more than just a recipe; they’re an invitation to create cherished memories of your own. Recreate a treasured childhood memory, or forge new ones! Don’t be intimidated by the multiple steps – each one is simple and rewarding. Share your creations with loved ones, and let the delicious flavors transport you back to those heartwarming moments. Happy baking!