
The Tangy Magic of Homemade Sauerkraut
The scent of fermenting cabbage always takes me back to my grandmother’s kitchen. As a child, I remember being both intrigued and slightly repulsed by the bubbling jars on her counter. Yet, I was always excited to enjoy the tart and tangy flavor of the sauerkraut she would pull out of those jars to serve alongside brats or pierogies. I’ve since come to appreciate the simple magic of lacto-fermentation, and now I carry on the tradition with my own family.
Recipe Overview
- Prep Time: 30 minutes
- Fermentation Time: 1.5-2 months
- Yields: Approximately 12 quarts
- Dietary Type: Vegan, Gluten-Free, Dairy-Free, Paleo, Keto
Ingredients
- 1 quart water
- 1 cup salt
- 1 pint vinegar
- 6 heads cabbage, shredded
Equipment Needed
- Large pot
- Sharp knife or mandoline
- Large bowls
- Jars (quart-sized) with lids and rings
- Measuring cups and spoons
Instructions
-
In a large pot, combine the water, salt, and vinegar. Bring the mixture to a boil over medium-high heat, stirring until the salt is completely dissolved. This brine is essential for creating the right environment for fermentation. Once dissolved, remove from heat and allow to cool completely. This is very important. Adding this hot to the cabbage will kill the cabbage and cause it not to ferment.
-
Prepare the cabbage. Remove any outer leaves that are damaged or discolored. Rinse the cabbage heads thoroughly under cold running water. Using a sharp knife or a mandoline, shred the cabbage into thin ribbons. If using a knife, cut the cabbage into quarters, remove the core, and then slice thinly. A mandoline can make this process much faster and more uniform.
-
In a very clean, large bowl, begin to pack the shredded cabbage a cake pan full at a time. You want to really pack the cabbage in there. This helps to release its natural juices, which are crucial for the fermentation process. Continue until all the cabbage is shredded.
-
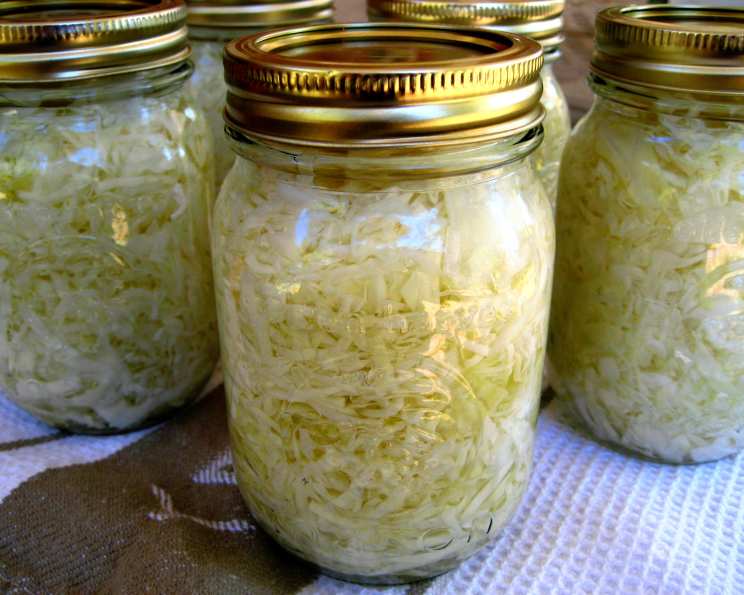
Pack the shredded cabbage tightly into the sterilized jars, leaving about 1-2 inches of headspace at the top of each jar. Press down firmly on the cabbage to release any trapped air and ensure it’s densely packed. The goal is to create an anaerobic (oxygen-free) environment.
-
Once the brine has cooled, carefully pour the brine over the cabbage in each jar, ensuring that the cabbage is completely submerged. You may need to gently press down on the cabbage to release any trapped air bubbles. Be sure to “burp” the jars, releasing any trapped air. Leave approximately 1/2 inch of headspace to allow for expansion during fermentation.
-
Wipe the rim of each jar with a clean, damp cloth to remove any cabbage or brine residue. This ensures a proper seal. Place the lids on the jars and tighten the rings securely.
-
Place the jars in a cool, dark place, out of direct sunlight. A garage, basement, or pantry works well. The ideal temperature for fermentation is between 65-75°F (18-24°C). The sauerkraut will take approximately 1.5 to 2 months to ferment properly. The length of fermentation depends on the temperature and your personal taste preferences. You’ll know it’s fermenting when you see bubbles forming in the jars.
-
During the fermentation process, it’s important to “burp” the jars every few days to release excess carbon dioxide that builds up. To do this, simply loosen the lid slightly to allow the gas to escape, then retighten it. This prevents the jars from exploding due to pressure buildup.
-
After 1.5-2 months, taste the sauerkraut to check for desired sourness and texture. If it’s not sour enough, allow it to ferment for another week or two, tasting periodically. Once it reaches your preferred level of tanginess, transfer the jars to the refrigerator to slow down the fermentation process and preserve the sauerkraut.
Expert Tips & Tricks
- Use High-Quality Cabbage: Choose firm, heavy heads of cabbage for the best results. Organic cabbage is always a good choice to avoid any unwanted pesticides.
- Salt is Key: Do not reduce the amount of salt in the recipe, as it plays a vital role in inhibiting the growth of undesirable bacteria and promoting the growth of beneficial bacteria.
- Keep it Submerged: Ensuring the cabbage stays submerged in the brine is crucial to prevent mold growth. If needed, you can use a clean glass weight or a small cabbage leaf to keep the cabbage down.
- Patience is a Virtue: Fermentation takes time, so be patient and allow the sauerkraut to develop its flavor fully. Tasting it periodically will help you determine when it’s ready.
- Sterilize Everything: Make sure all the equipment you are using, including jars, bowls, and utensils, is completely clean to avoid introducing unwanted bacteria that can spoil the sauerkraut.
Serving & Storage Suggestions
Homemade sauerkraut is incredibly versatile and can be served in numerous ways. Enjoy it as a side dish with grilled sausages, pork chops, or roasted chicken. It’s also a delicious topping for hot dogs, sandwiches, and burgers. Add it to soups and stews for a tangy kick, or use it in salads and slaws for added flavor and texture.
Once opened, store your homemade sauerkraut in the refrigerator. It will keep for several months, and the flavor may even continue to develop over time. Be sure to keep the cabbage submerged in the brine to prevent spoilage.
Nutritional Information
| Nutrient | Amount per Serving (estimated) | % Daily Value (estimated) |
|---|---|---|
| Calories | 120.6 kcal | N/A |
| Calories from Fat | 4 g | 3% |
| Total Fat | 0.5 g | 0% |
| Saturated Fat | 0.1 g | 0% |
| Cholesterol | 0 mg | 0% |
| Sodium | 9516 mg | 396% |
| Total Carbohydrate | 26.4 g | 8% |
| Dietary Fiber | 11.3 g | 45% |
| Sugars | 14.5 g | N/A |
| Protein | 5.8 g | 11% |
Note: Nutritional information is an estimate and may vary based on ingredient variations and portion sizes.
Variations & Substitutions
- Spiced Sauerkraut: Add spices such as caraway seeds, juniper berries, or dill seeds to the brine for a more complex flavor profile.
- Red Cabbage Sauerkraut: Use red cabbage instead of green cabbage for a vibrant color and slightly different flavor.
- Kimchi-Inspired Sauerkraut: Add ginger, garlic, and chili flakes to the cabbage before packing it into the jars for a spicy, fermented Korean-style sauerkraut.
- Lower Sodium: While salt is essential, you can experiment with using a lower-sodium salt substitute, but be aware this may affect the fermentation process.
- Herbed Sauerkraut: Add fresh herbs like thyme, rosemary, or oregano to the cabbage for an earthier profile.
FAQs (Frequently Asked Questions)
Q: Why is my sauerkraut slimy?
A: Slimy sauerkraut is usually caused by an overgrowth of undesirable bacteria. This can be due to using insufficient salt, improper sanitation, or fluctuating temperatures during fermentation.
Q: How do I know if my sauerkraut has gone bad?
A: Look for signs of mold growth (especially colored mold), a foul odor, or an unusual texture. If in doubt, it’s best to discard it. Properly fermented sauerkraut should have a pleasant, tangy aroma and taste.
Q: Can I use iodized salt instead of non-iodized salt?
A: No, iodized salt can inhibit the fermentation process and may result in an off-flavor. Always use non-iodized sea salt or kosher salt.
Q: How long will homemade sauerkraut last?
A: Properly fermented and stored sauerkraut can last for several months in the refrigerator. Its flavor will continue to develop over time.
Q: What if my sauerkraut isn’t sour enough?
A: If your sauerkraut isn’t sour enough, allow it to ferment for a longer period of time. Taste it every few days until it reaches your desired level of tanginess.
Final Thoughts
There’s something incredibly satisfying about creating your own food through the ancient art of fermentation. Homemade sauerkraut is not only delicious and nutritious but also a rewarding project that connects you to a rich culinary tradition. So, gather your cabbage, embrace the process, and prepare to enjoy the tangy magic of homemade sauerkraut. Share your creations with friends and family, and don’t hesitate to experiment with different flavors and variations to make it your own!