
Homemade Self-Rising Flour: A Baker’s Secret Weapon
The scent of freshly baked biscuits always transports me back to my grandmother’s kitchen. She was a master of simple, comforting recipes, and her self-rising flour biscuits were legendary. I remember watching her, a blur of flour and practiced movements, as she whipped up a batch on a moment’s notice. The secret, she told me, wasn’t some fancy technique, but the magic of self-rising flour – a pantry staple she always kept on hand. It ensured perfectly light and fluffy biscuits every time, a legacy I proudly carry on.
Recipe Overview:
- Prep Time: 1 minute
- Total Time: 1 minute
- Yields: 1 cup
- Dietary Type: Vegetarian
Ingredients:
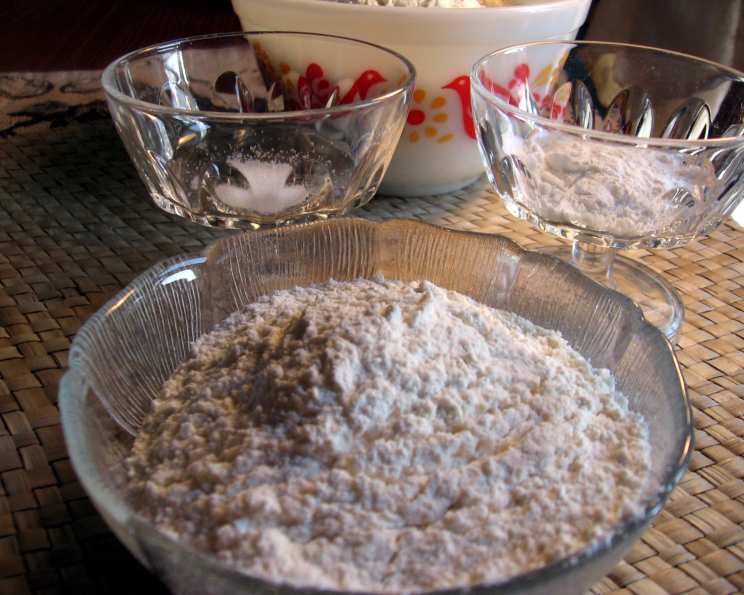
- 1 cup all-purpose flour (120 grams = 4 1/4 ounces) or 1 cup whole wheat flour, weighs (140 grams = 4 7/8 ounces)
- 1 1/4 teaspoons baking powder
- 1/4 – 1/2 teaspoon salt
Equipment Needed:
- Airtight container
- Measuring cups and spoons
Instructions:
- Combine all ingredients (flour, baking powder, and salt) in an airtight container.
- Secure the lid tightly and shake vigorously until the ingredients are thoroughly combined. This ensures that the baking powder and salt are evenly distributed throughout the flour.
- Store the self-rising flour in the airtight container in a cool, dry place. It’s best to use it within a few months for optimal leavening power.
Expert Tips & Tricks:
- Weighing your flour is the most accurate way to ensure consistent results in baking. Cup measurements can vary depending on how the flour is scooped and packed. If possible, use a kitchen scale to measure the flour by weight.
- Double or triple the recipe to have a larger batch of self-rising flour on hand. Just be sure to store it properly to maintain its freshness.
- For a lighter texture, use all-purpose flour. Whole wheat flour will give a more nutritious and slightly denser result.
- Always check the expiration date on your baking powder to ensure it’s still active. Inactive baking powder won’t provide the proper leavening, resulting in flat or dense baked goods.
- If you are using this self-rising flour in a recipe that already calls for baking powder or salt, reduce the amount specified in the recipe to avoid over-leavening or a salty taste. For example, reduce the salt by 1/4 teaspoon for every cup of self-rising flour used.
Serving & Storage Suggestions:
This homemade self-rising flour is perfect for a variety of baked goods, including biscuits, scones, muffins, and pancakes. It’s best used in recipes that call specifically for self-rising flour.
Store your homemade self-rising flour in an airtight container in a cool, dry place. Properly stored, it should last for 2-3 months. To maintain freshness, consider adding a desiccant packet to the container to absorb any excess moisture.
Do not refrigerate or freeze the self-rising flour, as this can affect its ability to leaven properly. Always check for any unusual odors before using. If it smells stale or off, discard it.
Nutritional Information:
Please note that the following nutritional information is an estimate and can vary based on the specific flour used and the amount of salt added.
| Nutrient | Amount per Serving (1 cup) | % Daily Value* |
|---|---|---|
| Calories | 457.9 kcal | 23% |
| Calories from Fat | 11 g | 2% |
| Total Fat | 1.2 g | 1% |
| Saturated Fat | 0.2 g | 0% |
| Cholesterol | 0 mg | 0% |
| Sodium | 1037.7 mg | 43% |
| Total Carbohydrate | 96.8 g | 32% |
| Dietary Fiber | 3.4 g | 13% |
| Sugars | 0.3 g | 1% |
| Protein | 12.9 g | 25% |
*Percent Daily Values are based on a 2000 calorie diet.
Variations & Substitutions:
- Gluten-Free Self-Rising Flour: Use a gluten-free all-purpose flour blend and ensure the baking powder is also gluten-free. You may need to experiment with the amount of baking powder, as gluten-free flours can react differently. Start with the recommended amount and adjust as needed.
- Spelt Flour Self-Rising Flour: Substitute spelt flour for the all-purpose flour. Spelt has a slightly nutty flavor and can add a unique dimension to your baked goods.
- Brown Rice Flour Self-Rising Flour: Brown rice flour can also be used, but be aware that it can result in a slightly gritty texture. Consider combining it with another gluten-free flour for a better result.
- Experiment with Salt: Use different types of salt to add subtle flavor variations. Sea salt, kosher salt, or even a smoked salt can create interesting nuances.
FAQs (Frequently Asked Questions):
Q: Why is it important to weigh the flour?
A: Weighing flour provides a much more accurate measurement compared to using cups. This ensures consistent results in your baking, as the density of flour can vary depending on how it’s packed into the cup.
Q: Can I use this self-rising flour in any recipe that calls for regular flour?
A: No, this self-rising flour should only be used in recipes that specifically call for self-rising flour. Substituting it directly for regular flour can lead to over-leavening and an undesirable texture.
Q: How long does homemade self-rising flour last?
A: When stored in an airtight container in a cool, dry place, homemade self-rising flour should last for 2-3 months. Be sure to check the expiration date of your baking powder before using.
Q: Can I make self-rising flour without salt?
A: Yes, you can omit the salt if you prefer a salt-free version. However, salt enhances the flavor of baked goods and also helps to control the leavening process, so keep this in mind.
Q: My self-rising flour seems clumpy. Is it still okay to use?
A: If your self-rising flour is clumpy, it may have been exposed to moisture. Sifting the flour can help to break up the clumps, but if the clumps are hard and don’t break apart easily, it’s best to discard the flour.
Final Thoughts:
Creating your own self-rising flour is a simple yet powerful way to elevate your baking. Not only does it save you a trip to the store when you’re in the midst of a baking project, but it also allows you to control the ingredients and tailor them to your preferences. So, grab your flour, baking powder, and salt, and get ready to whip up some incredibly delicious baked goods. And don’t hesitate to share your experiences and variations – happy baking!