
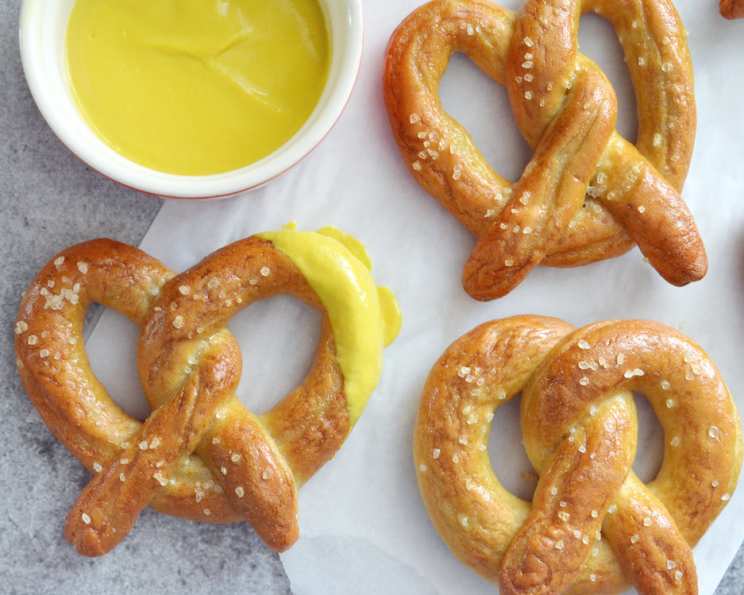
Homemade Soft Pretzels: A Culinary Adventure
The aroma of freshly baked pretzels always takes me back to weekend trips to the local farmer’s market with my grandfather. He’d buy me one, still warm from the oven, and I’d carefully peel off each salty, chewy piece, savoring the unique flavor. That simple joy sparked a lifelong passion for baking, and these homemade soft pretzels are my way of recreating those cherished memories.
Recipe Overview
- Prep Time: 48 minutes
- Cook Time: 18 minutes
- Total Time: 2 hours 48 minutes
- Yields: 16 pretzels
- Dietary Type: Vegetarian
Ingredients
- 2 ¼ teaspoons active dry yeast
- 2 teaspoons sugar
- 1 cup warm water
- 3 cups all-purpose flour (plus extra for kneading)
- ½ teaspoon salt
- ¼ cup baking soda
- 1 large egg
- Coarse sea salt, for sprinkling
Equipment Needed
- Large bowl
- Whisk
- Measuring cups and spoons
- Lightly floured surface
- Lightly greased bowl
- Clean surface
- Baking sheet
- Parchment paper
- Non-stick spray
- Large pot
- Wire rack
Instructions
-
Begin by activating the yeast. In a bowl, dissolve the active dry yeast and sugar in 1 cup of warm water. Allow the yeast mixture to sit for five minutes, or until it becomes frothy on top. This step is crucial; if the yeast doesn’t foam, it’s likely inactive, and your pretzels won’t rise properly. Start with fresh yeast for the best results!
-
While the yeast is proofing, prepare the dry ingredients. In a large bowl, whisk together 2 cups of the all-purpose flour with ½ teaspoon of salt.
-
Once the yeast mixture is frothy, pour it into the bowl with the flour and stir until it forms a shaggy ball of dough. Don’t worry if it looks a little rough at this stage; the kneading process will bring it all together.
-
Turn the dough out onto a lightly floured surface and knead for 8 minutes. While kneading, incorporate ¾ to 1 cup of additional flour. Add the flour gradually, a tablespoon or two at a time, until the dough is smooth, elastic, and no longer sticky.
-
After kneading for 8 minutes, the dough should be smooth, elastic, and should spring back when poked with a finger. This is a sign that the gluten has developed properly, which is essential for the chewy texture of the pretzels.
-
Place the dough in a lightly greased bowl, cover loosely, and let rise for one hour, or until double in volume. A warm environment will speed up the rising process.
-
Once the dough has risen, punch it down to deflate. This releases the excess air and prepares it for shaping.
-
Turn the dough out onto a clean surface, pat the dough down into a round disc, then cut into 16 equal-sized wedges.
-
Roll each wedge into a thin 24-inch long rope, then twist into the classic pretzel shape. For pretzel buns, roll the wedges into balls (cut into 8 pieces for larger rolls) and for pretzel bites, cut the ropes into one-inch sections.
-
Place the shaped pretzels on a baking sheet covered with parchment paper and coated lightly with non-stick spray. Allow to rise for 30 minutes. This second rise helps create a lighter, airier texture.
-
Preheat the oven to 425 degrees Fahrenheit (220 degrees Celsius).
-
Bring a large pot of water to a rolling boil, then carefully add ¼ cup of baking soda. The baking soda bath is what gives pretzels their signature chewy crust and characteristic flavor.
-
Add two or three pretzels to the pot at a time and let boil in the baking soda water for 60 seconds on each side. Be careful not to overcrowd the pot, as this can lower the water temperature and affect the pretzels’ texture.
-
Let the boiled pretzels drain for a few minutes on a wire rack before transferring them back to the parchment-lined baking sheets. This allows excess water to drip off, preventing soggy pretzels.
-
Prepare an egg wash by whisking together one egg and one tablespoon of water.
-
Liberally brush the egg wash over the pretzels, then sprinkle with coarse sea salt. The egg wash adds shine and color, while the sea salt provides the perfect salty crunch.
-
Bake the pretzels for 15-18 minutes, or until deep golden brown on the surface. Keep a close eye on them, as baking times may vary depending on your oven.
Expert Tips & Tricks
- For a deeper, more intense pretzel flavor: Increase the baking soda in the boiling water to 1/3 cup. Be cautious, as too much baking soda can result in a metallic taste.
- To achieve a perfectly even bake: Rotate the baking sheet halfway through the baking time.
- Make-ahead tip: After shaping the pretzels, freeze them on a baking sheet. Once frozen, transfer them to a freezer bag. When ready to bake, boil them directly from frozen, adding a minute or two to the boiling time.
- Don’t skip the resting time! This allows the dough to relax and develop its flavor.
Serving & Storage Suggestions
Serve these homemade soft pretzels warm, straight from the oven. They’re delicious on their own or with your favorite dipping sauces, such as mustard, cheese sauce, or even a sweet cinnamon glaze. Leftover pretzels can be stored in an airtight container at room temperature for up to 2 days. To reheat, wrap them in foil and warm them in a 350°F (175°C) oven for 5-10 minutes, or until heated through. For longer storage, freeze them for up to 2 months. Reheat from frozen as described above.
Nutritional Information
| Nutrient | Amount per Serving | % Daily Value |
|---|---|---|
| Calories | 150 kcal | 8% |
| Total Fat | 1.5g | 2% |
| Saturated Fat | 0.3g | 1% |
| Cholesterol | 15mg | 5% |
| Sodium | 400mg | 17% |
| Total Carbohydrate | 30g | 10% |
| Dietary Fiber | 1g | 4% |
| Sugars | 2g | 4% |
| Protein | 4g | 8% |
Note: Nutritional information is an estimate and may vary based on specific ingredients and preparation methods.
Variations & Substitutions
- Gluten-free pretzels: Use a gluten-free all-purpose flour blend and follow the recipe as directed. You may need to adjust the amount of liquid slightly, as gluten-free flours tend to absorb more moisture.
- Whole wheat pretzels: Substitute up to half of the all-purpose flour with whole wheat flour for a nuttier flavor and added fiber.
- Cinnamon-sugar pretzels: After boiling the pretzels and before baking, brush with melted butter and sprinkle with a mixture of cinnamon and sugar.
- Garlic parmesan pretzels: Sprinkle with grated parmesan cheese and garlic powder before baking for a savory twist.
FAQs (Frequently Asked Questions)
Q: Why is it important to boil the pretzels in baking soda water?
A: The baking soda bath gelatinizes the starches on the surface of the dough, creating the signature chewy crust and distinctive pretzel flavor.
Q: Can I use instant yeast instead of active dry yeast?
A: Yes, you can. If using instant yeast, you can skip the proofing step and add it directly to the flour.
Q: My pretzels are tough. What went wrong?
A: Over-kneading the dough or using too much flour can result in tough pretzels. Also, be sure not to overbake them.
Q: Can I make the dough ahead of time and refrigerate it?
A: Yes, you can. After the first rise, punch down the dough, wrap it tightly in plastic wrap, and refrigerate for up to 24 hours. Let it come to room temperature before shaping and baking.
Q: What if my yeast doesn’t foam when I proof it?
A: If your yeast doesn’t foam, it’s likely inactive and won’t leaven the dough. Start with fresh yeast to ensure your pretzels rise properly.
Final Thoughts
Creating these homemade soft pretzels is more than just following a recipe; it’s about crafting an experience. Whether you’re recreating a childhood memory or simply seeking a satisfying baking project, the aroma and taste of freshly baked pretzels are sure to delight. Don’t be afraid to experiment with different toppings and flavors to make them your own. And most importantly, share your creations with friends and family – because good food is always best enjoyed in good company. Happy baking!