
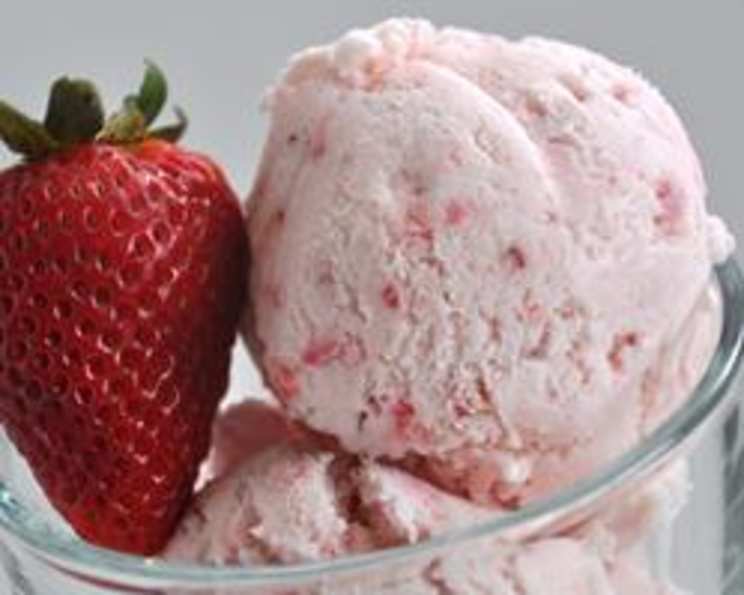
Indulge in the Sweetest Summer Treat: Homemade Strawberry Ice Cream
There’s something magical about the first bite of homemade ice cream on a hot summer day. I remember being a little girl, perched on the porch steps with my grandmother, her hand-crank ice cream maker whirring away. The anticipation was almost unbearable! The moment we finally tasted that first spoonful of her strawberry ice cream, bursting with fresh berry flavor, it was pure bliss. That memory, that taste, is what I strive to recreate every time I make my own batch of strawberry ice cream. This recipe is a direct descendant of that happy memory, and I am thrilled to share it with you.
Recipe Overview
- Prep Time: 2 hours 20 minutes (includes chilling time)
- Cook Time: 25 minutes
- Total Time: 2 hours 45 minutes
- Servings: 12
- Yield: Approximately 1 pint
- Dietary Type: Not specified (contains dairy)
Ingredients
- 3 cups fresh ripe strawberries, stemmed and sliced
- 4 tablespoons lemon juice
- 1 1/2 cups sugar, divided
- 1 1/2 cups whole milk (Skim milk can be substituted, but the ice cream will be less creamy)
- 2 3/4 cups heavy cream
- 1 1/2 teaspoons vanilla extract
Equipment Needed
- Medium bowl
- Strainer
- Blender or food processor
- Ice cream maker (Cuisinart recommended)
- Freezer-safe container
Instructions
-
In a medium bowl, combine the sliced strawberries, lemon juice, and 1/2 cup of sugar. Gently stir to combine. Let this mixture sit at room temperature for up to 2 hours. This process, called maceration, draws out the juices from the strawberries, intensifying their flavor and creating a delicious syrup.
-
After 2 hours, strain the strawberry mixture through a strainer, reserving the flavorful juices. Set the juices aside.
-
Puree half of the macerated strawberries in a blender or food processor until smooth.
-
In a separate medium bowl, whisk together the milk and the remaining 1 cup of sugar until the sugar is completely dissolved. This might take a minute or two, but ensure no sugar granules remain, as they can affect the ice cream’s texture.
-
Stir in the heavy cream, the reserved strawberry juice from the macerated berries, the vanilla extract, and the pureed strawberries into the milk mixture. Mix until everything is well combined.
-
Turn on your ice cream maker (like the Cuisinart recommended). Pour the strawberry mixture into the frozen freezer bowl of the ice cream maker and churn for approximately 20 minutes, or according to your ice cream maker’s instructions. The mixture will begin to thicken and freeze.
-
Add the remaining sliced, macerated strawberries to the ice cream maker and continue to churn for an additional 5 minutes. This will incorporate the chunks of strawberry into the ice cream.
-
The ice cream will be quite soft at this stage. For a firmer consistency, transfer the freshly churned ice cream to a freezer-safe container. Place the container in the freezer for at least one hour to allow the ice cream to firm up to your desired consistency.
Expert Tips & Tricks
- Strawberry Selection: The quality of your strawberries will greatly impact the flavor of your ice cream. Use the ripest, sweetest, and most fragrant strawberries you can find for the best results.
- Chill Out: Make sure your ice cream maker bowl is thoroughly frozen before starting the churning process. This typically requires at least 12-24 hours in the freezer. An insufficiently frozen bowl will result in a slushy, rather than creamy, ice cream.
- Adjust Sweetness: Taste the strawberry mixture before churning and adjust the amount of sugar to your preference. Keep in mind that the flavor will mellow slightly as the ice cream freezes.
- Alcohol Boost: For a more sophisticated flavor, add a tablespoon or two of strawberry liqueur or vodka to the mixture before churning. The alcohol also helps to prevent the ice cream from freezing too hard.
- Even Strawberry Distribution: Adding the remaining strawberries during the last 5 minutes ensures even distribution and prevents them from sinking to the bottom of the container.
- Creaminess Hack: For an ultra-creamy texture, consider adding a tablespoon of corn syrup or a touch of cream cheese to the mixture before churning.
Serving & Storage Suggestions
Serve your homemade strawberry ice cream in bowls, cones, or alongside your favorite desserts. It pairs beautifully with warm fruit crisps, chocolate brownies, or simply on its own.
For storage, transfer the ice cream to an airtight, freezer-safe container. Press a piece of plastic wrap directly onto the surface of the ice cream to prevent ice crystals from forming. Store in the freezer for up to 2 weeks for optimal quality.
Avoid letting the ice cream sit at room temperature for extended periods, as it will melt quickly. If the ice cream becomes too hard after freezing, let it sit at room temperature for a few minutes to soften slightly before serving.
Nutritional Information
Please note that the following values are estimates and can vary based on specific ingredients and portion sizes.
| Nutrient | Amount per Serving | % Daily Value |
|---|---|---|
| Calories | 318 kcal | N/A |
| Total Fat | 21g | 32% |
| Saturated Fat | 13g | 65% |
| Cholesterol | 78mg | 25% |
| Sodium | 35mg | 1% |
| Total Carbohydrate | 31g | 10% |
| Dietary Fiber | 1g | 2% |
| Sugars | 29g | N/A |
| Protein | 2g | 4% |
Variations & Substitutions
- Dairy-Free Strawberry Ice Cream: Substitute the whole milk and heavy cream with coconut milk or other plant-based alternatives for a vegan-friendly version.
- Strawberry Swirl: Create a strawberry swirl effect by layering the ice cream with strawberry jam or a homemade strawberry sauce as you transfer it to the freezer container.
- Chocolate Chip Strawberry Ice Cream: Add mini chocolate chips or chopped dark chocolate during the last minute of churning for a delightful twist.
- Strawberry Cheesecake Ice Cream: Mix in small pieces of cream cheese frosting or crumbled graham crackers for a cheesecake-inspired flavor.
- Seasonal Fruit Variations: Adapt this recipe with other seasonal fruits like blueberries, raspberries, or peaches.
FAQs (Frequently Asked Questions)
Q: Why do I need to let the strawberries sit with sugar?
A: Macerating the strawberries with sugar draws out their natural juices, intensifying their flavor and creating a syrup that adds extra sweetness and depth to the ice cream.
Q: Can I use frozen strawberries instead of fresh?
A: While fresh strawberries are ideal, frozen strawberries can be used in a pinch. Thaw them completely and drain off any excess liquid before using.
Q: My ice cream is too hard after freezing. What can I do?
A: Let the ice cream sit at room temperature for a few minutes before scooping to soften it slightly. Alternatively, you can add a tablespoon of vodka or another spirit to the mixture before churning to help prevent it from freezing too hard.
Q: Can I make this recipe without an ice cream maker?
A: While an ice cream maker produces the best results, you can try the “no-churn” method. Freeze the strawberry mixture in a shallow dish, then break it up with a fork every 30 minutes for the first few hours to prevent ice crystals from forming.
Q: How long does homemade strawberry ice cream last in the freezer?
A: For optimal quality, homemade strawberry ice cream should be consumed within 2 weeks. After that, it may develop ice crystals and lose some of its flavor.
Final Thoughts
This homemade strawberry ice cream recipe is a labor of love, but the results are well worth the effort. The taste of fresh, homemade ice cream is simply unmatched, and knowing exactly what ingredients are going into your treat is an added bonus. Gather your ingredients, dust off your ice cream maker, and get ready to create a taste of summer that will bring joy to everyone who tries it. Don’t be afraid to experiment with variations and make it your own. And please, share your creations with me – I’d love to hear how it turns out! Enjoy!