
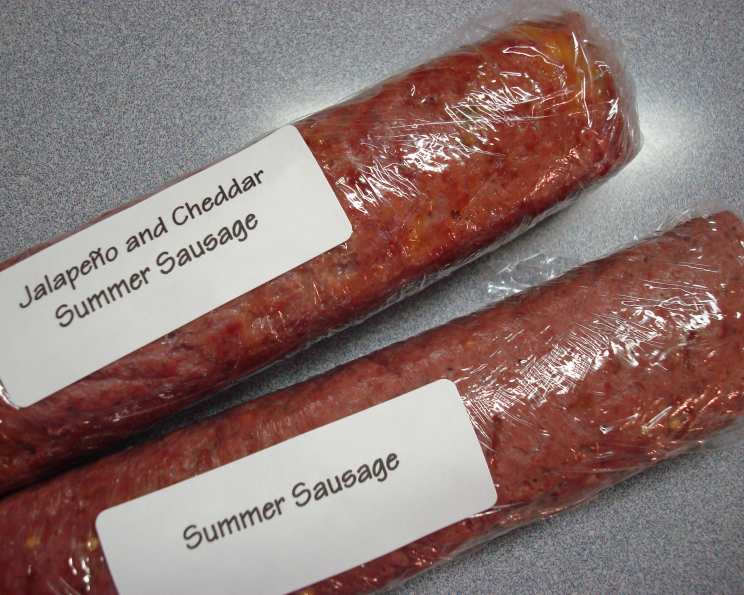
Homemade Summer Sausage: A Culinary Journey
The aroma of summer sausage always transports me back to my childhood. I can almost feel the crisp autumn air and see my grandfather meticulously slicing the perfectly seasoned rolls, a twinkle in his eye as he shared his “secret” recipe. Each bite was a symphony of smoky, savory flavors, a simple yet profound pleasure that cemented summer sausage as a family tradition. Now, decades later, I’m thrilled to share a time-tested recipe that allows you to recreate this experience at home.
Recipe Overview
- Prep Time: 30 minutes
- Cook Time: 1 hour 30 minutes
- Total Time: 2 hours (plus 24 hours refrigeration)
- Servings: Approximately 4 rolls
- Yield: Varies based on roll size
- Dietary Type: Not specified; contains meat.
Ingredients
- 2 lbs ground beef
- 1 cup water
- 1/2 teaspoon liquid smoke
- 1/2 teaspoon onion powder
- 1/2 teaspoon coarse black pepper
- 1/2 teaspoon garlic powder
- 1/2 teaspoon mustard seeds
- 2 tablespoons quick curing salt (Morton’s Tender Quick salt)
Equipment Needed
- Non-metal bowl
- Ice cream bucket (or similar container) with lid
- Aluminum foil
- Plastic wrap
- Broiler pan
Instructions
- In a non-metal bowl, combine all the ingredients.
- It’s easiest to first mix the seasonings with the water. This ensures they are evenly distributed throughout the meat.
- Next, add the ground beef to the seasoned water.
- Using your hands (or a sturdy spoon), gently mix the ingredients together, being careful not to overmix. Overmixing can result in a tough final product. Think of it like making meatloaf – you want everything incorporated, but you don’t want to work the meat too much.
- Place the mixture in an ice cream bucket (or similar container) and cover it with a lid. This prevents the meat from drying out during refrigeration.
- Refrigerate the mixture for 24 hours. This allows the curing salt to properly penetrate the meat, which is essential for both flavor and safety.
- After 24 hours, remove the mixture from the bowl.
- Divide the mixture into 4 equal portions.
- Shape each portion into a roll, approximately 1 1/2 to 2 inches in thickness.
- Wrap each roll tightly in aluminum foil, ensuring the shiny side of the foil is facing the meat. This helps to retain moisture during cooking.
- With a fork or toothpick, punch tiny holes along one side of each foil-wrapped roll. This allows liquid to drain out during baking.
- Place the wrapped rolls in a broiler pan with the holes facing down. The broiler pan will catch the rendered fat and juices.
- Bake in a preheated oven at 325 degrees Fahrenheit for 1 1/2 hours. This low and slow cooking method ensures the sausage is cooked through without becoming dry.
- After 1 1/2 hours, remove the rolls from the oven.
- Carefully remove the foil from each roll. Be cautious, as there will be hot liquid inside.
- Rewrap each roll tightly in plastic wrap. This will help the sausage retain its shape and moisture as it cools.
- The summer sausage is now ready to use. You can slice it and serve immediately or freeze it for later use.
Expert Tips & Tricks
- Don’t overmix! Remember, gentle handling is key to a tender sausage.
- If you don’t have an ice cream bucket, any airtight container will work.
- Ensure your oven temperature is accurate. An oven thermometer is a worthwhile investment.
- For a deeper smoke flavor, try adding a touch more liquid smoke, but be careful not to overdo it. A little goes a long way.
- If you want to add a bit of heat, consider incorporating a pinch of cayenne pepper or red pepper flakes to the mixture.
- To ensure even cooking, rotate the broiler pan halfway through the baking time.
- If you find that the sausage is browning too quickly, you can loosely tent it with aluminum foil during the last 30 minutes of baking.
Serving & Storage Suggestions
Summer sausage is incredibly versatile and can be served in a variety of ways. Slice it thinly and serve it on a charcuterie board with crackers, cheese, and olives. It also makes a fantastic addition to sandwiches and wraps.
To store, wrap tightly in plastic wrap and keep in the refrigerator for up to a week. For longer storage, freeze the sausage for up to 3 months. To thaw, simply transfer it to the refrigerator overnight. You can also slice the sausage before freezing for easier portioning later.
Nutritional Information
Note: Nutritional information is an estimate and may vary based on specific ingredients and portion sizes.
| Nutrient | Amount per Serving (Estimate) | % Daily Value (Estimate) |
|---|---|---|
| Calories | 350 kcal | 18% |
| Total Fat | 25g | 38% |
| Saturated Fat | 10g | 50% |
| Cholesterol | 100mg | 33% |
| Sodium | 800mg | 33% |
| Total Carbohydrate | 2g | 1% |
| Dietary Fiber | 0g | 0% |
| Sugars | 1g | – |
| Protein | 25g | 50% |
Variations & Substitutions
- Spice it up: Experiment with different spices, such as smoked paprika, coriander, or caraway seeds.
- Vary the meat: While this recipe calls for ground beef, you can also use ground venison, pork, or a combination of meats.
- Add cheese: For a cheesy twist, incorporate small cubes of cheddar, mozzarella, or provolone cheese into the mixture before shaping the rolls.
- Sweeten the deal: A touch of brown sugar or maple syrup can add a subtle sweetness that complements the savory flavors.
- Go wild with garlic: For garlic lovers, adding roasted garlic cloves or increasing the amount of garlic powder can significantly enhance the flavor profile.
FAQs (Frequently Asked Questions)
Q: Why do I need to use curing salt?
A: Curing salt, specifically Morton’s Tender Quick, is essential for preserving the meat and preventing the growth of harmful bacteria like botulism. It also contributes to the characteristic flavor and color of summer sausage.
Q: Can I use regular salt instead of curing salt?
A: No, regular salt cannot be substituted for curing salt. Curing salt contains sodium nitrite, which is crucial for the preservation and safety of the sausage.
Q: Can I skip the refrigeration step?
A: No, the 24-hour refrigeration period is crucial for allowing the curing salt to properly penetrate the meat and ensure food safety.
Q: My summer sausage is dry. What did I do wrong?
A: Overbaking is the most common cause of dry summer sausage. Ensure your oven temperature is accurate, and consider reducing the baking time slightly. Tightly wrapping the sausage in foil and plastic wrap also helps to retain moisture.
Q: Can I freeze the summer sausage after baking?
A: Yes, summer sausage freezes very well. Wrap it tightly in plastic wrap and then in a layer of aluminum foil for best results.
Final Thoughts
Creating homemade summer sausage is a rewarding culinary adventure. With its blend of smoky, savory flavors, this recipe is sure to become a staple in your kitchen. Don’t be afraid to experiment with different spices and ingredients to create your own unique version. Gather your loved ones, slice up a roll, and savor the delicious taste of homemade summer sausage. I encourage you to try this recipe and share your feedback. Pair it with your favorite artisanal cheese and a crisp pilsner for the ultimate summer sausage experience.