
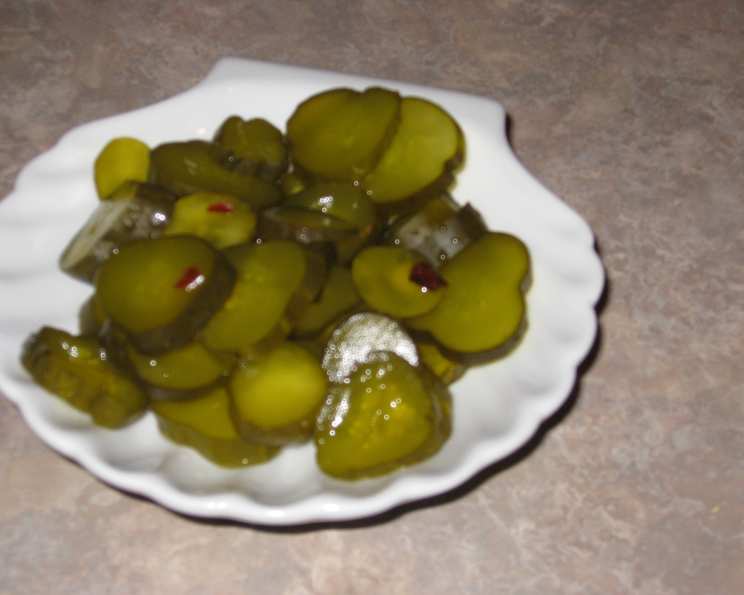
Homemade Sweet Dill Yum-Yum Pickles: A Family Favorite
The memory of my grandmother’s kitchen is forever etched in my mind: the comforting aroma of baking bread, the gentle clatter of pots and pans, and the ever-present jar of her famous sweet dill pickles. Those pickles weren’t just a condiment; they were a symbol of her love, a tangy-sweet reminder of home. I remember sneaking into the pantry as a child, carefully unscrewing the lid to steal just one more crunchy, flavorful bite. I’ve tried countless store-bought versions, but nothing ever quite matched the magic of hers. So, I embarked on a quest to recreate that beloved recipe, tweaking and testing until I finally captured that perfect balance of sweet, dill, and satisfying crunch. Now, I’m excited to share this family treasure with you. These pickles are far superior to the store-bought variety, and stay remarkably crunchy.
Recipe Overview
- Prep Time: 30 minutes
- Cook Time: 2 minutes
- Total Time: 48 hours+
- Yields: 2 (32-ounce) jars pickles
- Dietary Type: Vegetarian
Ingredients
- 2 (32 ounce) jars large-size garlic dill pickles (drained and washed under cold water)
- 4 cups white sugar, divided (measured exactly)
- 1/2 cup white vinegar
- 1/2 cup water
- 1 tablespoon pickling spices
Equipment Needed
- Medium bowl
- Medium saucepan
- Pyrex or heat-proof bowl
- Spoon
- Clean glass jars (32 oz)
Instructions
-
Start by slicing the washed pickles into approximately 1/4 to 1/3-inch slices. Place the sliced pickles into a medium bowl. It’s best to keep the slices consistent in thickness for even flavor absorption.
-
Pour 2 cups of white sugar over the pickle slices in the bowl. Toss and stir the pickles to ensure they are thoroughly coated with the sugar. This is the first step in drawing out the pickle juice and infusing them with sweetness.
-
Now, let the sugared pickle slices sit out at room temperature for 24 hours. During this time, toss/stir the mixture several times using a spoon. As the pickles sit, juice will naturally gather in the bowl. Do not drain this juice! This sugary brine is essential for the next steps. Leaving the spoon in the bowl makes this task easy to accomplish.
-
After the 24-hour period, prepare the sweetening liquid. In a medium saucepan, combine the remaining 2 cups of white sugar, white vinegar, water, and pickling spice.
-
Bring the mixture to a boil over medium heat, stirring constantly until the sugar is completely dissolved (this should take about 2 minutes). Make sure the sugar doesn’t burn at the bottom of the pan by stirring continuously.
-
Now comes the important step of combining the hot liquid with the pickles. Before you proceed, make sure the bowl containing the sugared pickles is made of Pyrex or another heat-proof material. Pouring boiling liquid into a regular glass bowl could cause it to crack. Carefully pour the hot sugar-vinegar mixture over the sugared pickles, including all of the juice that has gathered in the bowl.
-
Mix the entire concoction very well with a spoon, ensuring that all the pickle slices are immersed in the hot liquid. This step is crucial for uniform flavor distribution and pickling.
-
Let the mixture stand at room temperature for about 8 hours or overnight. This allows the flavors to meld and further penetrate the pickles. The longer they sit, the more intense the sweet and sour taste will become.
-
Drain the pickles, but you don’t have to drain them completely dry. A little bit of the liquid clinging to them is perfectly fine.
-
Transfer the drained pickles to clean glass jars. The jars should be sterilized for best results.
-
Store the jars covered or uncovered in the refrigerator. These pickles are best served cold.
Expert Tips & Tricks
-
Choose your pickles wisely: Opt for high-quality dill pickles that are already firm and crunchy. The better the base, the better the final product. I have had great success with Claussen garlic dills or Vlassic dills, but feel free to experiment with your preferred brand or even homemade dill pickles. Regular or large-size dills are recommended; avoid using small baby dills.
-
Don’t skimp on the sugar: The sweetness is essential to these pickles, so be sure to measure the sugar accurately.
-
Patience is key: Don’t rush the resting periods. Allowing the pickles to sit for the specified times is crucial for proper flavor development and texture.
-
Sterilize the jars: Sterilizing the jars before filling them with pickles will help to prevent spoilage and prolong their shelf life. You can sterilize jars by boiling them in water for 10 minutes.
Serving & Storage Suggestions
Serve these sweet dill pickles chilled as a delightful accompaniment to sandwiches, burgers, or grilled meats. They also make a fantastic addition to charcuterie boards. To store, keep the pickles in their jars, covered or uncovered, in the refrigerator. They will keep for several weeks, if not months, in the fridge. These pickles are not suitable for freezing.
Nutritional Information
| Nutrient | Amount per Serving | % Daily Value |
|---|---|---|
| Calories | 1725.1 kcal | N/A |
| Calories from Fat | N/A | N/A |
| Total Fat | 1.7 g | 2% |
| Saturated Fat | 0.4 g | 2% |
| Cholesterol | 0 mg | 0% |
| Sodium | 11725.3 mg | 488% |
| Total Carbohydrate | 438.1 g | 146% |
| Dietary Fiber | 11 g | 43% |
| Sugars | 432 g | 1727% |
| Protein | 5.7 g | 11% |
Note: Nutritional information is an estimate and may vary based on specific ingredients and portion sizes.
Variations & Substitutions
-
Spice it up: Add a pinch of red pepper flakes to the sugar-vinegar mixture for a touch of heat.
-
Herb it up: Include fresh dill sprigs along with the pickling spices for an extra layer of dill flavor.
-
Sweeten differently: Experiment with different types of sugar, such as brown sugar or coconut sugar, for a unique flavor profile. Be aware that this might change the color and texture of the pickles slightly.
-
Vinegar variety: Use apple cider vinegar instead of white vinegar for a slightly different tangy taste.
FAQs (Frequently Asked Questions)
Q: Can I use baby dill pickles for this recipe?
A: While you can technically use baby dill pickles, it’s not recommended. Regular or large-size pickles hold up better to the pickling process and offer a more satisfying crunch.
Q: Do I have to use garlic dill pickles?
A: No, you don’t have to. You can use regular dill pickles if you prefer, but the garlic adds a nice flavor dimension to the final product.
Q: Can I reduce the amount of sugar in the recipe?
A: Reducing the sugar will affect the sweetness and overall flavor of the pickles. You can try reducing it slightly, but be aware that the pickles may not be as sweet or as shelf-stable.
Q: How long do these pickles last in the refrigerator?
A: Properly stored in the refrigerator, these pickles can last for several weeks, if not months. Just make sure the jars are clean and the pickles are submerged in the brine.
Q: Can I process these pickles in a hot water bath for long-term storage?
A: This recipe is not specifically designed for canning. While some people have had success canning them, I recommend storing them in the refrigerator for optimal safety and quality.
Final Thoughts
I truly hope you enjoy this treasured family recipe for Sweet Dill Yum-Yum Pickles. This recipe is so easy to follow, and you’re guaranteed to have a tasty snack to share with your family and friends! Don’t be afraid to experiment with different variations and make them your own. Whether you’re enjoying them straight from the jar or adding them to your favorite dishes, I’m confident that these pickles will become a staple in your kitchen. Please share your thoughts and any successful tweaks you make! These pickles pair perfectly with a classic Reuben sandwich or a crispy fried chicken platter. Happy pickling!