
Homemade Taco Shells #1: A Culinary Revelation
The memory is etched in my mind: a bustling kitchen, filled with laughter and the irresistible aroma of sizzling goodness. My Abuela, a culinary wizard with flour-dusted hands, would always make taco night an event. But the real magic wasn’t just in the seasoned meat or the vibrant salsa; it was in the homemade taco shells. Their unique texture, a perfect balance of tender and crispy, elevated the entire experience. These weren’t just tacos; they were edible vessels of love, carefully crafted and shared with family. Now, I’m sharing this cherished tradition with you, so you can experience the joy of creating something truly special.
Recipe Overview
- Prep Time: 5 minutes
- Cook Time: 17 minutes
- Total Time: 22 minutes
- Servings: 4-6
- Dietary Type: Vegetarian (easily made vegan by omitting the egg)
Ingredients
- 1 cup flour
- ½ cup yellow enriched cornmeal
- ¼ teaspoon salt
- 1 ½ cups water
- 1 egg (optional, for added structure – can be omitted for a vegan version)
Equipment Needed
- Dry skillet
- Large utensil (spoon or ladle)
- Optional: Coffee cups or similar objects for molding
Instructions
-
Begin by preheating a dry skillet over medium-high heat. It’s important that the skillet is completely dry; no oil is needed for this process. The heat will provide the necessary cooking power.
-
In a mixing bowl, combine the flour, yellow enriched cornmeal, and salt. Whisk these dry ingredients together until evenly distributed.
-
Add the water and egg (if using) to the dry ingredients. Whisk thoroughly until you achieve a smooth batter. Don’t worry if the batter appears runny; that is precisely the consistency you’re aiming for.
-
Once the skillet is hot, use a large utensil – a spoon or a ladle works well – to drop a spoonful of batter onto the heated surface.
-
Immediately spread the batter in a circular motion, working from the inside out. The goal is to create a thin, even layer resembling a crepe. This will form the base of your taco shell.
-
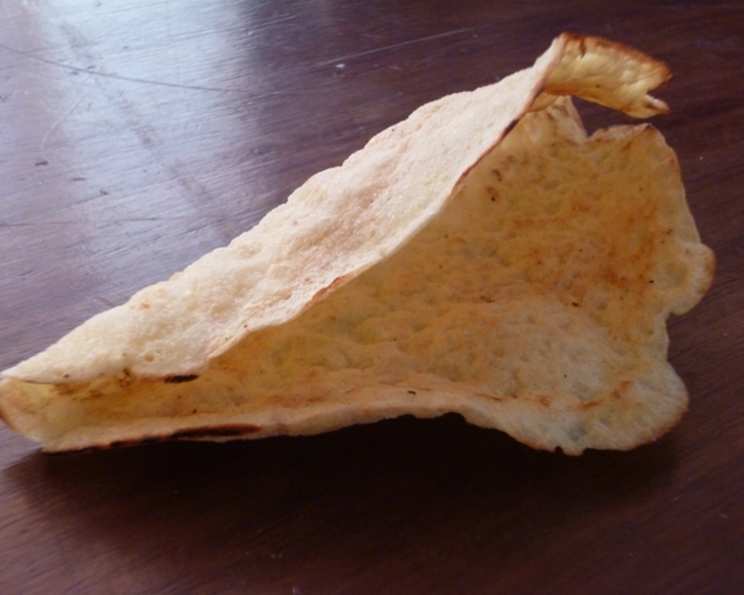
Allow each side of the shell to cook for approximately 1 minute. You’ll notice the edges begin to set, and the surface will appear slightly dry. The shells are not intended to brown significantly; they should remain relatively pale.
-
Once both sides are cooked, carefully remove the shell from the skillet. At this stage, the shell will be hot and pliable.
-
To mold the shells into the classic taco shape, you can gently place them, half-curled, between two objects, such as coffee cups. This will hold their shape as they cool slightly.
-
Alternatively, and this is my preferred method, serve the shells directly from the pan to each guest. Because they are still warm and pliable, they are less likely to crack when filled with your favorite taco toppings.
-
Fill with your favorite taco fillings and toppings, then enjoy!
Expert Tips & Tricks
- Batter Consistency is Key: Don’t be tempted to add more flour if the batter seems too thin. The runny consistency is what allows the shells to spread thinly and cook evenly.
- Skillet Temperature Control: If the shells are cooking too quickly or burning, reduce the heat slightly. Conversely, if they are taking too long to cook, increase the heat a bit.
- Prevent Sticking: Ensure your skillet is thoroughly heated before adding the batter. A well-heated skillet will prevent the shells from sticking.
- Egg Alternative: If you’re omitting the egg, consider adding a tablespoon of cornstarch to the batter for a bit of added structure.
- Flavor Boost: For a deeper flavor, try adding a pinch of chili powder or cumin to the batter.
Serving & Storage Suggestions
Serve these homemade taco shells immediately after cooking for the best flavor and texture. Guests can assemble their own tacos with their preferred fillings. If you have leftover cooked shells, store them in an airtight container in the refrigerator for up to 2 days. Reheat them in a dry skillet or a warm oven (300°F or 150°C) for a few minutes until they are pliable again. They are best when consumed fresh, but reheating works in a pinch. Avoid freezing the cooked shells, as they tend to become soggy upon thawing.
Nutritional Information
(Estimated values per shell, without fillings)
| Nutrient | Amount per Serving | % Daily Value |
|---|---|---|
| Calories | 120 kcal | 6% |
| Total Fat | 1g | 1% |
| Saturated Fat | 0.2g | 1% |
| Cholesterol | 15mg | 5% |
| Sodium | 70mg | 3% |
| Total Carbohydrate | 25g | 8% |
| Dietary Fiber | 2g | 7% |
| Sugars | 0g | 0% |
| Protein | 3g | 6% |
Variations & Substitutions
- Gluten-Free: Substitute the all-purpose flour with a gluten-free all-purpose flour blend.
- Spicy Kick: Add a pinch of cayenne pepper or a finely chopped jalapeño to the batter for a spicy twist.
- Herb Infused: Mix in some finely chopped fresh herbs, such as cilantro or oregano, for added flavor and aroma.
- Colored Shells: Add a teaspoon of beet juice or spinach puree to the batter for naturally colored shells.
- Vegan Upgrade: For a richer vegan taco shell, replace some of the water with plant-based milk, such as almond or soy milk.
FAQs (Frequently Asked Questions)
Q: Why are my taco shells cracking when I try to fold them?
A: This usually happens if the shells have cooled down too much. Serve them directly from the pan, while they are still warm and pliable, or reheat them gently before folding.
Q: Can I make the batter ahead of time?
A: Yes, you can prepare the batter up to a few hours in advance. Store it in the refrigerator, and give it a quick whisk before using.
Q: What kind of skillet works best for making these taco shells?
A: A non-stick skillet is ideal, but a well-seasoned cast iron skillet can also work well. The key is to ensure the skillet is evenly heated.
Q: My taco shells are sticking to the skillet. What am I doing wrong?
A: Make sure your skillet is hot enough before adding the batter. Also, ensure it’s a non-stick surface or well-seasoned.
Q: How do I store leftover taco shells?
A: Store leftover cooked shells in an airtight container in the refrigerator for up to 2 days. Reheat them in a dry skillet or oven before serving.
Final Thoughts
Now that you have this simple yet transformative recipe, I urge you to embark on this culinary adventure. Making your own taco shells is an experience that transcends the ordinary; it’s a way to connect with tradition, nourish your loved ones, and elevate your taco nights to a whole new level. Don’t be afraid to experiment with variations, tailor the flavors to your preferences, and most importantly, have fun in the kitchen! I can’t wait to hear about your creations and the joy they bring to your table. Happy cooking!