
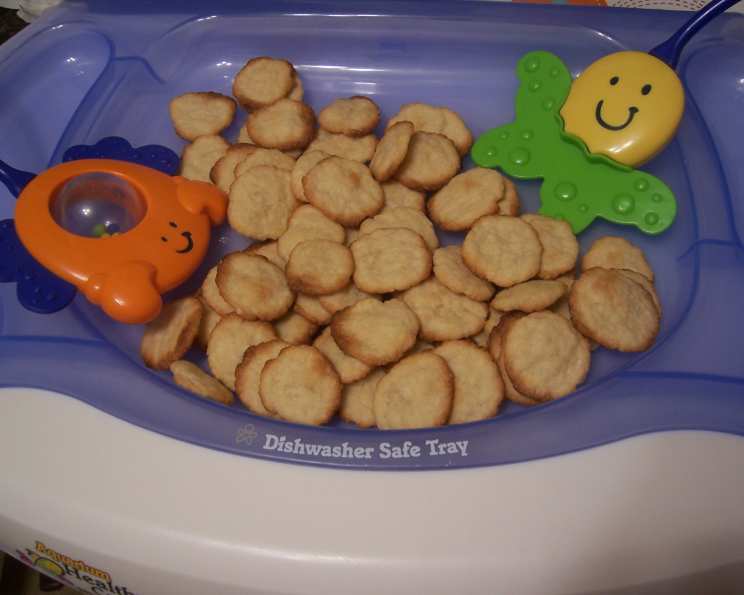
Soothing Relief: Homemade Teething Crackers for Little Gums
My daughter, Lily, was a champion teether. Those tiny pearly whites seemed determined to break free from the very start. Store-bought teething biscuits, loaded with hidden sugars and preservatives, were a no-go for our family. It was during one particularly fussy afternoon that I stumbled upon a simple, wholesome recipe for homemade teething crackers. The look of pure relief on her face as she gummed away on those little crackers remains one of my most cherished memories. Knowing exactly what went into them gave me peace of mind, and Lily got the soothing comfort she desperately needed. These crackers became a staple in our home, and I’m thrilled to share this invaluable recipe with you.
Recipe Overview
- Prep Time: 15 minutes
- Cook Time: 10-12 minutes
- Total Time: Approximately 25 minutes
- Yields: Approximately 36 crackers
- Dietary Type: Baby-Friendly
Ingredients
- 1 cup all-purpose flour
- 1 cup dry infant rice cereal with bananas (or other flavored or unflavored infant cereal)
- 3 tablespoons cooking oil
- Ice water
Equipment Needed
- Large mixing bowl
- Measuring cups and spoons
- Rolling pin
- Cookie cutters (optional)
- Baking sheet
- Parchment paper (optional)
Instructions
-
Preheat your oven to 425°F (220°C). This high temperature will help the crackers crisp up quickly.
-
In a large mixing bowl, combine the flour and dry infant rice cereal. Whisk them together thoroughly to ensure even distribution. This step helps create a consistent texture throughout the crackers.
-
Gradually stir in the cooking oil. Use a fork or your fingertips to incorporate the oil into the flour mixture. The mixture should resemble coarse crumbs.
-
Add ice water a little at a time, starting with about ¼ cup. Mix until the dough begins to form a ball and pulls away from the sides of the bowl. The amount of water needed may vary depending on the humidity and the type of flour used. Be careful not to add too much water, as this will make the dough sticky.
-
Lightly flour a clean, flat surface. Roll out the dough to the thickness of a cracker, about ⅛ inch thick. The thinner the cracker, the crispier it will be.
-
Use a knife or cookie cutters to cut the dough into desired shapes. Small, easy-to-handle shapes are ideal for little hands. You can make simple squares, rectangles, or use fun cookie cutters to create interesting shapes.
-
Place the cut-out crackers on an ungreased cookie sheet. You can also line the baking sheet with parchment paper to prevent sticking and make cleanup easier.
-
Bake for 10-12 minutes, or until lightly golden brown. Keep a close eye on the crackers, as they can burn quickly. The baking time may vary depending on your oven, so check them frequently after the 10-minute mark.
-
Remove the baking sheet from the oven and let the crackers cool completely on the baking sheet before storing. This will help them crisp up further.
-
Store the cooled crackers in an airtight container at room temperature to maintain their crispness.
Expert Tips & Tricks
- Achieving the Perfect Dough: The key to these crackers is the dough. It should be firm enough to roll out easily but not so dry that it crumbles. If the dough is too dry, add a teaspoon of ice water at a time until it comes together. If it’s too sticky, add a tablespoon of flour.
- Flavor Variations: While the rice cereal provides a subtle sweetness, you can experiment with other flavors. A pinch of cinnamon or a tiny drop of vanilla extract can add a lovely touch. Be mindful of any potential allergens.
- Preventing Sticking: If you’re having trouble with the dough sticking to your rolling pin or surface, lightly flour both. You can also roll the dough between two sheets of parchment paper for easier handling.
- Baking Evenly: To ensure even baking, rotate the baking sheet halfway through the baking time. This helps prevent some crackers from browning faster than others.
- Gluten-Free Option: For babies with gluten sensitivities, use a gluten-free all-purpose flour blend. Be sure to check the label to ensure it’s suitable for infants.
Serving & Storage Suggestions
These teething crackers are best served at room temperature. Ensure the crackers have cooled completely before offering them to your little one to avoid burning. Supervise your baby while they are enjoying the crackers to prevent choking.
Store the crackers in an airtight container at room temperature for up to a week. If you live in a humid climate, they may soften slightly over time. You can re-crisp them by baking them in a low oven (200°F or 95°C) for a few minutes.
Freezing is not recommended as it can alter the texture of the crackers.
Nutritional Information
Please note that these are estimated values and may vary depending on specific ingredients used.
| Nutrient | Amount per Serving (1 cracker) | % Daily Value* |
|---|---|---|
| Calories | 23 kcal | ~1% |
| Total Fat | 1.2 g | ~2% |
| Saturated Fat | 0.1 g | ~1% |
| Cholesterol | 0 mg | 0% |
| Sodium | 0.1 mg | 0% |
| Total Carbohydrate | 2.6 g | ~1% |
| Dietary Fiber | 0.1 g | ~<1% |
| Sugars | 0 g | 0% |
| Protein | 0.4 g | ~1% |
*Based on a 2,000 calorie diet. Daily values for infants are much lower.
Variations & Substitutions
- Flavor Boost: Add a pinch of unsweetened apple sauce or pureed banana to the dough for a slightly sweeter flavor. Reduce the amount of ice water accordingly.
- Spice it Up: A tiny pinch of ginger or cardamom can add a warm, comforting flavor, especially during colder months.
- Cereal Swap: Experiment with different types of infant cereal, such as oat or mixed grain. Be sure to check for any allergens.
- Oil Alternatives: While cooking oil works well, you can use melted coconut oil for a subtle coconut flavor and added health benefits. Ensure the coconut oil is unrefined.
- Vegetable Infusion: Add a tablespoon of pureed cooked sweet potato or butternut squash to the dough for added nutrients and a subtle sweetness. Adjust the amount of ice water as needed.
FAQs (Frequently Asked Questions)
Q: Can I use whole wheat flour instead of all-purpose flour?
A: Yes, you can substitute whole wheat flour, but the crackers may be slightly denser. You might need to add a bit more water to achieve the right dough consistency.
Q: My dough is too sticky. What should I do?
A: Gradually add more flour, one tablespoon at a time, until the dough becomes easier to handle.
Q: How do I know when the crackers are done?
A: The crackers are done when they are lightly golden brown around the edges. They should also feel firm to the touch.
Q: Can I make these crackers ahead of time?
A: Yes, you can make the dough ahead of time and store it in the refrigerator for up to 24 hours. Be sure to wrap it tightly in plastic wrap to prevent it from drying out.
Q: Are these crackers suitable for babies with allergies?
A: Always check the ingredient list to ensure there are no allergens present for your baby. If you have concerns, consult with your pediatrician. You can also easily customize these crackers to be free of common allergens by substituting ingredients.
Final Thoughts
Creating these homemade teething crackers is a labor of love, offering comfort and relief to your little one while providing you with the peace of mind that comes from knowing exactly what they’re consuming. Don’t hesitate to experiment with different flavors and ingredients to find what your baby loves best. I encourage you to try this simple recipe and share your experiences. Feel free to adjust it to suit your baby’s needs and preferences. Happy baking!