
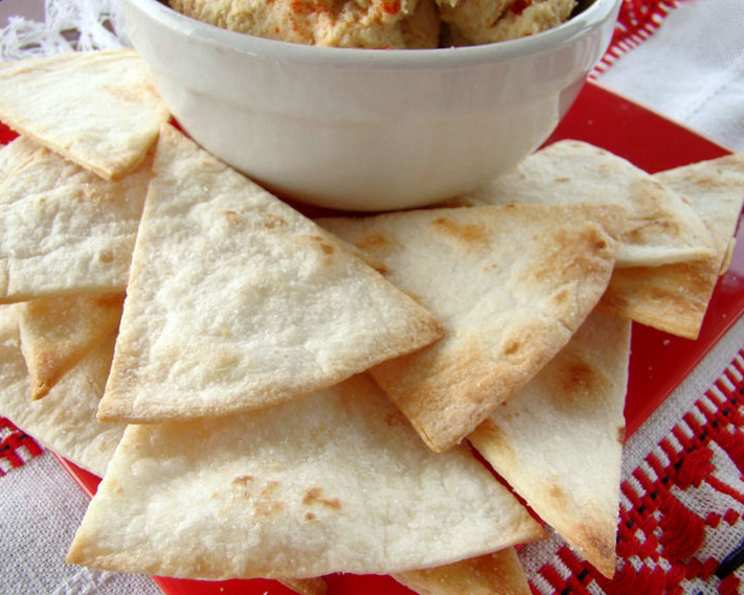
The Simple Joy of Homemade Tortilla Chips
There’s something deeply satisfying about the simple crunch of a perfectly salted tortilla chip. I remember countless summer evenings spent gathered around a picnic table, a bowl of homemade salsa, and a mountain of golden tortilla chips in the center. It wasn’t just the food; it was the laughter, the shared stories, and the feeling of connection that those simple chips seemed to amplify. To this day, the aroma of warm corn tortillas toasting in the oven instantly transports me back to those carefree days.
Recipe Overview
- Prep Time: 5 minutes
- Cook Time: 5-7 minutes
- Total Time: 10-12 minutes
- Servings: Varies
- Yield: Varies depending on the number of tortillas
- Dietary Type: Vegan, Gluten-Free
Ingredients
- 10 Tortillas (corn or flour, your preference)
- 1 teaspoon Salt, or to taste
- Cooking Spray, or vegetable oil
Equipment Needed
- Baking Sheet
- Pizza cutter or sharp knife
- Spray bottle (if using cooking spray)
Instructions
-
Begin by preheating your oven to 400 degrees Fahrenheit (200 degrees Celsius). Ensure your oven rack is positioned in the center for even heat distribution.
-
Prepare the tortillas. Stack the tortillas on a cutting board. Using a pizza cutter or a sharp knife, cut the stack in half, then cut each half into wedges. The number of wedges per tortilla is up to you, but I usually aim for 6-8 wedges for a good chip size.
-
Arrange the tortilla wedges in a single layer on the baking sheet. Avoid overcrowding the pan; if necessary, use two baking sheets or bake in batches to ensure even crisping.
-
Lightly coat the tortilla wedges with either vegetable oil or cooking spray. If using vegetable oil, lightly brush each wedge. For cooking spray, hold the can about 6 inches away and spray a light, even coat. Don’t oversaturate the tortillas with oil as this can result in soggy chips.
-
Sprinkle the tortilla wedges generously with salt. Adjust the amount of salt to your personal preference. Some people prefer a more subtle saltiness, while others enjoy a bolder flavor.
-
Bake in the preheated oven for approximately 5-7 minutes, or until the chips are crisp and lightly golden brown. Keep a close eye on them, as they can burn quickly. The exact baking time will depend on your oven and the thickness of your tortillas.
-
Remove the tortilla chips from the oven and let them cool completely on the baking sheet. They will crisp up further as they cool.
-
Once cooled, transfer the homemade tortilla chips to an airtight container for storage.
Expert Tips & Tricks
- For extra flavor, consider adding a pinch of chili powder, cumin, or garlic powder along with the salt before baking.
- To prevent soggy chips, make sure the tortillas are not too oily. Lightly spray or brush them with oil.
- If using day-old tortillas, you may need to bake them for a shorter amount of time, as they will dry out faster.
- To achieve perfectly even baking, rotate the baking sheet halfway through the cooking time.
- For thicker chips, use thicker tortillas. Conversely, for thinner, crispier chips, use thinner tortillas.
- If your chips start to burn, reduce the oven temperature slightly for the next batch.
- To re-crisp slightly softened chips, spread them on a baking sheet and bake in a 300-degree Fahrenheit (150 degrees Celsius) oven for a few minutes until they regain their crispness.
- Consider using a variety of colored corn tortillas for a beautiful and festive presentation.
Serving & Storage Suggestions
Serve your homemade tortilla chips immediately with your favorite dips, such as salsa, guacamole, queso, or bean dip. They’re also fantastic alongside soups and salads. Store leftover chips in an airtight container at room temperature for up to 2 days. If they lose their crispness, you can re-crisp them in a low oven as described above. Because of the potential for staleness, freezing is not recommended.
Nutritional Information
| Nutrient | Amount per Serving (approximate) | % Daily Value (approximate) |
|---|---|---|
| Calories | 150 kcal | 8% |
| Total Fat | 7g | 11% |
| Saturated Fat | 1g | 5% |
| Cholesterol | 0mg | 0% |
| Sodium | 150mg | 6% |
| Total Carbohydrate | 20g | 7% |
| Dietary Fiber | 2g | 8% |
| Sugars | 0g | 0% |
| Protein | 3g | 6% |
Note: Nutritional information is an estimate and can vary based on the specific ingredients used.
Variations & Substitutions
- Spicy Tortilla Chips: Add a pinch of cayenne pepper or a dash of hot sauce to the oil before spraying or brushing onto the tortillas.
- Herb-Infused Tortilla Chips: Mix dried herbs like oregano, basil, or thyme with the salt before sprinkling onto the tortillas.
- Lime Tortilla Chips: Zest a lime and mix the zest with the salt before sprinkling onto the tortillas. A squeeze of fresh lime juice after baking adds a bright, citrusy flavor.
- Cinnamon-Sugar Tortilla Chips: For a sweet treat, brush the tortillas with melted butter and sprinkle with a mixture of cinnamon and sugar before baking. Reduce the oven temperature to 350 degrees Fahrenheit to prevent burning.
- Gluten-Free Tortilla Chips: Ensure you are using corn tortillas, which are naturally gluten-free.
- Flour Tortilla Chips: For a different texture and flavor, use flour tortillas instead of corn. They will be a bit softer and chewier.
- Low-Sodium Tortilla Chips: Reduce or omit the salt altogether for a healthier option.
FAQs (Frequently Asked Questions)
Q: Can I use store-bought tortillas for this recipe?
A: Absolutely! Store-bought tortillas work perfectly well. Freshly made tortillas can also be used, just be aware they may require slightly longer baking times.
Q: How do I prevent the chips from sticking to the baking sheet?
A: Use a non-stick baking sheet or line your baking sheet with parchment paper.
Q: My chips are browning too quickly. What should I do?
A: Reduce the oven temperature by 25 degrees Fahrenheit (about 15 degrees Celsius) and continue baking until crisp. You can also move the baking sheet to a lower rack in the oven.
Q: Can I make these ahead of time?
A: Yes, you can make them ahead of time. Store them in an airtight container at room temperature for up to 2 days.
Q: My chips aren’t crispy enough. What am I doing wrong?
A: Make sure you’re not overcrowding the baking sheet and that the tortillas are spread out in a single layer. Also, ensure that the tortillas are lightly coated with oil and baked until golden brown. You may also need to increase the baking time slightly.
Final Thoughts
Homemade tortilla chips are surprisingly easy to make and infinitely more satisfying than store-bought versions. The simple act of transforming humble tortillas into crispy, flavorful chips is a rewarding experience. I encourage you to give this recipe a try. Experiment with different seasonings and dips to create your own signature snack. And don’t be afraid to share your creations with friends and family – after all, good food is always best enjoyed in good company. So, gather your ingredients, preheat your oven, and get ready to enjoy the simple pleasure of homemade tortilla chips!