
Homemade Vanilla Fudge: A Taste of Nostalgia
The scent of vanilla fudge instantly transports me back to my grandmother’s kitchen. She always seemed to have a batch cooling on the counter, its sweet aroma permeating the entire house. As a child, I’d sneak slivers of the creamy confection, savoring each bite until my grandmother, with a twinkle in her eye, would offer me a proper square. It was a simple treat, but one that epitomizes love and warmth – a tradition I cherish recreating today.
Recipe Overview
- Prep Time: 10 minutes
- Cook Time: 30 minutes
- Total Time: 50 minutes
- Servings: 24
- Yield: Approximately 2 pounds
- Dietary Type: Not specified (contains dairy)
Ingredients
- 2 cups sugar
- 2/3 cup evaporated milk
- 1/3 cup milk
- 1/8 teaspoon salt
- 1/4 cup (1/2 stick) butter
- 1 tablespoon vanilla extract
Equipment Needed
- Heavy 2-quart saucepan
- Candy thermometer
- Wooden spoon
- Buttered 8-inch square pan
Instructions
-
First, butter the sides of a heavy 2-quart saucepan. This step is crucial to prevent sugar crystals from clinging to the sides and ruining the fudge’s smooth texture.
-
In the buttered saucepan, combine the sugar, evaporated milk, milk, and salt. Stir gently to incorporate all the ingredients.
-
Place the saucepan over medium-high heat. Cook and stir continuously until the mixture comes to a boil. Use a sturdy wooden spoon to ensure the sugar dissolves completely and nothing sticks to the bottom.
-
Once the mixture is boiling, clip on a candy thermometer to the side of the pan, making sure it doesn’t touch the bottom. Reduce the heat to medium-low and continue to cook and stir constantly, maintaining a gentle simmer.
-
Continue cooking, stirring consistently, until the candy thermometer registers 238°F (114°C), which is the soft ball stage. This may take approximately 15-20 minutes. It’s essential to stir constantly during this phase to prevent burning and ensure even heating. If you notice the mixture browning too quickly, lower the heat slightly.
-
Once the mixture reaches 238°F, remove the saucepan from the heat. Immediately add the butter and vanilla extract to the hot mixture.
-
DO NOT STIR at this point. Allowing the mixture to cool undisturbed is critical for the fudge’s texture. Let the fudge cool until the thermometer reads 110°F (43°C). This cooling process can take about 30-45 minutes.
-
Remove the candy thermometer from the saucepan.
-
Now, using a wooden spoon, beat the fudge vigorously until it thickens and begins to lose its glossy sheen. This step is essential for creating the desired fudge-like consistency. Be patient; it may take several minutes of continuous beating. The mixture will become noticeably lighter in color and more difficult to stir.
-
Pour the thickened fudge into a buttered 8-inch square pan. Spread it evenly using a spatula.
-
Before the fudge completely sets, score it into squares using a sharp knife. This will make it easier to break into individual pieces later.
-
Allow the fudge to cool completely at room temperature before cutting and serving. This usually takes several hours.
Expert Tips & Tricks
- Humidity matters: On humid days, fudge can be tricky. Consider cooking to a slightly higher temperature (239-240°F) to compensate.
- The cold water test: If you don’t have a candy thermometer, you can use the cold water test. Drop a small spoonful of the boiling mixture into a bowl of ice water. If it forms a soft, pliable ball, it’s reached the soft ball stage.
- Preventing crystallization: Wipe down the sides of the pan with a wet pastry brush during cooking to prevent sugar crystals from forming.
- For a richer flavor: Use high-quality vanilla extract or vanilla bean paste.
- Don’t overcook: Overcooked fudge will be dry and crumbly.
- If your fudge is grainy: This usually means you didn’t stir constantly during cooking or didn’t allow it to cool undisturbed before beating. Unfortunately, grainy fudge is difficult to fix.
Serving & Storage Suggestions
Serve the vanilla fudge at room temperature. It makes a wonderful gift, party favor, or after-dinner treat.
To store, keep the fudge in an airtight container at room temperature for up to 2 weeks. For longer storage, refrigerate for up to a month, but be aware it might become slightly firmer. You can also freeze the fudge for up to 3 months. Wrap it tightly in plastic wrap and then in foil to prevent freezer burn. Thaw at room temperature before serving.
Nutritional Information
| Nutrient | Amount per Serving | % Daily Value |
|---|---|---|
| Calories | 94.6 kcal | N/A |
| Calories from Fat | 23 kcal | 24% |
| Total Fat | 2.6 g | 3% |
| Saturated Fat | 1.6 g | 8% |
| Cholesterol | 7.6 mg | 2% |
| Sodium | 34.9 mg | 1% |
| Total Carbohydrate | 17.6 g | 5% |
| Dietary Fiber | 0 g | 0% |
| Sugars | 16.7 g | 66% |
| Protein | 0.6 g | 1% |
Note: Nutritional information is an estimate and may vary based on specific ingredients and portion sizes.
Variations & Substitutions
- Chocolate Vanilla Swirl: Before pouring into the pan, divide the fudge mixture in half. Add melted chocolate to one half and swirl it into the vanilla fudge.
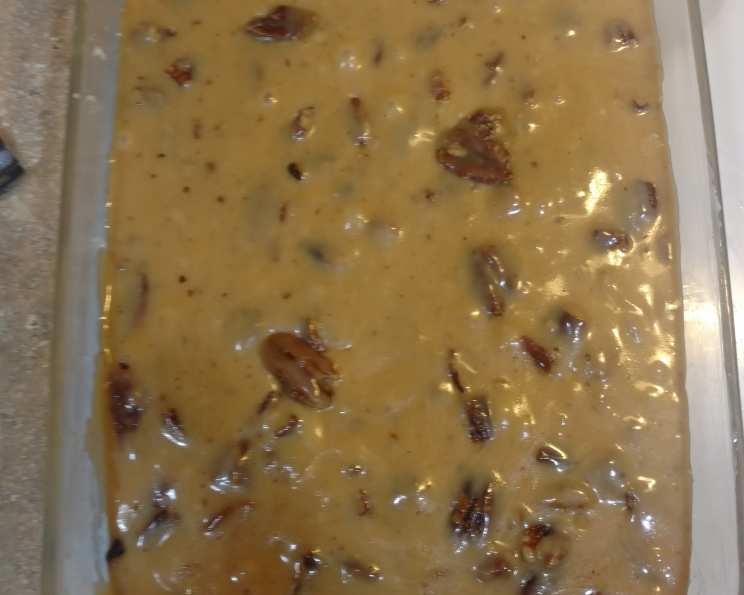
- Nutty Vanilla Fudge: Add chopped walnuts, pecans, or almonds after beating.
- Peppermint Vanilla Fudge: Stir in a few drops of peppermint extract after removing from the heat.
- Salted Caramel Vanilla Fudge: Sprinkle the top of the fudge with sea salt after pouring it into the pan.
- Espresso Vanilla Fudge: Add a teaspoon of instant espresso powder to the mixture while cooking.
FAQs (Frequently Asked Questions)
Q: Why is my fudge grainy?
A: Grainy fudge is usually caused by sugar crystals forming during the cooking process. This can happen if you don’t stir constantly or if sugar crystals stick to the sides of the pan.
Q: Can I use a different type of milk?
A: While evaporated milk is essential for the recipe’s texture, you can experiment with different types of milk for the 1/3 cup of milk. However, this may slightly alter the final result.
Q: How do I know when the fudge is ready to be poured into the pan?
A: The fudge is ready when it has thickened, lost its glossy sheen, and becomes more difficult to stir. It should be noticeably lighter in color.
Q: Can I add food coloring to the fudge?
A: Yes, you can add a few drops of food coloring after removing the fudge from the heat.
Q: How do I prevent the fudge from sticking to the pan?
A: Ensure the pan is thoroughly buttered before pouring in the fudge mixture. You can also line the pan with parchment paper, leaving an overhang for easy removal.
Final Thoughts
Making homemade vanilla fudge is more than just following a recipe; it’s about creating a little bit of magic in your kitchen. The process, with its gentle stirring and patient waiting, is almost meditative. And the reward? A creamy, melt-in-your-mouth treat that brings joy to everyone who tastes it. So, gather your ingredients, embrace the process, and create a batch of vanilla fudge that will evoke memories and create new ones. I encourage you to share your creations and feedback – and perhaps a square or two – with friends and family. Enjoy!