
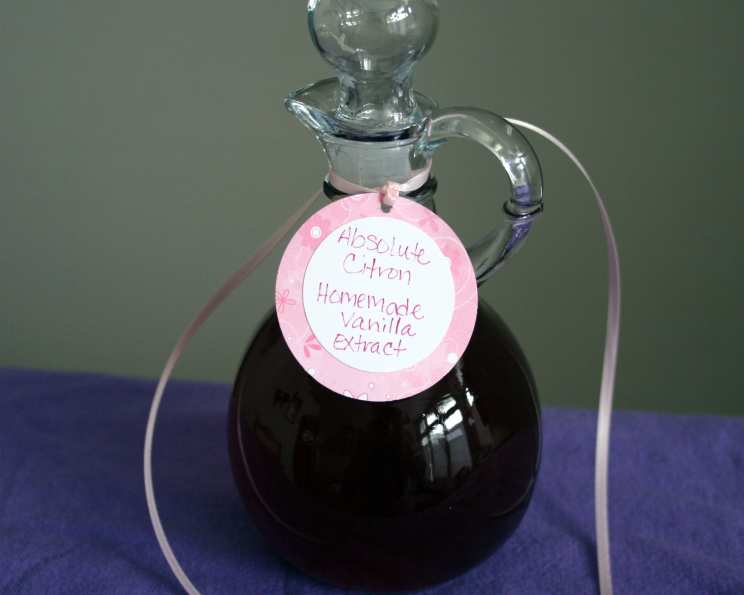
Unlocking Liquid Gold: The Art of Homemade Vanilla Extract
Vanilla. The very word conjures warmth, comfort, and a certain undeniable elegance. I remember being a child, standing on a stool next to my grandmother, her hands dusted with flour as she prepared her famous sugar cookies. The scent that permeated the kitchen wasn’t just sugar and butter; it was the deep, intoxicating aroma of real vanilla extract. That distinct fragrance is forever etched in my memory, a reminder of love, home, and the magic of baking. And that, my friends, is why I believe every home baker should know the simple pleasure of making their own vanilla extract. It’s surprisingly easy, incredibly rewarding, and the difference in flavor compared to store-bought is simply astonishing.
Recipe Overview
- Prep Time: 15 minutes
- Total Time: 6 months
- Yields: 12 ounces of vanilla essence
- Dietary Type: Gluten-Free, Dairy-Free, Vegan
Ingredients
- 2 vanilla beans
- 12 ounces vodka (or other 80-proof alcohol like rum, brandy or bourbon)
Equipment Needed
- Knife
- Cutting board
- One pint (2-cup) glass jar, or the emptied alcohol bottle
- Canning lid and ring or cap
Instructions
-
Begin by carefully slicing the vanilla beans lengthwise. This crucial step allows the alcohol to fully penetrate the beans and extract their precious flavor.
-
Next, gently scrape the seeds out from the inside of the vanilla bean. Don’t discard the pods! These are equally important.
-
Now, cut the empty pods into smaller pieces, about 1-2 inches each. This maximizes the surface area exposed to the alcohol, resulting in a more potent extract.
-
Add both the scraped seeds and the cut pods to a clean, one-pint (2-cup) glass jar. If you’re feeling resourceful, reuse the original bottle from the alcohol you’re using – just ensure it’s thoroughly cleaned and dried.
-
Pour the 12 ounces of vodka (or your chosen 80-proof alcohol) over the vanilla beans and seeds, completely submerging them. Using a higher-proof alcohol isn’t necessarily better; 80-proof is ideal for extracting the vanilla’s flavor compounds effectively without overpowering them.
-
Seal the jar tightly with a canning lid and ring, or the original cap. A good seal is essential to prevent evaporation and maintain the integrity of the extract.
-
Shake the jar vigorously to ensure the vanilla beans are well distributed throughout the alcohol. This helps to initiate the extraction process.
-
Label the jar with the start date and the anticipated “end date,” which should be six months from the day you make it. This will help you keep track of the maturation process.
-
Place the jar in a cool, dark cupboard, away from direct sunlight. Light can degrade the quality and color of the extract over time.
-
For the first week, shake the jar once a day. After that, reduce the shaking to once a week for the next couple of months. Finally, shake it once a month until the extract is fully mature (after six months). This regular shaking helps to agitate the mixture and promote the extraction of flavor.
-
After the six-month maturation period, the extract is ready to use! At this point, you can choose to strain out the vanilla bean pods, leaving any seeds in the jar for added visual appeal and flavor. However, you can also leave the pods in indefinitely – they will continue to impart flavor to the extract over time.
-
If desired, you can start a second batch by simply adding more alcohol to the jar with the existing vanilla bean pods. This second batch may take longer to mature, but it will still yield a delicious vanilla extract.
Expert Tips & Tricks
-
Bean Quality Matters: The quality of your vanilla beans will directly impact the flavor of your extract. Look for plump, moist beans with a rich, dark color and a pliable texture. Madagascar Bourbon vanilla beans are a popular choice for their classic vanilla flavor, but other varieties like Tahitian or Mexican vanilla beans will create unique and interesting extracts.
-
Don’t Be Afraid to Experiment: While vodka is the most neutral choice, experimenting with other 80-proof alcohols can add subtle nuances to your extract. Bourbon will impart a warm, caramel-like note, while rum can add a hint of sweetness and spice. Brandy offers a more complex, fruity flavor profile.
-
Patience is Key: Resist the urge to use the extract before the six-month maturation period. While it will have some vanilla flavor, the flavor will continue to develop and deepen over time.
-
Top It Off: As you use your homemade vanilla extract, you can top off the jar with more alcohol to keep the vanilla beans submerged. This will help prolong the life of your extract.
-
Extract Color: Over time, your extract will darken in color. This is perfectly normal and indicates that the vanilla flavor is developing.
Serving & Storage Suggestions
Your homemade vanilla extract is best stored in a cool, dark place, away from direct sunlight. A pantry or cupboard is ideal. Properly stored, it will last for many years, and may even improve with age like a fine wine! There’s no need to refrigerate it.
Use your homemade vanilla extract in any recipe that calls for vanilla, from cakes and cookies to ice cream and sauces. The flavor will be far superior to commercially produced extracts.
Nutritional Information
Since vanilla extract is used in small quantities, the nutritional impact is minimal. However, here’s a general estimate based on a 1-teaspoon serving (approximately 5ml):
| Nutrient | Amount per Serving | % Daily Value |
|---|---|---|
| Calories | 12 kcal | <1% |
| Total Fat | 0g | 0% |
| Sodium | <1mg | 0% |
| Carbohydrates | <1g | 0% |
| Sugars | 0g | 0% |
| Protein | 0g | 0% |
Note: Nutritional information can vary slightly depending on the specific alcohol used.
Variations & Substitutions
-
Different Vanilla Beans: Experiment with different varieties of vanilla beans to create unique flavor profiles. Tahitian vanilla beans offer a floral, fruity aroma, while Mexican vanilla beans have a spicier, more robust flavor.
-
Infused Extracts: Add other ingredients to the jar along with the vanilla beans to create infused extracts. Try adding citrus zest (lemon, orange, lime), spices (cinnamon, cardamom, cloves), or coffee beans.
-
Gluten-Free Extract: Ensure you use a gluten-free alcohol, such as vodka specifically labeled as gluten-free, if you need to create a gluten-free vanilla extract.
-
Vanilla Bean Paste: After several years of making extract, the vanilla beans will be thoroughly exhausted. You can then blend them with a bit of simple syrup to make a delicious vanilla bean paste!
FAQs (Frequently Asked Questions)
Q: Can I use imitation vanilla extract instead of homemade?
A: While imitation vanilla is cheaper, it lacks the complex flavor of real vanilla extract. Homemade vanilla extract offers a far superior taste.
Q: How long does homemade vanilla extract last?
A: Properly stored, homemade vanilla extract can last for many years, even improving with age.
Q: What if my vanilla extract isn’t dark enough after six months?
A: The color of the extract will continue to darken over time. You can either wait longer or add more vanilla beans to the jar.
Q: Can I use cheap vodka for my vanilla extract?
A: While you don’t need to use top-shelf vodka, it’s best to avoid the cheapest options. A decent quality, neutral-flavored vodka will produce the best results.
Q: Can I use the vanilla beans after I’ve made the extract?
A: Yes! You can dry them and grind them into vanilla powder, or use them to infuse sugar or milk with vanilla flavor.
Final Thoughts
Creating your own homemade vanilla extract is an incredibly rewarding experience. It’s a simple yet elegant way to elevate your baking and cooking, infusing everything you create with the pure, rich flavor of real vanilla. So, gather your ingredients, exercise a little patience, and prepare to unlock the liquid gold that awaits. The aroma alone is worth the effort, and the resulting flavor will transform your dishes in ways you never imagined. Don’t hesitate to experiment with different alcohols and vanilla bean varieties to discover your perfect signature extract. Happy extracting!