
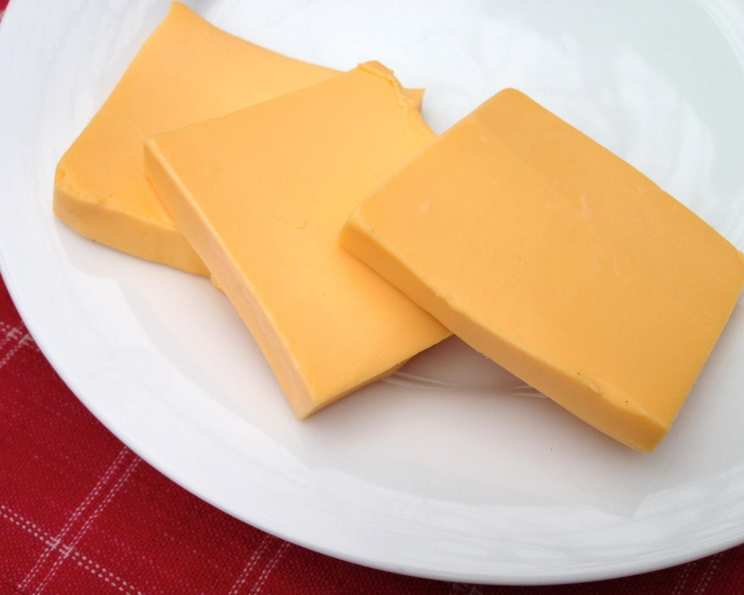
The Surprisingly Simple Secret to Homemade Velveeta
There’s a memory from childhood that I always associate with Velveeta. Not the plastic-wrapped brick from the grocery store, but the Velveeta my grandmother made. Every holiday, without fail, she’d set out a bowl of creamy, cheesy dip alongside pretzel sticks. It was richer, smoother, and somehow more flavorful than anything store-bought. I never knew how she did it – she was a vault of culinary secrets. Years later, digging through her recipe box, I stumbled upon this incredible Velveeta substitute recipe. It captured the same nostalgic taste and texture I remembered so fondly, proving that sometimes, the best things really are made from scratch.
Recipe Overview:
- Prep Time: 20 minutes
- Cook Time: 18 minutes
- Total Time: 38 minutes
- Yields: 2 pounds
- Dietary Type: Not Gluten-Free
Ingredients:
- 1 1⁄2 cups water, very hot
- 1⁄2 cup instant milk, plus 1 tablespoon instant milk
- 0.5 (1/4 ounce) envelope unflavored gelatin (1 1/2 teaspoons)
- 1 1⁄2 lbs cheddar cheese, shredded
Equipment Needed:
- 8x4x2.5″ loaf pan
- Plastic wrap
- Blender
Instructions:
- Line an 8x4x2.5″ loaf pan generously with plastic wrap, ensuring enough overhang to completely cover the cheese later. This makes unmolding much easier.
- In a blender, combine 1/2 cup of the very hot water, 3 tablespoons of the instant milk, and 1/2 teaspoon of the unflavored gelatin.
- Whip the mixture in the blender until the gelatin is completely dissolved. This is crucial for a smooth, consistent texture. If the gelatin isn’t fully dissolved, the final product may be grainy.
- Quickly add 1/2 lb of the shredded cheddar cheese to the hot mixture in the blender. Working quickly is key, as the heat helps melt the cheese.
- Whip the mixture until completely blended and smooth. Don’t over-blend, but ensure all the cheese is incorporated and there are no lumps.
- Pour the cheese mixture into the prepared loaf pan.
- Repeat steps 2-6 twice, using the remaining ingredients each time. This layering method ensures even distribution and a firm, sliceable cheese.
- Once all the cheese has been processed and poured into the loaf pan, cover the pan completely with more plastic wrap. Press down gently to eliminate any air pockets.
- Chill the loaf pan in the refrigerator overnight before attempting to unmold it. This allows the gelatin to fully set and the cheese to firm up.
- Once chilled completely, unmold your homemade Velveeta by lifting the edges of the plastic wrap.
- Keep cold and slice as needed.
Expert Tips & Tricks:
- Cheese Choice: While this recipe calls for cheddar, you can experiment with different cheeses or cheese blends to customize the flavor. Try adding a touch of smoked Gouda or Monterey Jack for added depth. Make sure you are using good quality block cheese and shredding it yourself. Pre-shredded cheese has cellulose added which can affect the melt and texture.
- Gelatin Bloom: For even better results, especially in cooler climates, you can “bloom” the gelatin before adding it to the blender. To do this, sprinkle the gelatin over the cold water called for in the recipe and let it sit for 5-10 minutes. It will become soft and spongy, making it easier to dissolve.
- Temperature Control: The hot water is crucial for melting the cheese and dissolving the gelatin. Make sure it’s hot, but not boiling, to avoid curdling the cheese.
- Blender Speed: Start with a low speed on your blender and gradually increase it as the cheese melts. This will help prevent splattering and ensure even blending.
- Troubleshooting a Grainy Texture: If your Velveeta turns out grainy, it’s likely due to the gelatin not dissolving completely or the cheese not melting evenly. Next time, make sure the water is hot enough and blend for a longer period.
Serving & Storage Suggestions:
This homemade Velveeta is incredibly versatile. Serve it sliced on crackers, use it to make grilled cheese sandwiches, or melt it into your favorite mac and cheese recipe. It’s also fantastic in dips, queso, and casseroles.
- Storage: Store the Velveeta in an airtight container in the refrigerator for up to 5 days.
- Freezing: While it’s not ideal, you can freeze homemade Velveeta. Wrap it tightly in plastic wrap and then in aluminum foil. Freeze for up to 2 months. Thaw it in the refrigerator overnight before using. The texture may change slightly after freezing, becoming a bit more crumbly.
- Reheating: To melt the Velveeta, you can use the microwave, stovetop, or oven. For the microwave, heat in short bursts, stirring in between, until melted. On the stovetop, heat over low heat, stirring constantly. In the oven, place the Velveeta in a baking dish and bake at 350°F (175°C) until melted.
Nutritional Information:
Please note that this is an estimate. Actual values may vary based on specific ingredients used.
| Nutrient | Amount per Serving (approx. 4 oz) | % Daily Value |
|---|---|---|
| Calories | 389 kcal | 19% |
| Total Fat | 29g | 45% |
| Saturated Fat | 18g | 90% |
| Cholesterol | 98mg | 33% |
| Sodium | 565mg | 24% |
| Total Carbohydrate | 5g | 2% |
| Dietary Fiber | 0g | 0% |
| Sugars | 4g | N/A |
| Protein | 24g | 48% |
Variations & Substitutions:
- Spicy Velveeta: Add a pinch of cayenne pepper or a tablespoon of your favorite hot sauce to the blender for a spicy kick.
- Smoked Velveeta: Use smoked cheddar cheese for a smoky flavor.
- Herb Velveeta: Add finely chopped fresh herbs like chives, parsley, or thyme to the blender for a fresh, aromatic twist.
- Different Cheeses: Try using a blend of cheddar and Gruyere, or even Pepper Jack for added flavor and spice.
FAQs (Frequently Asked Questions):
Q: Can I use regular milk instead of instant milk?
A: While you could experiment, instant milk is specifically formulated to dissolve easily and contribute to the smooth texture. Regular milk might not produce the same results.
Q: Why is the water temperature so important?
A: The hot water helps to melt the cheese and dissolve the gelatin properly. If the water isn’t hot enough, the cheese may not melt evenly, and the gelatin may not fully dissolve, resulting in a grainy texture.
Q: How long does the homemade Velveeta last?
A: Stored properly in the refrigerator, the homemade Velveeta will last for up to 5 days.
Q: Can I use pre-shredded cheese?
A: While convenient, pre-shredded cheese often contains cellulose, which can affect the melting process and final texture. It’s best to shred your own cheese for optimal results.
Q: What if my Velveeta is too soft?
A: If your Velveeta is too soft, it might not have chilled long enough, or you may have used too much water or not enough gelatin. Allow it to chill for a longer period. If this persists, adjust your water/gelatin ratios next time.
Final Thoughts:
This homemade Velveeta recipe is a surprisingly simple way to recreate a classic favorite, offering a fresher, more flavorful alternative to store-bought versions. It’s an excellent project for cheese lovers and those looking to elevate their everyday dishes. Don’t be afraid to experiment with different cheese blends and flavor additions to create your own signature Velveeta. I hope this recipe becomes a staple in your kitchen, bringing the same joy and nostalgia it brings to mine. Happy cooking!