
Homemade Watermelon Jelly: A Taste of Summer Sunshine
The first time I tasted watermelon jelly was at a county fair, a sweltering August day buzzing with laughter and the sweet aroma of fried dough. A local farmer’s wife, her face as weathered and kind as the land she tilled, offered me a sample on a simple cracker. That tiny bite, a burst of pure, concentrated watermelon flavor, captured the essence of summer in a jar. It was so unique, so unexpected, and so intensely delicious that I knew I had to learn how to make it myself. This recipe is my tribute to that day, and to all the simple pleasures of summer.
Recipe Overview
- Prep Time: 30 minutes
- Cook Time: 30 minutes
- Total Time: 1 hour
- Yields: 8 half-pint jars
- Dietary Type: Gluten-Free
Ingredients
- 4 cups watermelon, cubed (yielding 2 cups juice/puree)
- 3 tablespoons lemon juice, freshly squeezed
- 2 teaspoons lemon zest
- 1/2 cup granulated sugar
- 1 (1.75 ounce) package dry pectin (Sure-Jell Premium Fruit Pectin)
- 1 tablespoon dry pectin (from another package)
- 3 cups granulated sugar
Equipment Needed
- Blender or food processor
- Large stainless steel pot (Dutch Oven size)
- Whisk
- Measuring cups and spoons
- Canning jars (half-pint or quarter-pint)
- Jar lifter
- Boiling water canner or large stock pot
- Towel
Instructions
-
Begin by preparing your jars and lids. Sterilize them by boiling in water for about 10 minutes. Leave the jars in the hot water until ready to fill.
-
Next, prepare the watermelon. Using the red part of the watermelon, remove all the seeds and cut the flesh into cubes. Place the cubed watermelon in a blender or food processor and blend well until you have a smooth puree.
-
Measure out exactly 4 cups of cubed watermelon. This should yield approximately 2 cups of juice/puree. Add or remove juice as needed to equal 2 cups. While optional, you can strain the juice at this point for a clearer jelly, but I prefer to leave the pulp in for a richer flavor.
-
Juice the lemons to get 3 tablespoons of fresh lemon juice. Freshly squeezed lemon juice is highly recommended for the best flavor, but bottled lemon juice can be used in a pinch. Add the zest of one lemon to the lemon juice. The amount of zest is approximate, so don’t worry about being too precise. If you’re using bottled lemon juice, the zest is optional. Set the lemon juice and zest aside.
-
In a separate bowl, combine 1/2 cup of granulated sugar with the package of dry pectin. I recommend using Sure-Jell Premium Fruit Pectin (1.75 ounces per package, which is 4 tablespoons). Open another box of pectin and measure out an additional tablespoon to add to the sugar-pectin mixture. Mix the sugar and pectin well and set it aside. This crucial step ensures that the pectin disperses evenly and prevents clumping when added to the juice.
-
In a separate container, measure out the remaining 3 cups of sugar. Set this aside close to your cooking area, ready to be added later. Having all your ingredients pre-measured and within reach will streamline the jelly-making process.
-
Pour the 2 cups of watermelon juice/puree into a large stainless steel pot (a Dutch Oven size is ideal). Add the 3 tablespoons of lemon juice and the lemon zest to the watermelon juice. The lemon juice not only brightens the flavor but also helps with the jelling process.
-
Stir in the sugar-pectin mixture and bring the mixture to a hard boil over medium-high to high heat, depending on your stovetop. A hard boil is defined as a boil that doesn’t stop when stirred. I find that using a whisk to constantly stir the mixture prevents scorching and ensures even heat distribution. Reaching the boiling stage should take approximately 5-10 minutes. Continue stirring.
-
Once the mixture reaches a hard boil, add the remaining 3 cups of sugar and bring it back to a hard boil, stirring or whisking constantly for about 1-2 minutes. Maintaining a hard boil is essential for activating the pectin and achieving a good set.
-
Remove the pot from the heat.
-
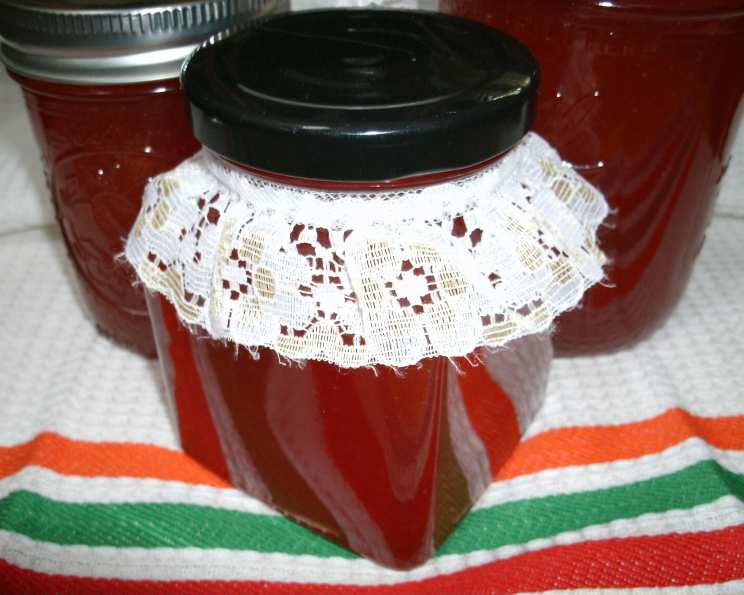
Fill the prepared jars to about 1/4 inch from the top. Use a clean, damp cloth to wipe the rim of each jar to ensure a good seal. Place the lids and rings onto the jars, tightening the rings finger-tight.
-
Seal the filled jars using a boiling water bath. You should yield approximately (8) 1/2 pint jars, (16) 1/4 pint jars, or (4) pint jars.
-
Place the filled jars in a boiling water canner or a large stock pot filled with enough boiling water to cover the jars by about 1 inch. If you don’t have a canner, place a towel in the bottom of a large stock pot to prevent the jars from touching the bottom directly. Ensure that the jars do not touch each other during processing.
-
Boil gently for 10 minutes. Adjust processing time for altitude as needed.
-
Carefully remove the jars from the canner using a jar lifter and set them on a towel-lined surface away from drafts to cool. I like to place a towel-lined cookie sheet in a cold oven and let the jars cool in the oven with the door closed to minimize temperature fluctuations.
-
As the jars cool, you should hear a “popping” sound as the lids seal. Make sure that the jars have sealed properly before storing. To check the seal, press down on the center of the lid. If it doesn’t flex or pop back up, the jar is sealed. If the lid flexes, it’s not sealed, and you’ll need to reprocess the jar with a new lid or refrigerate the jelly and use it soon.
Expert Tips & Tricks
- Pectin Power: Using the correct type and amount of pectin is crucial for successful jelly-making. Be sure to use a dry pectin specifically formulated for no-sugar or reduced-sugar recipes, like the Sure-Jell Premium Fruit Pectin recommended here. Adding the extra tablespoon of pectin helps ensure a firm set.
- Heat Control: Monitor the heat carefully during cooking. If the mixture boils over, reduce the heat slightly. Conversely, if it takes too long to reach a hard boil, increase the heat gradually.
- Jar Sealing: Properly sealed jars are essential for long-term storage. Ensure the jar rims are clean and free of any jelly residue before applying the lids. Follow the recommended processing time for your altitude to achieve a secure seal.
Serving & Storage Suggestions
Homemade watermelon jelly is incredibly versatile. Spread it on toast, biscuits, or scones for a delightful breakfast treat. Use it as a glaze for grilled chicken or pork for a sweet and savory flavor combination. It also makes a fantastic filling for thumbprint cookies or a unique addition to a cheese board.
Stored in a cool, dark place, watermelon jelly is good for about 12 months, although it is best enjoyed within the first 6 months. The color and consistency may change slightly over time, but the flavor will remain delicious. Once opened, store the jelly in the refrigerator.
Nutritional Information
Please note that these values are estimates and can vary based on specific ingredients and serving sizes.
| Nutrient | Amount per Serving | % Daily Value |
|---|---|---|
| Calories | 383 kcal | 19% |
| Total Fat | 0.1 g | 0% |
| Saturated Fat | 0 g | 0% |
| Cholesterol | 0 mg | 0% |
| Sodium | 13.3 mg | 1% |
| Total Carbohydrate | 99.4 g | 33% |
| Dietary Fiber | 0.9 g | 3% |
| Sugars | 92.3 g | 185% |
| Protein | 0.5 g | 1% |
Variations & Substitutions
- Spiced Watermelon Jelly: Add whole spices like allspice, cinnamon sticks, cloves, or ginger to the pot while cooking for a warm, aromatic twist. Remove the spices before filling the jars.
- Hot Pepper Watermelon Jelly: For a sweet and spicy jelly, add a small amount of finely minced jalapeño pepper to the juice along with the lemon juice and zest.
- Low-Sugar Option: While this recipe does call for a significant amount of sugar to ensure proper setting and preservation, you could experiment with using a sugar substitute suitable for canning. However, this may affect the texture and shelf life of the jelly.
FAQs (Frequently Asked Questions)
Q: Can I use frozen watermelon for this recipe?
A: Yes, you can use frozen watermelon. Just be sure to thaw it completely and drain off any excess liquid before blending.
Q: What if my jelly doesn’t set?
A: If your jelly doesn’t set after 24 hours, you can try re-cooking it with more pectin. Add 1-2 tablespoons of pectin mixed with 1/4 cup of sugar to the jelly, bring it back to a boil for 1-2 minutes, and then re-jar and process it.
Q: Can I use a different type of fruit juice with this recipe?
A: While this recipe is specifically for watermelon jelly, you can adapt it for other fruits. However, you may need to adjust the amount of sugar and pectin depending on the acidity and pectin content of the fruit.
Q: How long does the jelly last after opening?
A: Once opened, store the watermelon jelly in the refrigerator. It should last for several weeks, but it’s best to use it within a couple of weeks for optimal flavor.
Q: Why is the lemon juice important?
A: Lemon juice is important because it provides acidity, which is necessary for pectin to set properly. It also helps to balance the sweetness of the watermelon and adds a bright, refreshing flavor.
Final Thoughts
Now you have a recipe to capture the essence of summer sunshine in every delicious spoonful. Homemade Watermelon Jelly is a unique and delightful treat that is sure to impress your friends and family. Don’t be afraid to experiment with variations and make it your own. I encourage you to try this recipe and share your experience with me! Consider serving it alongside a simple cheese and cracker plate for a fantastic appetizer, or even paired with a refreshing summer cocktail. Happy preserving!