
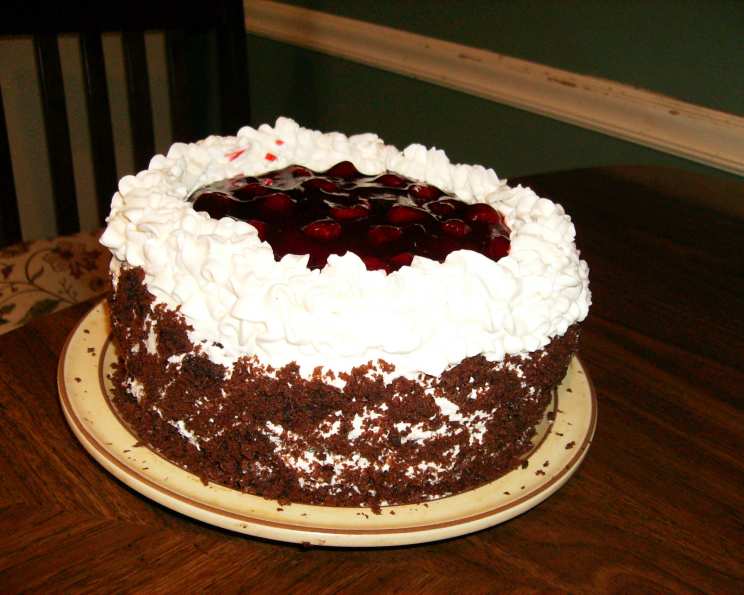
Decadent Homemade Whipped Cream and Cream Cheese Icing
I can still picture it: my grandmother’s pale yellow kitchen, sunlight streaming through the floral curtains, the scent of vanilla hanging heavy in the air. She always made the most incredible cakes, and her secret weapon was this very icing. It wasn’t just sweet; it was airy, tangy, and impossibly smooth. I’d sneak spoonfuls when she wasn’t looking, the creamy sweetness melting on my tongue. Years later, I finally coaxed the recipe from her, and I’ve been making it ever since. It’s more than just icing; it’s a taste of home, a reminder of love, and the perfect finishing touch to any dessert.
Recipe Overview
- Prep Time: 5 minutes
- Total Time: 5 minutes
- Servings: 8-12
Ingredients
- 1 (8 ounce) package reduced-fat cream cheese, softened
- ½ cup white sugar
- 1 teaspoon vanilla extract
- ½ teaspoon almond extract
- 2 cups heavy cream
Equipment Needed
- Large Mixing Bowl (or Stand Mixer Bowl)
- Electric Mixer (Handheld or Stand Mixer with Whisk Attachment)
- Rubber Spatula
Instructions
-
In a large mixing bowl, or the bowl of your stand mixer, combine the softened cream cheese, white sugar, vanilla extract, and almond extract. Make sure the cream cheese is adequately softened to avoid lumps in the final product.
-
If using a stand mixer, fit it with the whisk attachment. If using a handheld electric mixer, ensure you have whisks attached. Mix on medium speed until the mixture is completely smooth and homogenous. This usually takes about 1-2 minutes. Scrape down the sides of the bowl with a rubber spatula to ensure all ingredients are fully incorporated.
-
With the mixer still running on medium speed, slowly pour in the heavy cream in a steady stream. Pouring it too quickly can cause splattering or prevent the cream from emulsifying properly.
-
Stop and scrape the bottom of the bowl a couple of times during the whipping process to ensure even incorporation of all ingredients. This is especially important when using a stand mixer.
-
Continue whipping the mixture until the cream can hold a stiff peak. This means when you lift the whisk, the peaks of the icing stand straight up without drooping. Be careful not to overwhip, as this can cause the cream to separate and become grainy. The total whipping time will vary depending on your mixer and the temperature of your ingredients, but it usually takes between 2-5 minutes.
Expert Tips & Tricks
- Temperature Matters: Ensure your cream cheese is thoroughly softened before starting. Cold cream cheese will result in a lumpy icing. Similarly, cold heavy cream whips best, so chill it in the refrigerator for at least 30 minutes before using.
- Don’t Overwhip: Overwhipped cream can turn grainy and separate. Keep a close eye on the mixture, and stop whipping as soon as stiff peaks form. If you accidentally overwhip it, try adding a tablespoon or two of fresh heavy cream and gently folding it in to rehydrate the mixture.
- Flavor Boost: For a richer, more intense flavor, try using vanilla bean paste instead of vanilla extract. You can also add a pinch of salt to enhance the sweetness and balance the flavors.
- Stable Icing Secret: Adding a tablespoon of powdered sugar, along with the granulated sugar, can help stabilize the whipped cream and prevent it from deflating too quickly.
- Citrus Zest: A teaspoon of lemon or orange zest adds a bright, fresh note to the icing that complements cakes and cupcakes beautifully.
- Chocolate Infusion: For a chocolatey twist, whisk in 2 tablespoons of unsweetened cocoa powder after the cream cheese and sugar are combined.
Serving & Storage Suggestions
This whipped cream and cream cheese icing is incredibly versatile. It’s perfect for frosting cakes, cupcakes, and cookies. It also makes a delightful topping for fruit tarts, pies, or even waffles and pancakes.
For serving, pipe the icing onto your baked goods using a piping bag fitted with your desired tip for a professional look. Alternatively, you can simply spread it on with a spatula.
Leftover icing should be stored in an airtight container in the refrigerator. It will keep for up to 2-3 days. The texture may change slightly upon refrigeration, becoming a bit firmer. If necessary, you can rewhip it briefly before using. It is best to use it shortly after it’s made.
This icing is not suitable for freezing as the texture will significantly degrade upon thawing.
Avoid leaving the icing at room temperature for extended periods, especially in warm environments, as it can become unstable and separate.
Nutritional Information
(Estimated per serving, based on 12 servings)
| Nutrient | Amount per Serving | % Daily Value |
|---|---|---|
| Calories | 312.9 kcal | – |
| Calories from Fat | 237 g | 76% |
| Total Fat | 26.4 g | 40% |
| Saturated Fat | 16.3 g | 81% |
| Cholesterol | 96.8 mg | 32% |
| Sodium | 156.1 mg | 6% |
| Total Carbohydrate | 16.6 g | 5% |
| Dietary Fiber | 0 g | 0% |
| Sugars | 14.3 g | – |
| Protein | 3.5 g | – |
Note: Nutritional information is an estimate and can vary based on specific ingredients and portion sizes.
Variations & Substitutions
- Dairy-Free Option: While this recipe relies heavily on dairy, it’s possible to create a similar texture using plant-based alternatives. Substitute the cream cheese with a vegan cream cheese alternative and the heavy cream with a high-fat coconut cream (refrigerated overnight and only using the solid cream). The taste and texture will differ slightly, but it can still be a delicious option for those with dietary restrictions.
- Lemon Whipped Cream: Add the zest of one lemon and a tablespoon of lemon juice for a bright, citrusy flavor.
- Maple Whipped Cream: Replace the white sugar with an equal amount of maple syrup for a naturally sweetened and subtly flavored variation.
- Peppermint Whipped Cream: Add ¼ teaspoon of peppermint extract for a festive, holiday-inspired flavor.
- Espresso Whipped Cream: Add 1-2 teaspoons of instant espresso powder for a coffee-flavored kick.
- Berry Swirl: Gently fold in a few tablespoons of your favorite berry puree (such as raspberry or strawberry) after the icing is whipped for a beautiful and flavorful swirl.
FAQs (Frequently Asked Questions)
Q: Can I make this icing ahead of time?
A: Yes, you can make it a few hours in advance and store it in the refrigerator. However, it’s best to use it as soon as possible after making it for the best texture. It may need a quick rewhip if it sits for too long.
Q: My icing is too runny. What can I do?
A: If your icing is too runny, try chilling it in the refrigerator for 15-20 minutes to firm it up. You can also try adding a tablespoon of powdered sugar and whipping it again until it reaches the desired consistency.
Q: My icing is too stiff. How can I fix it?
A: If your icing is too stiff, add a tablespoon of heavy cream and gently fold it in until it reaches the desired consistency. Be careful not to overwhip it.
Q: Can I use a different type of sugar?
A: Yes, you can use powdered sugar instead of granulated sugar. However, the texture of the icing may be slightly different. Powdered sugar will result in a smoother, more stable icing.
Q: Why is my icing grainy?
A: Grainy icing is usually caused by overwhipping the cream or using cream cheese that is not softened enough. Be sure to soften the cream cheese completely and avoid overwhipping the cream.
Final Thoughts
Now it’s your turn! Give this homemade whipped cream and cream cheese icing recipe a try. Whether you’re frosting a birthday cake, topping a batch of cupcakes, or simply adding a dollop to your favorite dessert, I guarantee this icing will elevate your creation to the next level. Don’t be afraid to experiment with different flavor variations to create your own signature icing. And, most importantly, share your creations and feedback! This icing is a reminder that even the simplest ingredients, when combined with care and a touch of creativity, can create something truly special. So, go ahead, whip up a batch and experience the magic for yourself!