
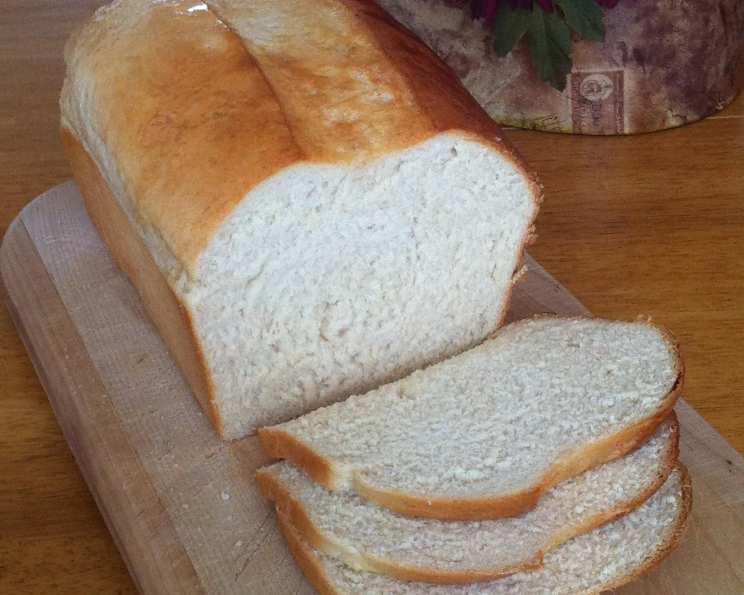
The Nostalgic Comfort of Homemade “Wonder” Bread
I remember, as a child, the pure delight of unwrapping a fresh loaf of Wonder Bread. The pillowy softness, the subtle sweetness, and the perfectly uniform slices were the epitome of lunchtime happiness. It was more than just bread; it was a symbol of comfort and simplicity. Recreating that experience at home has been a culinary quest of mine for years. While I’ve elevated my baking skills far beyond simple white bread, there’s still a special place in my heart for that classic loaf. This recipe captures that familiar flavor and texture, bringing a little bit of childhood nostalgia to my kitchen.
Recipe Overview
- Prep Time: 30 minutes
- Cook Time: 35 minutes
- Total Time: 3 hours 15 minutes (includes proofing time)
- Servings: Approximately 20 slices
- Yield: 1 2lb loaf
- Dietary Type: Vegetarian
Ingredients
- 2 ½ teaspoons active dry yeast
- ¼ cup warm water (110 degrees F)
- 1 tablespoon white sugar
- 4 cups all-purpose flour
- ¼ cup instant potato flakes
- ¼ cup powdered milk
- 2 teaspoons salt
- ¼ cup white sugar
- 2 tablespoons butter or margarine
- 1 cup warm water
Equipment Needed
- Measuring cups and spoons
- Mixing bowls
- Stand mixer (optional, but recommended)
- 9×5 inch loaf pan
- Clean kitchen towel
- Wire rack
Instructions
-
Activate the yeast: In a small bowl, whisk together the active dry yeast, ¼ cup of warm water (it should feel comfortably warm, not hot, to the touch), and 1 tablespoon of white sugar. Let this mixture sit for about 15 minutes, or until it becomes foamy and bubbly. This step ensures that your yeast is active and will properly leaven the bread.
-
Combine the dry ingredients: In a large mixing bowl, whisk together the all-purpose flour, instant potato flakes, powdered milk, salt, and ¼ cup of white sugar. The potato flakes contribute to the bread’s soft texture, while the powdered milk adds richness and helps with browning.
-
Incorporate the wet ingredients: If using a stand mixer, attach the dough hook. Add the butter (or margarine) and 1 cup of warm water to the dry ingredients. Pour in the yeast mixture. Begin mixing on low speed until the dough starts to come together. If mixing by hand, use a wooden spoon or your hands to combine the ingredients until a shaggy dough forms.
-
Knead the dough: Increase the mixer speed to medium and knead the dough for 8-10 minutes, or until it becomes smooth and elastic. If kneading by hand, turn the dough out onto a lightly floured surface and knead for 10-12 minutes. The dough should be slightly tacky but not sticky. If it’s too sticky, add a tablespoon of flour at a time until it reaches the desired consistency.
-
First Proof: Place the dough in a lightly oiled bowl, turning to coat all sides. Cover the bowl with a clean kitchen towel and let it rise in a warm place for 1-1.5 hours, or until it has doubled in size. A warm environment is crucial for proper proofing; you can place the bowl in a slightly warmed oven (turned off) or near a sunny window.
-
Shape the dough: Gently punch down the risen dough to release the air. Turn it out onto a lightly floured surface. Shape the dough into a loaf that fits snugly into your greased 9×5 inch loaf pan. You can roll it out into a rectangle and then tightly roll it up, or simply shape it into an oval.
-
Second Proof: Place the shaped loaf in the greased loaf pan. Cover it loosely with a clean kitchen towel and let it rise again in a warm place for about 45-60 minutes, or until it has nearly doubled in size and is crowned slightly above the rim of the pan.
-
Bake the bread: Preheat your oven to 350°F (175°C). Once the loaf has finished its second proof, bake it in the preheated oven for 30-35 minutes, or until the crust is golden brown and the internal temperature reaches 190-200°F (88-93°C). To check the internal temperature, insert an instant-read thermometer into the center of the loaf. If the crust is browning too quickly, you can tent it with foil during the last 10-15 minutes of baking.
-
Cool and slice: Remove the baked bread from the oven and let it cool in the pan for about 10 minutes. Then, transfer it to a wire rack to cool completely before slicing. Cooling the bread completely is essential for achieving clean slices and preventing a gummy texture.
Expert Tips & Tricks
- The Potato Flake Secret: Don’t skip the potato flakes! They are the key to the soft, tender crumb that makes this bread so special.
- Water Temperature is Key: Ensure the water is warm (110°F) but not hot. Hot water can kill the yeast, preventing the bread from rising. Use a thermometer for accuracy.
- The Windowpane Test: During kneading, perform the windowpane test to ensure the gluten has developed sufficiently. Stretch a small piece of dough between your fingers. If you can stretch it thin enough to see light through it without tearing, the gluten is ready.
- For a Softer Crust: Brush the top of the baked loaf with melted butter immediately after removing it from the oven. This will create a softer, more pliable crust.
Serving & Storage Suggestions
Serve this homemade “Wonder” Bread fresh, toasted, or as a base for sandwiches. It’s delicious with butter, jam, or your favorite spreads. For optimal freshness, store the bread in an airtight bag or container at room temperature for up to 3 days. You can also freeze slices of bread for longer storage (up to 2 months). Thaw frozen bread at room temperature or toast it directly from frozen. To retain the bread’s softness, avoid storing it in the refrigerator, as this can dry it out.
Nutritional Information
| Nutrient | Amount per Serving (approx. 1 slice) | % Daily Value |
|---|---|---|
| Calories | 125.5 kcal | 6% |
| Total Fat | 1.9 g | 3% |
| Saturated Fat | 1.05 g | 5% |
| Cholesterol | 4.6 mg | 2% |
| Sodium | 250.6 mg | 10% |
| Total Carbohydrate | 23.6 g | 8% |
| Dietary Fiber | 0.9 g | 4% |
| Sugars | 3.8 g | |
| Protein | 3.3 g | 7% |
Note: Nutritional information is an estimate and may vary based on specific ingredients and portion sizes.
Variations & Substitutions
- Whole Wheat Version: Replace up to half of the all-purpose flour with whole wheat flour for a nuttier flavor and added fiber.
- Dairy-Free Option: Substitute the powdered milk with a non-dairy milk powder or omit it altogether. Use a plant-based butter substitute.
- Sweet Bread: Increase the sugar in the recipe for a sweeter loaf, perfect for French toast or desserts.
- Herb Infused: Add dried herbs like rosemary or thyme to the dough for a savory twist.
FAQs (Frequently Asked Questions)
Q: Why are potato flakes added to the bread?
A: Potato flakes help create a softer, more tender crumb by retaining moisture in the dough.
Q: Can I use bread flour instead of all-purpose flour?
A: Yes, bread flour will result in a slightly chewier texture, but it’s a perfectly acceptable substitute.
Q: My bread is browning too quickly. What can I do?
A: Tent the loaf with foil during the last 10-15 minutes of baking to prevent the crust from burning.
Q: How do I know if the bread is fully cooked?
A: The internal temperature should reach 190-200°F (88-93°C). You can also tap the bottom of the loaf; it should sound hollow.
Q: Can I make this dough in a bread machine?
A: Yes, simply add the ingredients to your bread machine in the order recommended by the manufacturer, and select the basic white bread setting with a light crust.
Final Thoughts
This Homemade “Wonder” Bread recipe is a journey back to simpler times, filled with familiar flavors and textures. It’s more than just a loaf of bread; it’s a warm embrace of nostalgia and the satisfaction of creating something delicious from scratch. I encourage you to try it, experiment with the variations, and share the joy of homemade goodness with your loved ones. Whether you enjoy it as a simple sandwich or a comforting slice with butter, this bread is sure to bring a smile to your face. Happy baking!