
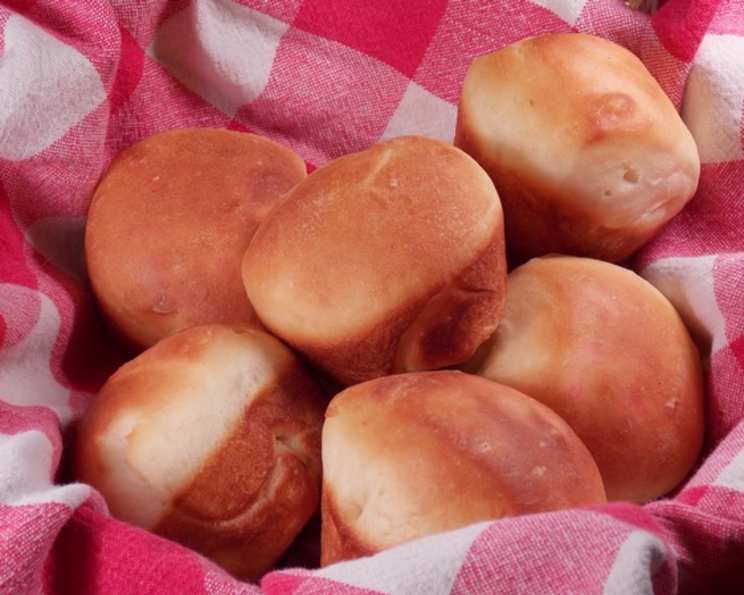
The Warm Embrace of Homemade Yeast Rolls
The aroma of yeast rolls baking in the oven is, for me, a direct portal back to my grandmother’s kitchen. I can almost feel the warmth of the old Aga stove, the gentle hum of her humming a hymn, and the satisfying squish of the dough between my chubby, flour-dusted fingers as she patiently guided me in shaping the perfect roll. Those weren’t just rolls; they were love, comfort, and tradition all rolled into one delectable bite. Every time I bake these, I hope to recreate a little of that magic.
Recipe Overview
- Prep Time: 30 minutes
- Cook Time: 12-15 minutes
- Total Time: 2 hours 30 minutes (including rising time)
- Yields: 36 rolls
- Dietary Type: Not adaptable for vegan, gluten-free, or dairy-free diets without significant modification.
Ingredients
- 2 cups milk, lukewarm
- 1/2 cup sugar
- 1 teaspoon salt
- 2 packages (or 2 cakes) yeast
- 2 eggs, beaten
- 1/2 cup shortening, soft
- 7 1/2 cups sifted flour
Equipment Needed
- Large Mixing Bowl
- Measuring Cups and Spoons
- Mixing Spoons or Stand Mixer
- Floured Surface
- Greased Bowl
- Baking Sheets
- Clean Kitchen Towel
Instructions
-
In a large mixing bowl, combine the 2 cups of lukewarm milk, 1/2 cup sugar, and 1 teaspoon salt. The milk temperature is critical here; too hot, and you’ll kill the yeast; too cold, and it won’t activate properly. Think baby-bottle warm.
-
Crumble the 2 packages (or cakes) of yeast into the milk mixture. Stir well until the yeast is completely dissolved. Give it a few minutes to bloom, which means the yeast will become foamy on top. This is a good sign that your yeast is alive and kicking.
-
In the same bowl, stir in the 2 beaten eggs, 1/2 cup of soft shortening, and the 7 1/2 cups of sifted flour. Add the flour gradually, mixing until a soft dough forms.
-
Turn the dough out onto a lightly floured board. Knead the dough for 8-10 minutes, until it is smooth and elastic. This is crucial for developing the gluten, which gives the rolls their structure.
-
Place the kneaded dough in a greased bowl, turning to coat all sides. Cover the bowl with a clean kitchen towel or plastic wrap, and let it rise in a warm place until doubled in bulk. This usually takes about an hour, but the exact time will depend on the temperature of your kitchen.
-
Once the dough has doubled, punch it down to release the air. Knead it briefly again and let it rise a second time until doubled in bulk. This second rise contributes to a lighter, more airy texture.
-
After the second rise, shape the dough into rolls. There are many ways to do this. You can roll the dough out and cut it into squares, form it into balls, or create more elaborate shapes. Place the shaped rolls on greased baking sheets, leaving some space between each roll.
-
Let the shaped rolls rise again until almost doubled in bulk. This final rise is essential for achieving that light and fluffy texture.
-
Bake the rolls in a preheated oven at 425 degrees Fahrenheit until golden brown. The baking time will vary depending on the size of your rolls, but it usually takes about 12-15 minutes. Keep a close watch, especially if your oven tends to run hot.
Expert Tips & Tricks
- Use a thermometer: Lukewarm milk should be between 105-115°F for optimal yeast activation.
- Don’t over-knead: Over-kneading can result in tough rolls. Aim for a smooth, elastic dough that springs back when poked.
- Proofing: Ensure your proofing area is warm but not too hot. A slightly warm oven (turned off) or a sunny spot works well.
- Egg Wash: For a shinier, golden-brown crust, brush the tops of the rolls with a beaten egg before baking.
- Herb Infusion: Add dried herbs like rosemary or thyme to the dough for a savory twist.
- Sweet Glaze: Brush the baked rolls with melted butter and sprinkle with powdered sugar for a sweeter treat.
- Make ahead: You can prepare the dough up to the shaping stage, then refrigerate it overnight. Let it come to room temperature before shaping and baking.
Serving & Storage Suggestions
Serve these homemade yeast rolls warm from the oven with a generous pat of butter. They are perfect alongside soups, stews, salads, or as a delightful addition to any holiday meal.
Leftover rolls can be stored at room temperature in an airtight container for up to 2 days. For longer storage, refrigerate them for up to a week or freeze them for up to 3 months. To reheat, wrap the rolls in foil and warm them in a low oven (300°F) until heated through. You can also microwave them for a few seconds, but be careful not to overcook them, or they will become tough.
Nutritional Information
| Nutrient | Amount per Serving | % Daily Value |
|---|---|---|
| Calories | 143.4 kcal | – |
| Calories from Fat | – | 24% |
| Total Fat | 3.9 g | 5% |
| Saturated Fat | 1.1 g | 5% |
| Cholesterol | 12.2 mg | 4% |
| Sodium | 75.7 mg | 3% |
| Total Carbohydrate | 23.3 g | 7% |
| Dietary Fiber | 0.7 g | 2% |
| Sugars | 2.9 g | – |
| Protein | 3.5 g | 6% |
Variations & Substitutions
- Whole Wheat Rolls: Substitute up to half of the all-purpose flour with whole wheat flour for a nuttier flavor.
- Garlic Herb Rolls: Add minced garlic and chopped fresh herbs (such as parsley, chives, or rosemary) to the dough.
- Cheese Rolls: Incorporate shredded cheddar or mozzarella cheese into the dough for a cheesy delight.
- Cinnamon Rolls: After the first rise, roll the dough out into a rectangle, spread with melted butter, sprinkle with cinnamon and sugar, roll up tightly, and slice into rolls.
- Potato Rolls: Replace half of the milk with mashed potatoes and a tablespoon of potato water for incredibly tender rolls.
- Sweet Potato Rolls: Add mashed sweet potato (about 1/2 cup) to the dough for added flavor and moisture.
FAQs (Frequently Asked Questions)
Q: Can I use active dry yeast instead of fresh yeast?
A: Yes, you can substitute active dry yeast for fresh yeast. Use the same quantity by weight. Make sure to proof it in warm water before adding it to the other ingredients.
Q: My rolls didn’t rise. What went wrong?
A: Several factors can prevent rolls from rising, including using expired yeast, milk that’s too hot or too cold, or a kitchen that’s too cold. Ensure your yeast is fresh, your milk is lukewarm, and your proofing environment is warm.
Q: Can I freeze the dough after the first rise?
A: Yes, you can freeze the dough after the first rise. Wrap it tightly in plastic wrap and store it in the freezer for up to 3 months. Thaw it in the refrigerator overnight before shaping and baking.
Q: How do I prevent the rolls from drying out?
A: To prevent the rolls from drying out, avoid overbaking them. Brush the tops with melted butter immediately after baking and store them in an airtight container.
Q: Can I make this recipe in a bread machine?
A: Yes, you can use a bread machine to make the dough. Add the ingredients in the order recommended by your bread machine manufacturer and select the dough cycle. Then, shape and bake the rolls as directed in the recipe.
Final Thoughts
These homemade yeast rolls are more than just a recipe; they’re an invitation to create cherished memories in your own kitchen. Whether you’re a seasoned baker or a novice, the simple act of kneading dough and watching it rise is incredibly rewarding. Gather your family, share the joy of baking, and savor the warm, comforting goodness of homemade yeast rolls. I encourage you to try this recipe and make it your own, adding your personal touch and flair. And don’t forget to share your creations and experiences with me! I’d love to hear how they turned out and any variations you tried. Happy baking!