
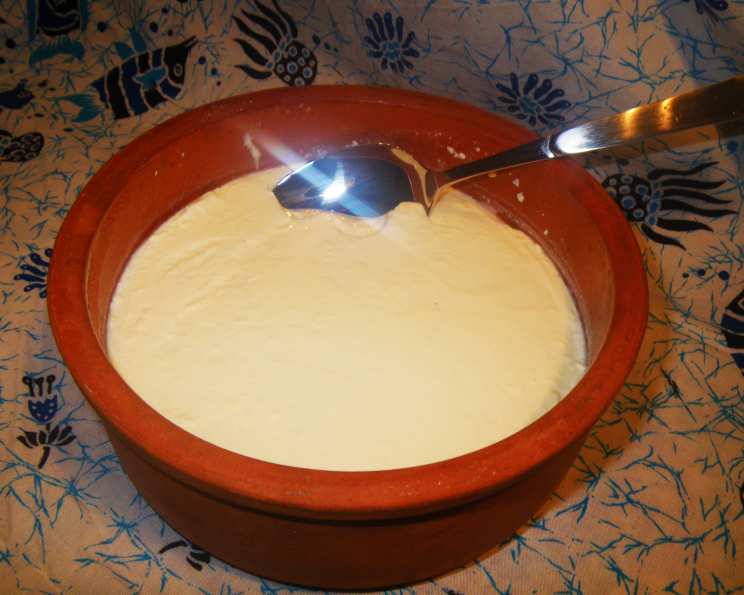
Homemade Yogurt by Sy
The first time I tasted truly exceptional yogurt was on a family trip to a small Greek island. The local taverna served it in earthenware bowls, drizzled with honey from their own hives, and sprinkled with toasted walnuts. It wasn’t just a breakfast item; it was a cultural experience – a testament to simple, wholesome ingredients transformed by time and tradition. The memory of that creamy, tangy yogurt has stayed with me, inspiring me to try and recreate that magic in my own kitchen. And this recipe by Sy comes incredibly close to capturing that essence.
Recipe Overview
- Prep Time: 15 minutes
- Cook Time: 2 hours
- Total Time: 12 hours 15 minutes
- Servings: 6 cups
- Yields: 6 cups
- Dietary Type: Vegetarian
Ingredients
- 4 cups milk (any kind, see notes below)
- 2 cups half-and-half
- 3-4 tablespoons cultured yogurt (I prefer using Erivan Acidophilus Yogurt with live yogurt cultures and unhomogenized whole milk.)
Ingredient Notes:
- You can experiment with different types of milk to achieve your desired consistency and flavor. Whole milk will yield a richer, creamier yogurt. Skim milk will result in a thinner, tangier yogurt. Goat milk offers a distinct, slightly earthy flavor.
- The cultured yogurt you use as a starter is crucial. Ensure it contains live and active cultures for successful fermentation. Plain, unflavored yogurt is best.
Equipment Needed
- Large pot (preferably non-stick)
- Thermometer
- Measuring cups and spoons
- Cup or small bowl
- Whisk or spoon
- Clean glass jar or ovenproof bowl
- Plastic wrap
- Dish cloth
- Clip-on desk lamp with a 75-watt bulb (optional, see instructions for alternative methods)
Instructions
-
Combine the milk and half-and-half: Pour the milk and half-and-half into a large pot. A non-stick pot is preferable to prevent scorching.
-
Heat the mixture: Bring the milk mixture to almost a boil over medium heat, stirring frequently to prevent the milk from burning on the bottom of the pot. Watch carefully; you want to see small bubbles forming around the edges, but the milk should not be boiling vigorously.
-
Cool the mixture: Turn off the heat and let the milk mixture cool to 115 degrees Fahrenheit (approximately 46 degrees Celsius). Use a thermometer to ensure accurate temperature reading. This step is crucial for the yogurt cultures to thrive.
-
Prepare the yogurt starter: While the milk is heating up and cooling, place the cultured yogurt (3-4 tablespoons) in a cup or small bowl. Let it sit at room temperature (about 70 degrees Fahrenheit/21 degrees Celsius). This allows the yogurt to adjust to the ambient temperature, which will help it blend more easily with the cooled milk.
-
Temper the yogurt starter: When the milk has cooled to 115 degrees Fahrenheit, add a small amount of the warm milk to the cup containing the yogurt starter.
-
Mix and combine: Stir the yogurt starter and milk mixture in the cup thoroughly until smooth and well combined. This process, called tempering, helps prevent the yogurt cultures from being shocked by the temperature difference.
-
Incorporate the yogurt starter: Pour the tempered yogurt starter back into the pot of milk, stirring gently but thoroughly to distribute the cultures evenly throughout the milk mixture.
-
Transfer to a container: Pour the milk mixture into a clean glass jar or ovenproof bowl. Stir well to ensure even distribution of the yogurt cultures.
-
Cover and insulate: Cover the jar or bowl tightly with plastic wrap to prevent a skin from forming on the surface of the yogurt during incubation. Then, cover the plastic wrap with a dish cloth for added insulation.
-
Incubate: Here are the methods for incubating the yogurt:
-
Heat Lamp Method: Take a clip-on desk lamp (with a shade and a 75-watt bulb) and point it towards the surface of the jar/bowl (about 6 inches away). Let the jar/bowl with the milk and yogurt starter incubate under the heat lamp for about 8 to 12 hours. I prefer 12 hours, with the finished yogurt having a nice tangy taste and consistency!
-
Oven Method: You can use a conventional oven which has been heated to 200 degrees Fahrenheit (93 degrees Celsius) and then turned off. Then place the jar/bowl with the milk & yogurt starter inside the oven for about 2 to 4+ hours. Check the yogurt frequently to see if it is to your liking.
-
Warm Kitchen Method: If you are placing the jar/bowl of milk in an 80-85 degree Fahrenheit (27-29 degrees Celsius) kitchen area you can reduce the time it sits under the lamp. Or in some cases no lamp is needed.
-
-
Refrigerate: Once the yogurt has reached your desired consistency and tanginess, remove it from the heat source and refrigerate it for at least 4 hours to stop the fermentation process and allow it to thicken further.
Expert Tips & Tricks
- Don’t overheat the milk: Overheating the milk can denature the proteins, resulting in a grainy yogurt.
- Maintain a stable temperature: Maintaining a consistent temperature during incubation is crucial for successful yogurt making. Avoid drafts and fluctuations in temperature.
- Experiment with incubation time: The longer you incubate the yogurt, the tangier it will become. Start with 8 hours and adjust to your preference.
- Save some yogurt for the next batch: Once you have a batch of homemade yogurt, you can use some of it as a starter for your next batch. This allows you to maintain a consistent flavor profile.
- Straining for thicker yogurt: For a thicker, Greek-style yogurt, strain the finished yogurt through a cheesecloth-lined colander for several hours. The longer you strain it, the thicker it will become. The strained liquid, called whey, can be used in smoothies, soups, or baking.
Serving & Storage Suggestions
Serve your homemade yogurt chilled, plain or sweetened with honey, maple syrup, or fruit. It’s delicious topped with granola, nuts, seeds, or fresh berries. It can also be used in smoothies, dips, sauces, and baked goods.
Store the yogurt in an airtight container in the refrigerator for up to 1-2 weeks. The yogurt may develop some whey on the surface during storage, which is perfectly normal. Simply stir it back in before serving. Freezing yogurt is not generally recommended as it can change the texture.
Nutritional Information
Note: The nutritional information below is an estimate and may vary based on the type of milk and half-and-half used.
| Nutrient | Amount per Serving | % Daily Value |
|---|---|---|
| Calories | 213.5 kcal | N/A |
| Calories from Fat | 139g | 65% |
| Total Fat | 15.5 g | 23% |
| Saturated Fat | 9.6 g | 48% |
| Cholesterol | 53.6 mg | 17% |
| Sodium | 116.2 mg | 4% |
| Total Carbohydrate | 11.4 g | 3% |
| Dietary Fiber | 0 g | 0% |
| Sugars | 0.5 g | 1% |
| Protein | 8 g | 15% |
Variations & Substitutions
- Dairy-Free Yogurt: Use soy milk, almond milk, or coconut milk instead of cow’s milk. Keep in mind that the texture and flavor will differ depending on the type of non-dairy milk used.
- Flavored Yogurt: Add fruit purees, extracts (vanilla, almond), or spices (cinnamon, nutmeg) to the milk mixture before incubating.
- Sweetened Yogurt: Stir in honey, maple syrup, or other sweeteners after the yogurt has finished fermenting.
- Greek-Style Yogurt: Strain the finished yogurt through cheesecloth to remove the whey and create a thicker consistency.
- Goat Milk Yogurt: Use goat milk for a tangier flavor.
FAQs (Frequently Asked Questions):
Q: Why is my yogurt too thin?
A: This could be due to several factors, including using milk with a low-fat content, not maintaining a consistent temperature during incubation, or using a weak yogurt starter. Try using whole milk, ensuring a stable incubation temperature, and using a fresh, high-quality yogurt starter.
Q: My yogurt has a skin on top. Is it still safe to eat?
A: Yes, the skin is harmless and forms when the proteins in the milk react with the air. You can simply remove it before serving or stir it back into the yogurt.
Q: Can I use honey as a starter?
A: No, you must use a yogurt starter that contains live and active cultures. Honey does not contain these cultures and will not ferment the milk into yogurt.
Q: How long does homemade yogurt last?
A: Homemade yogurt will typically last for 1-2 weeks in the refrigerator when stored in an airtight container.
Q: Can I use frozen yogurt as a starter?
A: It’s generally not recommended to use frozen yogurt as a starter, as the freezing process can damage the live and active cultures. Fresh yogurt with live cultures is best for a successful batch.
Final Thoughts
Making your own yogurt at home is a truly rewarding experience. It’s a simple process that allows you to control the ingredients and customize the flavor to your liking. Don’t be afraid to experiment with different types of milk, flavors, and incubation times to create your perfect batch. Share your creations with friends and family, and enjoy the satisfaction of knowing you made something delicious and healthy from scratch. This recipe by Sy provides the perfect starting point for your homemade yogurt journey.