
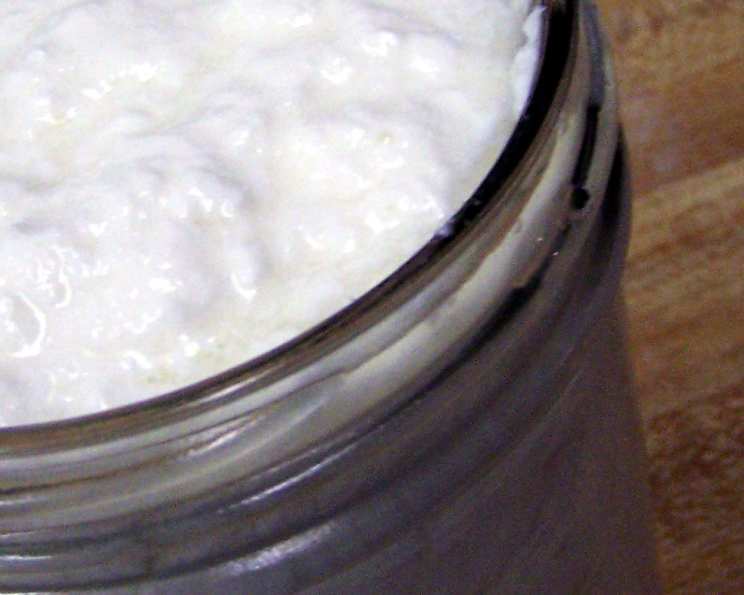
The Magic of Homemade Yogurt: A Simple Guide
The first time I tasted truly fresh yogurt, it was a revelation. Not the overly sweetened, artificially flavored stuff from the grocery store, but creamy, tangy yogurt made in my grandmother’s kitchen. She would serve it with a drizzle of honey and a sprinkle of walnuts, a simple yet exquisite treat that transported me to a place of pure comfort. That experience sparked a lifelong passion for creating my own yogurt at home, and I’m thrilled to share my tried-and-true method with you.
Recipe Overview
- Prep Time: 15 minutes
- Cook Time: 6 hours
- Total Time: 6 hours 15 minutes
- Yields: 1 quart
- Dietary Type: Vegetarian
Ingredients
- 1 quart milk (any kind, though whole milk creates a richer yogurt)
- 1/4 cup yogurt (from store), with live active cultures
- 1/2 – 1 cup nonfat dry milk powder (powdered milk)
Equipment Needed
- Large pot
- Whisk
- Thermometer (optional, but recommended)
- Very clean Tupperware container with lid
- Oven or toaster oven, or crockpot
Instructions
- In a large pot, combine the milk and nonfat dry milk powder. The powdered milk helps to thicken the yogurt, resulting in a creamier texture. Whisk well to ensure the powder is fully dissolved.
- Place the pot on the stove over medium heat. Watch carefully as the milk begins to heat.
- Heat the milk until it threatens to boil over. This is important for denaturing the milk proteins, which contributes to a thicker yogurt. You’ll see small bubbles forming around the edges of the pot and a slight skin developing on the surface. Do not let it boil vigorously!
- Remove the pot from the heat immediately. Now, the milk needs to cool down to a temperature that won’t kill the beneficial bacteria in the yogurt starter.
- Cool the milk. You can let it cool slowly at room temperature (this will take a while), or expedite the process by placing the pot in an ice bath. Stir occasionally to ensure even cooling. The ideal temperature is between 105-115°F (40-46°C). If you don’t have a thermometer, the milk should feel warm to the touch, but not scalding.
- Once the milk has cooled to the correct temperature, add the yogurt (the starter) to the pot. Gently whisk the yogurt into the milk until it is fully incorporated. It is important that the yogurt you use as a starter contains live and active cultures, which are essential for the fermentation process. Check the label to make sure that your chosen yogurt contains live cultures.
- Pour the mixture into a very clean Tupperware container and cover it with the lid. Cleanliness is crucial at this stage to prevent unwanted bacteria from interfering with the yogurt culture.
- Now it’s time for incubation. The yogurt needs to be kept at a consistent warm temperature (between 105-115°F) for several hours to allow the bacteria to multiply and ferment the milk into yogurt. There are a few ways to achieve this:
- Warm Oven: Preheat your oven or toaster oven to the “warm” setting (around 100-150°F). Place the covered container of yogurt in the preheated oven and leave it for about 6 hours. Check the temperature periodically to make sure it stays within the desired range. If the oven gets too hot, turn it off for a while and then back on when it cools down.
- Crockpot: Place water in your crockpot, filling the pot about halfway. Then place the covered yogurt container inside the crockpot, making sure the water does not enter the yogurt. Use a thermometer to monitor the water temperature, and adjust your crockpot during the incubation period to maintain ideal temperature, aim for 115 degrees F.
- Sunny Spot (Summer): During the summertime, you can utilize a sunny outdoor spot. Place the covered container in a sunny location, ensuring it’s protected from direct rain or extreme temperature fluctuations.
- Radiator/Wood Stove (Winter): In winter, you can set the container by a radiator or wood stove, but ensure it’s not directly on a hot surface that could overheat the yogurt.
- After about 6 hours, check your yogurt. It should be nice and thick. The longer it incubates, the tangier it will become.
- Once it reaches your desired thickness and tanginess, transfer the yogurt to the refrigerator and let it chill for at least 2 hours. This will further thicken the yogurt and stop the fermentation process. The yogurt can be stored in the fridge for up to two weeks.
Expert Tips & Tricks
- For a thicker yogurt, strain it through cheesecloth after it has chilled. This will remove some of the whey, resulting in a Greek-style yogurt.
- If your yogurt doesn’t thicken properly, it could be due to a few factors: the milk was too hot when you added the starter, the starter wasn’t fresh, or the incubation temperature wasn’t consistent. Try again with a fresh starter and carefully monitor the temperature.
- Don’t discard the whey! It’s a great source of protein and can be used in smoothies, baking, or as a marinade for meat.
- Experiment with different types of milk. Whole milk will give you the richest, creamiest yogurt, while skim milk will result in a lighter version. You can also try using goat milk or sheep milk for a unique flavor.
Serving & Storage Suggestions
Serve your homemade yogurt plain, with a drizzle of honey, fresh fruit, granola, or nuts. It’s also a great addition to smoothies, dips, and sauces. Use it as a healthy substitute for sour cream or mayonnaise.
Store leftover yogurt in an airtight container in the refrigerator for up to two weeks. While homemade yogurt can be frozen, the texture may change slightly upon thawing. It’s best enjoyed fresh.
Nutritional Information
| Nutrient | Amount per Serving (approximate) | % Daily Value (approximate) |
|---|---|---|
| Calories | 150 kcal | 8% |
| Total Fat | 8g | 12% |
| Saturated Fat | 5g | 25% |
| Cholesterol | 30mg | 10% |
| Sodium | 120mg | 5% |
| Total Carbohydrate | 12g | 4% |
| Dietary Fiber | 0g | 0% |
| Sugars | 12g | – |
| Protein | 8g | 16% |
Note: Nutritional information is an estimate and will vary depending on the type of milk used.
Variations & Substitutions
- Flavored Yogurt: Add fruit preserves, extracts (vanilla, almond), or spices (cinnamon, nutmeg) to the yogurt after it has chilled.
- Sweetened Yogurt: Stir in honey, maple syrup, or sugar to taste after chilling.
- Dairy-Free Yogurt: Experiment with non-dairy milks like almond milk, soy milk, or coconut milk. Keep in mind that the texture and flavor will be different from traditional yogurt.
- Greek Yogurt: Strain the finished yogurt through cheesecloth to remove whey, resulting in a thicker, tangier Greek-style yogurt.
- Vegan Yogurt: Use a plant-based milk and a vegan yogurt starter containing live active cultures.
- Fruit on the bottom: divide the yogurt into individual glass jars and add a spoonful of your favorite fruit preserve on the bottom.
FAQs (Frequently Asked Questions)
Q: What does the nonfat dry milk powder do?
A: The nonfat dry milk powder increases the solids content of the milk, which helps to create a thicker and creamier yogurt.
Q: Can I use any type of milk for making yogurt?
A: Yes, you can use any type of milk, including whole milk, skim milk, goat milk, or even plant-based milk. However, the type of milk will affect the flavor and texture of the yogurt.
Q: My yogurt didn’t thicken, what happened?
A: Several factors could contribute to this: the milk was too hot when you added the starter, the starter wasn’t fresh, the incubation temperature wasn’t consistent, or the starter didn’t contain enough live active cultures.
Q: How long does homemade yogurt last?
A: Homemade yogurt will last for up to two weeks in the refrigerator when stored in an airtight container.
Q: Can I use homemade yogurt as a starter for my next batch?
A: Yes, you can use a few tablespoons of your homemade yogurt as a starter for your next batch. However, the cultures may weaken over time, so it’s best to use a fresh starter every few batches.
Final Thoughts
Making homemade yogurt is a rewarding experience that allows you to control the ingredients and customize the flavor to your liking. It’s also a great way to reduce waste and enjoy a healthier alternative to store-bought yogurt. So, gather your ingredients, follow these simple steps, and prepare to be amazed by the deliciousness of homemade yogurt. I encourage you to experiment with different flavors and toppings and share your creations with friends and family. Bon appétit!