
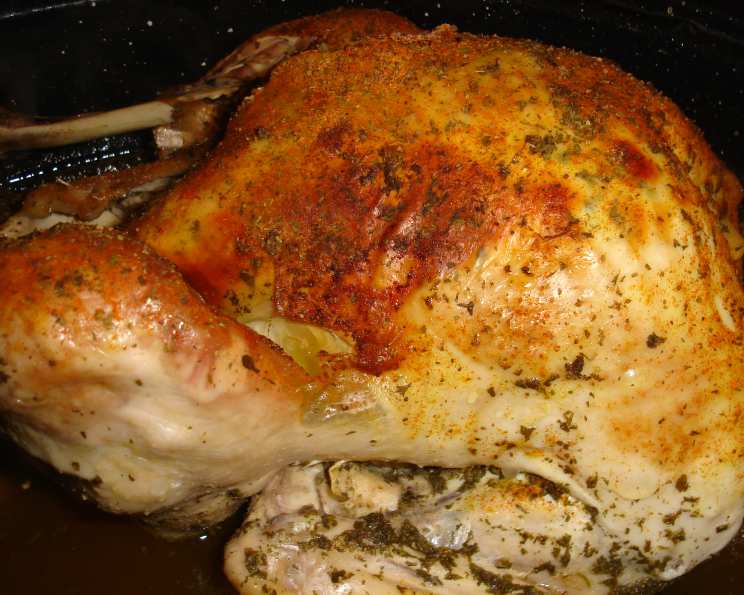
Homestyle Turkey, the Michigander Way
The aroma always hits me first. It’s a complex blend of savory, herbaceous, and deeply comforting – the scent of home in Michigan at Thanksgiving. My grandma Betty, a true Yooper at heart, made this turkey every year. The secret? Not really a secret, but a testament to simple, honest ingredients and a slow, loving bake. The golden-brown skin, the impossibly moist meat, and the gravy…oh, the gravy! It’s a memory I cherish, and a flavor I strive to recreate every Thanksgiving.
Recipe Overview
- Prep Time: 15 minutes
- Cook Time: 4 hours
- Total Time: 4 hours 15 minutes
- Servings: 12-14
- Dietary Type: Not specified
Ingredients
- 1 whole turkey
- 6 tablespoons butter, divided
- 4 cups warm water
- 3 tablespoons chicken bouillon
- 2 tablespoons dried onion flakes
- 2 tablespoons seasoning salt
- 2 tablespoons dried parsley
Equipment Needed
- Large roasting pan
- Aluminum foil
Instructions
-
Preheat your oven to 350 degrees F (175 degrees C). This moderate temperature ensures even cooking and helps keep the turkey moist.
-
Rinse and wash the turkey thoroughly, inside and out. Be sure to remove the giblets from the cavity (do with them what you like; they can be used for gravy!). Pat the turkey dry with paper towels. This helps the skin crisp up during roasting.
-
Place the turkey in a large roasting pan.
-
Carefully separate the skin from the breast meat. This is best done by gently sliding your fingers between the skin and the meat, starting at the neck cavity. Be careful not to tear the skin.
-
Evenly distribute the butter under the skin, over both sides of the breast. This infuses the breast meat with flavor and helps keep it incredibly moist. Use your fingers to spread the softened butter as evenly as possible.
-
In a large bowl or measuring cup, combine the warm water, chicken bouillon, dried onion flakes, and dried parsley. Stir until the bouillon is dissolved.
-
Pour the water mixture over the top of the turkey.
-
Sprinkle the seasoning salt evenly over the entire turkey.
-
Cover the roasting pan tightly with aluminum foil. This traps the steam and helps keep the turkey moist during the initial cooking period.
-
Bake for approximately 4 hours, or until the turkey is cooked through. The internal temperature of the thickest part of the thigh should reach 180 degrees F (82 degrees C). Use a meat thermometer to check for doneness. If the turkey starts to brown too quickly, you can lower the oven temperature slightly.
-
Remove the foil for the last 45 minutes to 1 hour of cooking time to allow the turkey to brown and the skin to crisp up. Basting the turkey with the pan juices every 15-20 minutes during this time will further enhance the browning and flavor.
Expert Tips & Tricks
- Brining: For an even more flavorful and moist turkey, consider brining it overnight before cooking. There are many brine recipes available online, but a simple salt and sugar brine can work wonders.
- Aromatic Infusion: Add aromatics like quartered onions, carrots, celery, and fresh herbs (such as thyme, rosemary, and sage) to the bottom of the roasting pan. They will infuse the pan juices with flavor, creating a delicious base for gravy.
- Resting Period: Allow the turkey to rest for at least 20-30 minutes after removing it from the oven. This allows the juices to redistribute throughout the meat, resulting in a more tender and flavorful bird. Cover the turkey loosely with foil during the resting period to keep it warm.
- Gravy Gold: Don’t discard the pan drippings! These are the key to making a rich and flavorful gravy. Skim off any excess fat from the drippings, then whisk in flour or cornstarch to create a roux. Gradually add chicken broth or water, stirring constantly, until the gravy reaches your desired consistency. Season with salt, pepper, and any other herbs or spices you like.
Serving & Storage Suggestions
Serve the turkey hot, carved, and accompanied by your favorite Thanksgiving side dishes, such as mashed potatoes, stuffing, cranberry sauce, and green bean casserole. Leftover turkey should be cooled completely before storing it in an airtight container in the refrigerator. It will keep for up to 3-4 days. You can also freeze leftover turkey for longer storage (up to 2-3 months). Reheat leftover turkey in the oven, microwave, or skillet. Add a little broth or water to keep it moist during reheating.
Nutritional Information
| Nutrient | Amount per Serving | % Daily Value |
|---|---|---|
| Calories | 54.8 kcal | N/A |
| Calories from Fat | 52 kcal | N/A |
| Total Fat | 5.8 g | 8% |
| Saturated Fat | 3.6 g | 18% |
| Cholesterol | 15.3 mg | 5% |
| Sodium | 66.8 mg | 2% |
| Total Carbohydrate | 0.8 g | 0% |
| Dietary Fiber | 0.1 g | 0% |
| Sugars | 0.3 g | 1% |
| Protein | 0.2 g | 0% |
Note: Nutritional information is an estimate and may vary based on specific ingredients and preparation methods.
Variations & Substitutions
- Herb Infusion: Experiment with different herbs under the skin. Fresh rosemary, thyme, and sage are all excellent choices.
- Citrus Zing: Add slices of lemon or orange to the turkey cavity for a bright, citrusy flavor.
- Spice It Up: For a spicier turkey, add a pinch of cayenne pepper or smoked paprika to the seasoning salt.
- Gluten-Free: Ensure the chicken bouillon is gluten-free to make this recipe suitable for those with gluten sensitivities.
FAQs (Frequently Asked Questions)
Q: How do I know when the turkey is done?
A: The best way to check for doneness is to use a meat thermometer. Insert it into the thickest part of the thigh, being careful not to touch the bone. The internal temperature should reach 180 degrees F (82 degrees C).
Q: Why is it important to let the turkey rest before carving?
A: Resting allows the juices to redistribute throughout the meat, resulting in a more tender and flavorful turkey. If you carve the turkey immediately after removing it from the oven, the juices will run out, leaving the meat dry.
Q: Can I use fresh onion instead of dried onion flakes?
A: Yes, you can substitute fresh onion for dried onion flakes. Use about 1/2 cup of finely chopped onion.
Q: Can I make the water mixture ahead of time?
A: Yes, you can make the water mixture a day or two in advance and store it in the refrigerator.
Q: What if my turkey starts to brown too quickly?
A: If your turkey starts to brown too quickly, you can tent it with aluminum foil to prevent it from burning. You can also lower the oven temperature slightly.
Final Thoughts
This Homestyle Turkey recipe is more than just a set of instructions; it’s a tradition, a connection to family, and a taste of home. It’s simple, honest, and consistently delivers a moist, flavorful bird that will be the star of your Thanksgiving feast. Gather your loved ones, put on some holiday music, and embark on this culinary journey. Don’t be afraid to experiment with the variations and make it your own. And most importantly, savor the moment and enjoy the delicious results. I’d love to hear about your experiences, so please share your feedback and any creative twists you add to this classic recipe. Perhaps pair it with a crisp Riesling from the Leelanau Peninsula for a true taste of Michigan!