
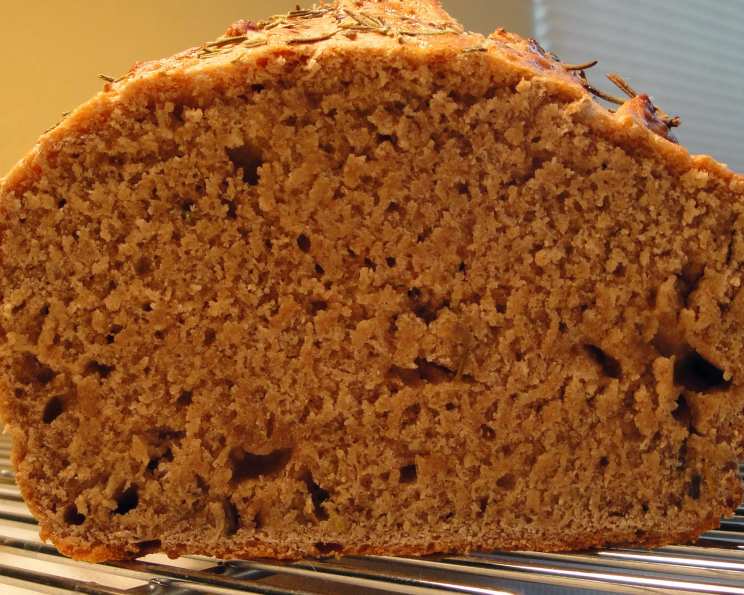
The Golden Embrace of Honey Bread
My earliest memories are filled with the comforting aroma of baking bread. But there’s one bread in particular that always takes me back: my grandmother’s honey bread. The subtle sweetness, the hint of rosemary, and the incredibly soft crumb made it an absolute treat. It wasn’t just a loaf of bread; it was a symbol of warmth, love, and togetherness, and I am so excited to share this bread with you.
Recipe Overview
- Prep Time: 20 minutes
- Rise Time: 1 hour 20 minutes
- Cook Time: 25-30 minutes
- Total Time: Approximately 2 hours
- Yields: 1 loaf
- Dietary Type: Vegetarian
Ingredients
- 1 ½ teaspoons chopped rosemary
- 2 tablespoons canola oil
- 2 ¼ teaspoons active dry yeast (1 packet)
- 1 ¼ cups warm water (around 110 degrees)
- 3 ½ cups all-purpose flour
- 1 ½ teaspoons salt
- 6 tablespoons honey
- Optional: Egg white for wash
- Optional: Additional rosemary for sprinkling
Equipment Needed
- Small sauté pan
- Small bowl
- Large bowl
- 9 x 4-inch loaf pan (or baking sheet)
- Cooling rack
- Plastic wrap or damp cloth
Instructions
-
Begin by toasting the rosemary: In a small sauté pan over medium-high heat, toast the chopped rosemary until fragrant, about 30 seconds. Watch carefully to prevent burning. Remove from the heat and set aside. Toasting the rosemary intensifies its aroma and flavor.
-
Activate the yeast: In a small bowl, combine the canola oil, active dry yeast, and warm water. Stir to dissolve the yeast. Let the mixture sit for 5 minutes, or until it becomes foamy. This indicates that the yeast is active and ready to leaven the bread.
-
Combine dry ingredients: In a large bowl, combine the all-purpose flour and salt. Mound the mixture in the bowl, creating a well in the center.
-
Incorporate wet ingredients: Slowly pour the dissolved yeast mixture into the well, working in the flour with your fingertips. Gradually incorporate more flour until a shaggy dough forms.
-
Knead the dough: Knead the dough until a ball forms. Then, knead in the honey and toasted rosemary. The dough will be quite sticky at this stage.
-
First rise: Put the dough in a large oiled bowl and turn to coat. Cover the bowl with a damp cloth or oiled plastic wrap. Let the dough rise in a warm place until it has increased to 1 ½ times its original size, about 1 hour. This first rise develops the gluten and flavor of the bread.
-
Shape the dough: Grease a 9 x 4-inch loaf pan. Punch down the dough to release the air. Transfer the dough to a floured work surface. Knead for 5 minutes to redistribute the yeast. Shape the dough into a loaf.
-
Second rise: Place the loaf in the prepared pan. Cover the pan with plastic wrap and let rise for 20 minutes. Alternatively, you can form the dough into a round or oval loaf and bake it on a greased baking sheet; in this case, also allow a 20 minute rise.
-
Preheat the oven: While the dough rises for the second time, preheat your oven to 400°F (200°C).
-
Bake the bread: Place the loaf pan (or baking sheet) in the preheated oven and bake until the top is golden brown, about 25 to 30 minutes. For a richer, more golden crust, brush the loaf with an egg white wash before baking and sprinkle with additional rosemary.
-
Cool the bread: Once the bread is baked, invert the pan onto a cooling rack and let it sit for 5 minutes. Then, remove the pan and let the bread cool completely on the rack before slicing. This prevents the bread from becoming soggy.
Expert Tips & Tricks
- For extra flavor: Infuse the canola oil with rosemary by gently heating the oil with a sprig of fresh rosemary over low heat for a few minutes before adding it to the yeast mixture.
- Sticky Dough Solutions: The dough can be quite sticky, so don’t be afraid to use extra flour on your hands and work surface while kneading.
- Oven Variations: Every oven is different. If your bread is browning too quickly, tent it with foil during the last 10 minutes of baking. If it’s not browning enough, increase the temperature slightly for the last few minutes.
- Doneness Check: The internal temperature of the bread should reach 200-210°F (93-99°C) when it’s done. You can use an instant-read thermometer to check. A hollow sound when tapped on the bottom also indicates doneness.
- Honey Type Matters: Using different types of honey can subtly alter the flavor profile of the bread. Experiment with wildflower, clover, or buckwheat honey.
- Make-Ahead Tip: You can prepare the dough through the first rise, then refrigerate it overnight. Let it come to room temperature before shaping and baking.
Serving & Storage Suggestions
This honey bread is delicious served warm with a smear of butter or a drizzle of extra honey. It also makes fantastic toast or sandwiches.
To store, wrap the cooled bread tightly in plastic wrap or place it in an airtight container. At room temperature, it will stay fresh for 2-3 days. In the refrigerator, it will last for up to a week. For longer storage, slice the bread and freeze it in a freezer-safe bag or container for up to 2 months. Thaw at room temperature or toast directly from frozen.
Nutritional Information
| Nutrient | Amount per Serving | % Daily Value |
|---|---|---|
| Calories | 282 kcal | 14% |
| Total Fat | 5.3g | 7% |
| Saturated Fat | 0.5g | 3% |
| Cholesterol | 0mg | 0% |
| Sodium | 424mg | 18% |
| Total Carbohydrate | 50.3g | 18% |
| Dietary Fiber | 1.4g | 5% |
| Sugars | 11.6g | 23% |
| Protein | 7.1g | 14% |
Note: Nutritional information is an estimate and can vary based on specific ingredients and portion sizes.
Variations & Substitutions
- Whole Wheat Honey Bread: Substitute up to half of the all-purpose flour with whole wheat flour for a nuttier flavor and added fiber.
- Gluten-Free Honey Bread: Use a gluten-free all-purpose flour blend with xanthan gum. Be sure to follow the package instructions for best results.
- Spiced Honey Bread: Add a pinch of cinnamon, nutmeg, or cardamom to the flour mixture for a warm, spiced flavor.
- Citrus Honey Bread: Zest of one lemon or orange can be added to the dough for a bright, citrusy twist.
- Nutty Honey Bread: Mix in 1/2 cup of chopped walnuts, pecans, or almonds for added texture and flavor.
- Vegan Honey Bread: Substitute the honey with agave nectar or maple syrup.
FAQs (Frequently Asked Questions)
Q: Why is my dough so sticky?
A: Honey bread dough is naturally sticky due to the high honey content. Ensure you measure your flour accurately and don’t be afraid to use extra flour on your hands and work surface.
Q: Can I use instant yeast instead of active dry yeast?
A: Yes, you can. If using instant yeast, you can add it directly to the flour mixture without proofing it in water first.
Q: How do I know when the bread is done baking?
A: The bread is done when the top is golden brown and a toothpick inserted into the center comes out clean. You can also check the internal temperature with an instant-read thermometer; it should be between 200-210°F (93-99°C).
Q: Can I make this recipe without rosemary?
A: Absolutely! If you’re not a fan of rosemary, you can omit it entirely or substitute it with another herb, such as thyme or oregano.
Q: My bread sank in the middle. What did I do wrong?
A: A few factors could cause this. Make sure your yeast is active and hasn’t expired. Also, avoid over-proofing the dough, as this can cause it to collapse during baking. Finally, ensure your oven is at the correct temperature.
Final Thoughts
This honey bread is more than just a recipe; it’s an invitation to create memories in your own kitchen. I encourage you to bake this bread, share it with loved ones, and experience the golden embrace of its warmth and flavor. Whether you enjoy it for breakfast, as a snack, or alongside a hearty soup, I hope it brings you as much joy as it has brought me over the years. Don’t hesitate to leave a comment sharing your experience or any variations you’ve tried. Happy baking!