
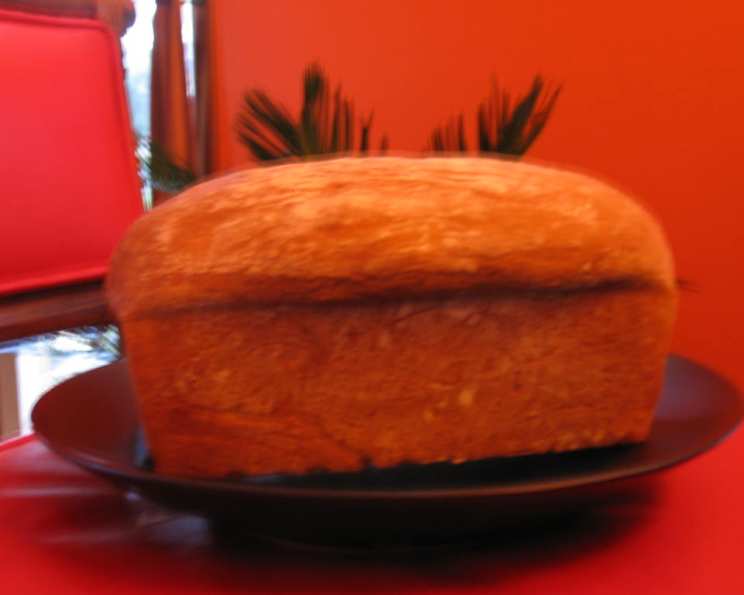
Honey Cornmeal Yeast Bread: A Taste of Sunshine in Every Slice
I remember the first time I tasted honey cornmeal bread. It was at a small-town bakery in rural Pennsylvania, the kind with a screen door that slams shut with a satisfying thwack and the scent of warm yeast hanging heavy in the air. The golden crust, slightly gritty from the cornmeal, yielded to a soft, honey-sweetened crumb. One bite and I was transported to a simpler time, a reminder of home-baked goodness and the comforting flavors of childhood. I’ve been chasing that taste ever since, and this recipe gets me incredibly close.
Recipe Overview
- Prep Time: 2 hours
- Cook Time: 40-45 minutes
- Total Time: 3 hours 30 minutes
- Yields: 2 loaves
- Dietary Type: Vegetarian
Ingredients
- 1 package dry yeast
- 1/4 cup warm water
- 2/3 cup cornmeal
- 2 teaspoons salt
- 3 cups milk
- 2/3 cup honey
- 3 tablespoons butter
- 6 1/2 – 7 cups flour (all-purpose or bread flour)
Equipment Needed
- Large mixing bowl
- Saucepan
- Measuring cups and spoons
- Two 9×5 inch loaf pans
- Clean kitchen towel
- Greased bowl
- Wire rack
Instructions
-
Begin by proofing the yeast. In a small bowl, dissolve one package of dry yeast in 1/4 cup of warm water. Let it sit for about 5-10 minutes until it becomes foamy, indicating the yeast is active.
-
In a large mixing bowl, combine 2/3 cup of cornmeal and 2 teaspoons of salt.
-
In a saucepan, heat 3 cups of milk, 2/3 cup of honey, and 3 tablespoons of butter over medium heat until the butter is melted and the mixture is warmed to about 115 degrees Fahrenheit. Be careful not to scald the milk; you want it warm, not boiling.
-
Slowly add the warm milk mixture to the cornmeal and salt, stirring constantly to prevent lumps from forming. This step ensures the cornmeal is properly hydrated and contributes to the bread’s moist texture.
-
Add 3 cups of flour to the mixture and stir well to combine. The mixture will be quite wet at this stage.
-
Pour in the proofed yeast mixture and stir well to incorporate it into the batter. The yeast is the lifeblood of the bread, providing the lift and airy texture we desire.
-
Gradually add the remaining flour (3 1/2 – 4 cups), mixing until a stiff dough forms. You may not need all of the flour, so add it slowly until the dough pulls away from the sides of the bowl and forms a shaggy mass.
-
Turn the dough out onto a lightly floured surface and knead for about 100 times, or approximately 8-10 minutes. Kneading develops the gluten in the flour, which gives the bread its structure. The dough should be smooth and elastic after kneading.
-
Place the kneaded dough in a greased bowl, turning to coat all sides. Cover the bowl with a clean kitchen towel and let it rise in a warm place until doubled in size, about 1 hour. This is the first rise, allowing the yeast to work its magic.
-
Punch down the risen dough to release the air. This step redistributes the yeast and ensures an even texture.
-
Let the dough rise again, covered, until doubled in size, about 1/2 – 3/4 hour. This second rise contributes to a lighter, more airy loaf.
-
Turn the dough out onto a lightly floured counter and divide it into two equal pieces.
-
Form each piece into a loaf shape and place them in two greased 9×5 inch loaf pans.
-
Cover the loaf pans with a clean kitchen towel and let the dough rise again until doubled in size, about 30-45 minutes. This final rise is crucial for a light and airy final product.
-
Preheat your oven to 375 degrees Fahrenheit (190 degrees Celsius).
-
Bake the loaves for about 40-45 minutes, or until they are golden brown and sound hollow when tapped on the bottom. If the tops of the loaves start to brown too quickly, cover them loosely with aluminum foil.
-
Remove the loaves from the oven and let them cool in the pans for a few minutes before transferring them to a wire rack to cool completely. This prevents the bread from becoming soggy.
Expert Tips & Tricks
- Temperature is key: Make sure your milk is warm to the touch but not hot, around 115°F (46°C). Too hot, and you’ll kill the yeast; too cold, and it won’t activate properly. A kitchen thermometer is your best friend here.
- Don’t over-knead: Over-kneading can result in a tough loaf. Knead until the dough is smooth and elastic, but no longer.
- Rising time varies: The rising time will depend on the temperature and humidity of your kitchen. Be patient and let the dough rise until doubled, even if it takes longer than the recipe suggests.
- Gluten-free: For a gluten-free version, use a high-quality gluten-free all-purpose flour blend and consider adding a teaspoon of xanthan gum to help with the structure.
Serving & Storage Suggestions
This honey cornmeal yeast bread is delicious served warm with a pat of butter or a drizzle of honey. It makes excellent toast and wonderful sandwiches. It pairs beautifully with soups, stews, and salads.
Store leftover bread in an airtight container at room temperature for up to 3 days, in the refrigerator for up to a week, or in the freezer for up to 3 months. To reheat, wrap the bread in foil and warm it in a 350°F (175°C) oven for 10-15 minutes, or until heated through. You can also toast individual slices for a quick and easy snack.
Nutritional Information
| Nutrient | Amount per Serving (estimated) | % Daily Value (based on 2000 calorie diet) |
|---|---|---|
| Calories | 236 kcal | 12% |
| Total Fat | 3.6g | 6% |
| Saturated Fat | 2g | 10% |
| Cholesterol | 10mg | 3% |
| Sodium | 266mg | 11% |
| Total Carbohydrate | 45g | 15% |
| Dietary Fiber | 1.5g | 6% |
| Sugars | 9.4g | N/A |
| Protein | 5.9g | 12% |
Note: Nutritional information is an estimate and may vary based on specific ingredients and portion sizes.
Variations & Substitutions
- Spice it up: Add a teaspoon of ground cinnamon or nutmeg to the dough for a warm, spicy flavor.
- Herbaceous twist: Incorporate 2 tablespoons of chopped fresh rosemary or thyme for a savory version.
- Sweeten it further: Replace some of the honey with maple syrup for a richer, more complex sweetness.
- Dairy-free: Substitute the milk with almond milk, soy milk, or oat milk. Use a plant-based butter alternative.
FAQs (Frequently Asked Questions)
Q: Can I use instant yeast instead of active dry yeast?
A: Yes, you can. If using instant yeast, you can skip the proofing step and add it directly to the dry ingredients. Use the same amount as the active dry yeast.
Q: My dough isn’t rising. What could be the problem?
A: Several factors can affect rising. Ensure your yeast is fresh and active, the water is warm enough (but not too hot), and the room is warm enough. Also, check that you haven’t added too much salt, as salt can inhibit yeast activity.
Q: How do I prevent the crust from getting too dark?
A: If the crust is browning too quickly, tent the loaves with aluminum foil during the last 15-20 minutes of baking.
Q: Can I freeze the dough for later use?
A: Yes, you can freeze the dough after the first rise. Punch it down, wrap it tightly in plastic wrap, and then place it in a freezer bag. Thaw overnight in the refrigerator before shaping and baking.
Q: The bread is dense and heavy. What did I do wrong?
A: This could be due to several factors, including not kneading enough, not allowing the dough to rise sufficiently, or using too much flour. Be sure to knead for the recommended time, allow the dough to double in size during each rise, and measure the flour accurately.
Final Thoughts
Honey cornmeal yeast bread is more than just a recipe; it’s an experience. From the initial bloom of the yeast to the golden-brown crust emerging from the oven, the process is both rewarding and therapeutic. I hope this recipe inspires you to create your own loaf, filling your kitchen with the comforting aroma of homemade bread. Don’t be afraid to experiment with variations and make it your own. And most importantly, share your creations with friends and family – because nothing tastes better than bread baked with love and shared with those you cherish.