
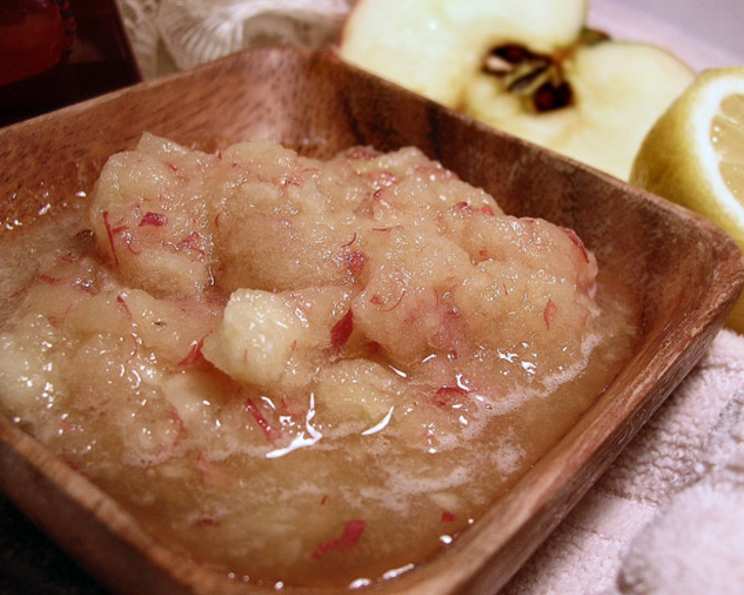
Honey Facial Toner: A Sweet Treat for Your Skin
I remember watching my grandmother in her garden, always meticulously tending to her herbs and flowers. She had this old, weathered notebook filled with handwritten recipes – not just for food, but for everything from cough syrups to beauty treatments. One of her favorites, tucked between rosewater recipes and lavender sachets, was a simple honey and apple facial. She swore it kept her skin glowing, and honestly, seeing her radiant complexion, I was inclined to believe her! Now, years later, I find myself reaching for that same natural remedy, a testament to the enduring power of simple, wholesome ingredients.
Recipe Overview
- Prep Time: 5 minutes
- Cook Time: 0 minutes
- Total Time: 5 minutes
- Servings: 1
- Yield: Enough for one facial application
- Dietary Type: Vegetarian, Gluten-Free, Dairy-Free
Ingredients
- 1 tablespoon honey
- 1 teaspoon fresh lemon juice
- ½ apple, cored and cut into pieces
Equipment Needed
- Blender
- Small bowl (optional, for applying the toner)
Instructions
- Begin by preparing your apple. Core half of an apple and cut it into small pieces. This will help your blender process it smoothly.
- In a blender, combine the apple pieces, 1 tablespoon of honey, and 1 teaspoon of fresh lemon juice.
- Puree the ingredients until you achieve a smooth consistency. You want a mixture that is easily spreadable.
- Apply a thin, even layer of the honey-apple mixture to your face, avoiding the delicate eye area.
- Leave the toner on for 15 minutes. Relax and let the natural ingredients work their magic.
- After 15 minutes, rinse your face thoroughly with cool water.
- Gently pat your skin dry with a soft towel.
Expert Tips & Tricks
- Honey Selection: Opt for raw, unfiltered honey for the best results. Raw honey retains more of its natural enzymes and antioxidants. Manuka honey is another great option, known for its potent antibacterial properties.
- Lemon Juice Caution: Lemon juice is a natural brightener, but it can be irritating to sensitive skin. If you have sensitive skin, start with just a few drops or consider diluting the mixture with a little water.
- Apple Variety: Different apple varieties will yield slightly different results. A sweeter apple, like a Fuji or Gala, will create a more hydrating toner, while a tart apple, like a Granny Smith, will offer a slightly more astringent effect. Experiment to find your favorite!
- Blending Power: If you don’t have a high-powered blender, you can grate the apple finely before adding it to the mixture. This will help ensure a smooth, lump-free toner.
- Patch Test: Before applying the toner to your entire face, perform a patch test on a small area of skin (like your inner arm) to check for any allergic reactions or sensitivities.
- For Extra Exfoliation: Add a pinch of finely ground oats to the blender for a gentle exfoliating effect.
- Consistency is Key: For best results, use this toner 1-2 times per week.
Serving & Storage Suggestions
This toner is best used immediately after preparation. Due to the fresh ingredients, it doesn’t store well. If you have any leftover mixture, you can store it in an airtight container in the refrigerator for up to 24 hours, but be aware that the apple may start to brown. It’s always preferable to make a fresh batch for each application.
Nutritional Information
| Nutrient | Amount per Serving | % Daily Value* |
|---|---|---|
| Calories | 65 kcal | 3% |
| Total Fat | 0.1g | 0% |
| Saturated Fat | 0g | 0% |
| Cholesterol | 0mg | 0% |
| Sodium | 1mg | 0% |
| Total Carbohydrate | 17g | 6% |
| Dietary Fiber | 1g | 4% |
| Sugars | 14g | N/A |
| Protein | 0.2g | 0% |
*Percent Daily Values are based on a 2,000 calorie diet.
Variations & Substitutions
- Honey Alternatives: If you’re vegan or allergic to honey, you can try using maple syrup or agave nectar as a substitute, although the properties might not be exactly the same.
- Lemon Juice Substitute: For sensitive skin, try substituting the lemon juice with apple cider vinegar. It’s gentler and still offers toning benefits.
- Herbal Infusion: For an extra boost of antioxidants, you can add a few drops of green tea or chamomile tea to the blender.
- Seasonal Adaptations: In the fall, try using a small piece of cooked pumpkin or butternut squash in place of the apple. In the summer, add a few slices of cooling cucumber.
- Adding Essential Oils: Depending on your skin type, you can add a drop or two of skin-friendly essential oils such as lavender (for relaxation), tea tree (for acne-prone skin), or rosehip (for anti-aging). Be sure to use high-quality, pure essential oils and test for sensitivities first.
FAQs (Frequently Asked Questions)
Q: Can I use this toner every day?
A: It’s generally recommended to use this toner 1-2 times per week. Overuse can potentially dry out your skin, especially if you have sensitive skin.
Q: Is this toner suitable for all skin types?
A: While generally safe, those with very sensitive skin should use caution due to the lemon juice. Always do a patch test first.
Q: Can I leave the toner on longer than 15 minutes?
A: It’s best to stick to the recommended 15 minutes to avoid potential irritation from the lemon juice.
Q: Can I use a different type of apple?
A: Yes! Experiment with different apple varieties to find your favorite. Sweeter apples will be more hydrating, while tart apples offer a slightly more astringent effect.
Q: Why is honey good for the skin?
A: Honey is a natural humectant, meaning it helps to retain moisture in the skin. It also has antibacterial and anti-inflammatory properties, making it beneficial for acne-prone skin.
Final Thoughts
I truly hope you give this simple honey facial toner a try. It’s a wonderful way to pamper yourself with natural ingredients and bring a little bit of that old-fashioned, grandmotherly wisdom into your skincare routine. Don’t hesitate to play around with the ingredients and find the perfect combination for your skin. And please, let me know how it turns out! Your feedback is always welcome, and I’d love to hear about any creative twists you come up with. After all, the best recipes are those that evolve and adapt to our individual tastes and needs. Enjoy!