
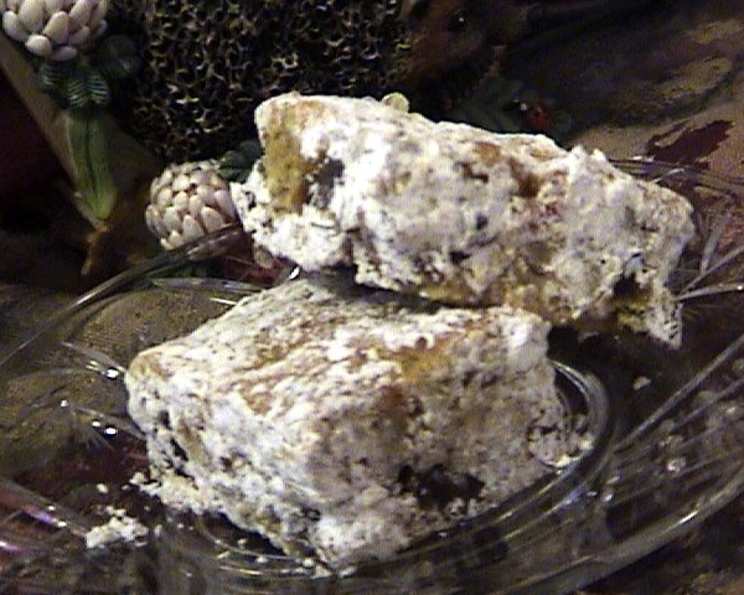
Honey Fruit Bars: A Taste of Nostalgia
The scent of honey and baked fruit instantly transports me back to my grandmother’s kitchen. She always had a tin of these bars, perfect for an afternoon treat or a simple dessert after supper. The chewy dates, the pop of candied cherries, and the satisfying crunch of nuts – it was a symphony of textures and flavors that spoke of simple pleasures and enduring love. These Honey Fruit Bars are more than just a recipe; they’re a memory, a comfort, and a slice of pure happiness.
Recipe Overview
- Prep Time: 20 minutes
- Cook Time: 45 minutes
- Total Time: 1 hour 5 minutes
- Servings: Approximately 24 bars
- Yield: One 9×13 inch pan
- Dietary Type: Not specified; contains eggs and may contain gluten depending on flour used.
Ingredients
- 1 ⅓ cups all-purpose flour
- 1 teaspoon baking powder
- ¼ teaspoon salt
- 3 large eggs, beaten
- 1 cup honey
- 1 teaspoon vanilla extract
- 1 ¾ cups pitted chopped dates
- ½ cup halved candied cherries
- 1 cup chopped nuts (walnuts, pecans, or a mixture work well)
- Powdered sugar, for dusting (optional)
Equipment Needed
- 9×13 inch baking pan
- Mixing bowls
- Sifter or fine-mesh sieve
- Measuring cups and spoons
- Whisk or electric mixer
- Rubber spatula
- Cooling rack
Instructions
-
Preheat your oven to 350°F (175°C). Grease a 9×13 inch baking pan thoroughly. This will prevent the bars from sticking and make them easier to remove.
-
In a medium bowl, whisk together the flour, baking powder, and salt. Sifting the dry ingredients ensures they are evenly distributed and helps to prevent lumps in the batter.
-
In a large bowl, combine the beaten eggs, honey, and vanilla extract. Beat until well combined using a whisk or an electric mixer. The mixture should be smooth and slightly frothy.
-
Gradually add the dry ingredients to the wet ingredients, mixing until just combined. Be careful not to overmix the batter, as this can result in tough bars.
-
Gently fold in the chopped dates, candied cherries, and chopped nuts. Ensure that the fruit and nuts are evenly distributed throughout the batter.
-
Pour the batter into the prepared baking pan and spread it evenly.
-
Bake for 45 minutes, or until a toothpick inserted into the center comes out clean. Keep a close eye on the bars during the last 15 minutes of baking, as oven temperatures can vary. If the top starts to brown too quickly, you can tent the pan with foil.
-
Remove the pan from the oven and let the bars cool completely in the pan on a wire rack before cutting them into squares or bars.
-
Once the bars are completely cool, dust them generously with powdered sugar, if desired. This adds a touch of sweetness and makes them look more appealing.
Expert Tips & Tricks
-
Toasting the nuts: Toasting the nuts before adding them to the batter will enhance their flavor and add a more pronounced nutty taste to the bars. Spread the chopped nuts on a baking sheet and toast them in a 350°F (175°C) oven for about 5-7 minutes, or until they are lightly golden brown and fragrant. Let them cool completely before adding them to the batter.
-
Preventing sticky dates: Dates can sometimes be sticky and clump together. To prevent this, toss the chopped dates with a tablespoon of flour before adding them to the batter. This will help them stay separate and distribute evenly throughout the bars.
-
Adding spices: For a warm and cozy flavor, try adding a pinch of cinnamon, nutmeg, or cardamom to the dry ingredients.
-
Cutting clean bars: For neat and clean cuts, chill the bars in the refrigerator for about 30 minutes before cutting them. Use a sharp knife and wipe it clean between each cut.
-
Adjusting sweetness: If you prefer a less sweet bar, you can reduce the amount of honey slightly.
Serving & Storage Suggestions
These Honey Fruit Bars are delicious served as a snack, dessert, or even a sweet addition to a brunch spread. They pair well with a cup of coffee, tea, or a glass of milk. For a more elegant presentation, serve them with a dollop of whipped cream or a scoop of vanilla ice cream.
To store the bars, place them in an airtight container at room temperature. They will stay fresh for up to 3-4 days. You can also freeze the bars for longer storage. Wrap them individually in plastic wrap and then place them in a freezer-safe container or bag. They can be frozen for up to 2-3 months. Thaw them at room temperature before serving.
Nutritional Information
(Estimated values, may vary based on specific ingredients used)
| Nutrient | Amount per Serving | % Daily Value |
|---|---|---|
| Calories | 150 kcal | 8% |
| Total Fat | 5g | 6% |
| Saturated Fat | 1g | 5% |
| Cholesterol | 20mg | 7% |
| Sodium | 30mg | 1% |
| Total Carbohydrate | 25g | 9% |
| Dietary Fiber | 1g | 4% |
| Sugars | 15g | – |
| Protein | 2g | 4% |
Variations & Substitutions
-
Gluten-Free: Substitute the all-purpose flour with a gluten-free blend. Be sure to check that the blend contains xanthan gum or another binding agent to help hold the bars together.
-
Different Nuts: Feel free to experiment with different types of nuts, such as almonds, hazelnuts, or macadamia nuts.
-
Dried Fruits: You can use a variety of dried fruits in place of or in addition to the dates and cherries, such as dried apricots, cranberries, or raisins.
-
Citrus Zest: Add the zest of an orange or lemon to the batter for a bright and refreshing flavor.
-
Chocolate Chips: For a chocolatey twist, add ½ cup of chocolate chips to the batter.
-
Vegan Option: While this recipe calls for eggs and is not naturally vegan, you may experiment with egg replacements to attempt a vegan version.
FAQs (Frequently Asked Questions)
Q: Can I use a different type of honey?
A: Yes, you can use any type of honey you prefer, such as clover, wildflower, or buckwheat honey. Each type of honey will impart a slightly different flavor to the bars.
Q: Can I omit the candied cherries?
A: Yes, if you don’t like candied cherries, you can leave them out or substitute them with another dried fruit.
Q: How do I know when the bars are done baking?
A: The bars are done when a toothpick inserted into the center comes out clean. The top should also be golden brown and the edges should be slightly pulling away from the sides of the pan.
Q: Can I make these bars ahead of time?
A: Yes, these bars can be made ahead of time and stored at room temperature or in the refrigerator. They actually taste even better the next day, as the flavors have had time to meld together.
Q: The top of my bars browned too quickly. What should I do?
A: If the top of the bars starts to brown too quickly, you can tent the pan with foil to prevent them from burning.
Final Thoughts
I truly hope you’ll give these Honey Fruit Bars a try. They are a delightful treat that’s perfect for any occasion. Whether you’re sharing them with family and friends or enjoying them all by yourself, I’m confident that they will bring a smile to your face. Don’t hesitate to experiment with different variations and substitutions to create your own unique version of this classic recipe. And please, let me know how they turn out – I love hearing from fellow bakers!