
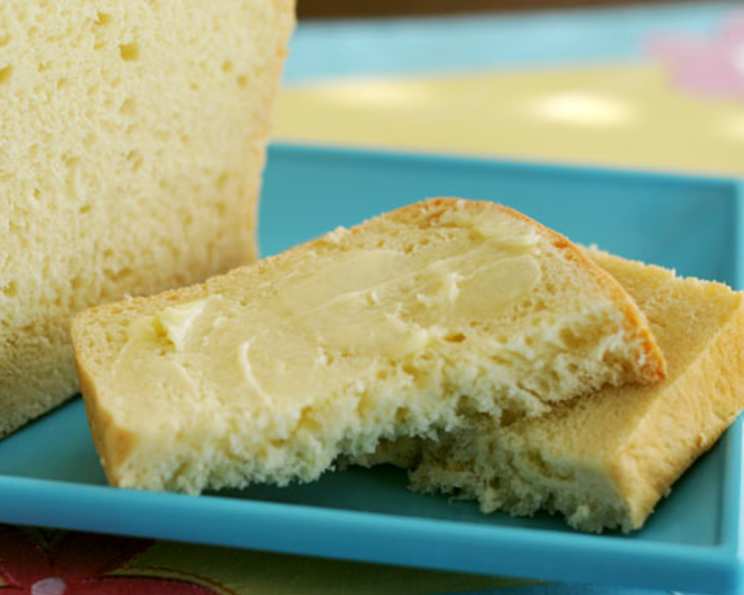
Honey I’m Home Bread: A Slice of Sweet Nostalgia
The aroma alone transports me back to my grandmother’s kitchen. I can almost see her now, flour dusting her apron as she pulled a golden-brown loaf from the oven. The scent of warm honey mingled with the yeasty tang of baking bread was the ultimate welcome—a promise of comfort, connection, and the simple joys of a home-cooked meal. This recipe, though found online, evokes that same feeling; it’s a taste of that familiar love baked into every slice.
Recipe Overview
- Prep Time: 1 hour 30 minutes (includes rising time)
- Cook Time: 30-35 minutes
- Total Time: 2 hours 5 minutes
- Servings: Approximately 19 slices
- Yield: 1 Loaf
- Dietary Type: Not specified (Contains dairy and eggs)
Ingredients
- 1 cup milk
- 4 tablespoons honey
- 1 large egg
- 3 1/4 cups bread flour
- 4 tablespoons butter or margarine
- 1 1/2 teaspoons salt
- 1 1/2 teaspoons instant yeast
Equipment Needed
- Bread machine
- Cutting board
- Greased loaf pan
- Oven
Instructions
- Begin by placing all the ingredients into your bread machine. The order in which you add them may vary depending on your bread machine model, so consult your machine’s instruction manual for the recommended sequence.
- Set the bread machine to the dough setting, which will mix and knead the ingredients to form a dough, and allow it to complete its first rise.
- Once the dough cycle is complete, carefully remove the dough from the bread machine and place it onto a lightly floured cutting board.
- Gently knead the dough for a few minutes to redistribute the yeast and even out the texture. This step helps to create a more consistent crumb structure in the final loaf.
- Shape the dough into a loaf and place it in a greased loaf pan. Ensure the pan is adequately greased to prevent the bread from sticking during baking.
- Cover the loaf pan with a clean kitchen towel or plastic wrap and let it rise in a warm place until it has nearly doubled in size. This second rise is crucial for achieving a light and airy texture. The rising time will depend on the ambient temperature and humidity.
- Preheat your oven to 325°F (163°C). Place the loaf pan in the preheated oven and bake for 30 to 35 minutes, or until the center of the loaf reaches an internal temperature of 190°F (88°C). Using a digital thermometer is the most accurate way to check for doneness.
- If the top of the bread starts to brown too quickly, you can tent it loosely with aluminum foil to prevent burning.
- Once the bread is done, carefully remove the loaf pan from the oven and let it cool in the pan for a few minutes before transferring it to a wire rack to cool completely.
- Allow the bread to cool completely before slicing to prevent it from becoming gummy.
Expert Tips & Tricks
- Milk Temperature: Ensure the milk is lukewarm (around 100-110°F or 38-43°C) to activate the yeast properly. If the milk is too hot, it can kill the yeast. If it’s too cold, the yeast may not activate.
- Honey Measurement: Lightly grease the measuring spoon or cup before measuring the honey. This will help the honey slide out easily and ensure accurate measurement.
- Yeast Activity: If you’re unsure about the freshness of your yeast, you can test it by mixing it with a little warm water and sugar. If it foams up within 5-10 minutes, it’s active and ready to use.
- Oven Calibration: Ovens can vary in temperature. Using an oven thermometer can help ensure your oven is accurately calibrated for the best baking results.
- Kneading Technique: When kneading, use the heel of your hand to push the dough away from you, then fold it back towards you. Rotate the dough and repeat. This develops the gluten, which gives the bread its structure.
- Preventing a Soggy Bottom: To prevent the bottom of the loaf from becoming soggy, you can place a baking sheet on the rack below the loaf pan. This helps to deflect some of the heat.
Serving & Storage Suggestions
This Honey I’m Home Bread is incredibly versatile. Serve it warm with a generous smear of butter or honey for breakfast or a comforting snack. It makes excellent toast and is perfect for sandwiches. Try it with grilled cheese, deli meats, or your favorite fillings.
To store, wrap the cooled loaf tightly in plastic wrap or place it in an airtight container. At room temperature, it will stay fresh for about 2-3 days. For longer storage, you can freeze the bread for up to 2-3 months. To freeze, slice the bread before wrapping it tightly in plastic wrap and placing it in a freezer bag. This allows you to thaw only what you need.
To reheat frozen bread, you can toast individual slices or thaw the entire loaf at room temperature. For a warm, crusty loaf, wrap it in foil and heat it in a 350°F (175°C) oven for about 10-15 minutes.
Nutritional Information
| Nutrient | Amount per Serving | % Daily Value |
|---|---|---|
| Calories | 125.7 kcal | N/A |
| Calories from Fat | 30 g | 24% |
| Total Fat | 3.4 g | 5% |
| Saturated Fat | 1.9 g | 9% |
| Cholesterol | 18 mg | 6% |
| Sodium | 215.7 mg | 8% |
| Total Carbohydrate | 20.7 g | 6% |
| Dietary Fiber | 0.7 g | 2% |
| Sugars | 3.7 g | N/A |
| Protein | 3.1 g | 6% |
Note: Nutritional information is an estimate and may vary based on specific ingredients and serving sizes.
Variations & Substitutions
- Dairy-Free: Substitute the milk with almond milk, soy milk, or oat milk. Use a plant-based butter or margarine alternative.
- Vegan: In addition to the dairy-free substitutions, replace the egg with a flax egg (1 tablespoon of ground flaxseed mixed with 3 tablespoons of water, let sit for 5 minutes to thicken).
- Whole Wheat: Replace up to half of the bread flour with whole wheat flour for a nuttier flavor and added fiber.
- Herb Infusion: Add a tablespoon of dried herbs like rosemary, thyme, or oregano to the dough for a savory twist.
- Citrus Zest: Add the zest of one lemon or orange for a bright, aromatic flavor.
- Spice it up: Add 1/2 teaspoon of cinnamon or nutmeg to the dough for a warmer, spicier bread.
FAQs (Frequently Asked Questions):
Q: Can I use active dry yeast instead of instant yeast?
A: Yes, you can. Use the same amount (1 1/2 teaspoons), but you’ll need to proof it first. Dissolve the yeast in a little warm milk with a pinch of sugar, let it sit for 5-10 minutes until foamy, then add it to the other ingredients.
Q: My bread is too dense. What did I do wrong?
A: Possible reasons include using old yeast, not kneading the dough enough, or not letting it rise sufficiently. Ensure your yeast is fresh, knead the dough until it’s smooth and elastic, and allow ample time for both rises.
Q: How do I prevent the bread from sticking to the pan?
A: Thoroughly grease the loaf pan with butter, shortening, or cooking spray. You can also dust it with flour after greasing for extra insurance.
Q: Can I make this dough ahead of time?
A: Yes, after the first rise, you can refrigerate the dough for up to 24 hours. Punch it down before shaping and allowing the second rise.
Q: What is the best way to slice the bread evenly?
A: Use a serrated bread knife and a gentle sawing motion. Avoid pressing down too hard, which can compress the bread.
Final Thoughts
This Honey I’m Home Bread is more than just a recipe; it’s an invitation to create memories and share moments of warmth and connection. Whether you’re a seasoned baker or just starting out, I encourage you to give this recipe a try. Imagine the sweet aroma filling your kitchen, the delighted faces of your loved ones, and the satisfaction of knowing you created something truly special. So, preheat that oven, gather your ingredients, and get ready to bake a slice of sweet nostalgia. I would love to hear what you think of this recipe!