
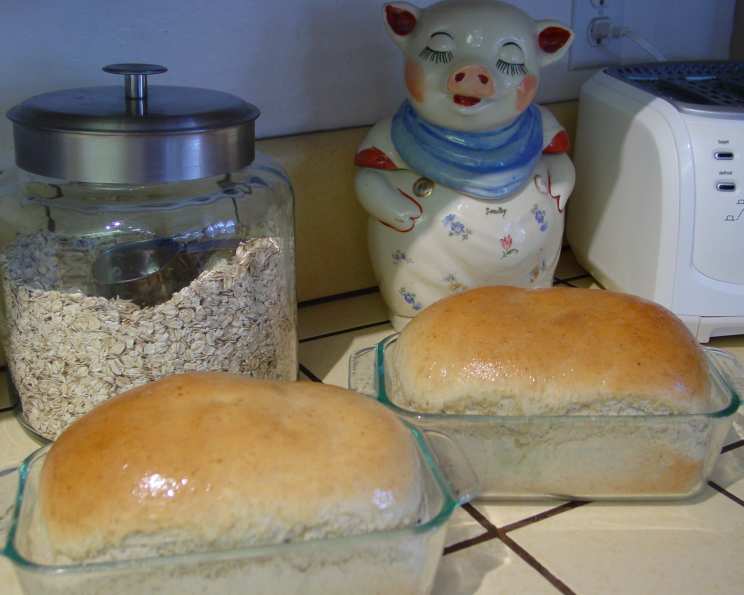
Harriet Lewis’s Honey Oat Bread: A Slice of Simple Comfort
There’s something truly magical about the smell of baking bread, a warmth that permeates the kitchen and fills the soul. I remember one particularly blustery autumn day, years ago, when I was just starting out as a baker. The wind howled outside, rattling the windows of my tiny apartment, but inside, the aroma of honey and toasted oats created a haven. It was a simple loaf of honey oat bread, much like this recipe from Harriet Lewis, but it felt like the most luxurious thing in the world. Each slice, slathered with butter, was a comforting reminder that even the simplest ingredients, when combined with care and time, can create something extraordinary.
Recipe Overview
- Prep Time: 25 minutes (including resting time for yeast)
- Cook Time: 30 minutes (loaves) / 20 minutes (rolls)
- Total Time: Approximately 2 hours 15 minutes (including proofing time)
- Yield: 4 Loaves or Numerous Rolls
- Dietary Type: Vegetarian (can be made vegan with appropriate substitutions)
Ingredients
- 4 cups warm water (not hot, about 110-115°F)
- 3 tablespoons yeast (active dry or instant)
- 1/2 cup oil (vegetable, canola, or melted coconut oil)
- 1/2 cup honey
- 9 cups high-gluten flour (or bread flour)
- 2 1/2 cups quick oats
- 4 teaspoons salt
Equipment Needed
- Stand mixer with dough hook (optional, can knead by hand)
- Large mixing bowl (if kneading by hand)
- Measuring cups and spoons
- Loaf pans (for loaves) or baking sheets (for rolls)
- Dishcloth or kitchen towel
- Floured surface
- Greased pans
Instructions
-
Activate the Yeast: Pour the warm water into the bowl of your stand mixer (or a large mixing bowl). Sprinkle the yeast over the water. Let it sit undisturbed for 5-10 minutes, or until it becomes foamy. This step is crucial to ensure your yeast is active and will help the bread rise properly.
-
Combine Wet Ingredients: Add the oil and honey to the foamy yeast mixture. Stir gently to combine. The honey not only adds sweetness but also contributes to the bread’s soft texture and beautiful crust.
-
Incorporate Dry Ingredients: Gradually add the high-gluten flour, quick oats, and salt to the wet ingredients. If using a stand mixer, attach the dough hook and knead on low speed for about 15 minutes. If kneading by hand, turn the dough out onto a lightly floured surface and knead for 15-20 minutes, until the dough is smooth and elastic. The dough will be slightly sticky, but resist the urge to add too much flour.
-
First Rise (Bulk Fermentation): Turn the dough out onto a floured surface. Form it into a smooth “blob” (round ball or oval). Divide the dough into 4 roughly equal pieces. Form each piece into a ball. Cover the balls with a clean dishcloth or kitchen towel and let them rise for about 15-20 minutes. This initial rise allows the gluten to relax and the dough to develop flavor.
-
Shape the Loaves or Rolls: After the first rise, gently punch down each ball of dough to release any trapped air. Shape each portion into a loaf by flattening it slightly and then rolling it up tightly, tucking the ends underneath. For rolls, shape each portion into the desired roll shape (round, oblong, etc.).
-
Second Rise (Proofing): Place the shaped loaves or rolls onto lightly greased loaf pans or baking sheets. Cover them loosely with a dishcloth or plastic wrap (ensure the plastic wrap does not stick to the dough) and let them rise until doubled in size, about 1-1.5 hours. The warmer the environment, the faster the dough will rise.
-
Bake: Preheat your oven to 350°F (175°C). Bake the loaves for 30 minutes, or the rolls for 20 minutes, or until they are golden brown and sound hollow when tapped on the bottom. Keep an eye on them; if they start to brown too quickly, tent them loosely with foil.
-
Cool and Enjoy: Once baked, remove the loaves or rolls from the oven and transfer them to a wire rack to cool completely before slicing and serving. Brushing the tops with melted butter while they’re still warm is optional but highly recommended for added richness and shine.
Expert Tips & Tricks
- High-gluten flour is essential for a chewy, well-structured loaf. If you can’t find it, bread flour is a good substitute. All-purpose flour can also be used, but the texture may be slightly less chewy.
- The water temperature is crucial for activating the yeast. If it’s too hot, it will kill the yeast; if it’s too cold, the yeast won’t activate properly.
- Don’t over-knead the dough. Over-kneading can result in a tough loaf.
- For a softer crust, you can brush the loaves with milk or an egg wash before baking.
- If your kitchen is cold, you can create a warm environment for proofing the dough by placing it in a slightly warmed oven (turn the oven on for a minute or two, then turn it off) or in a warm spot near a radiator.
- To test if the bread is done, insert a toothpick into the center. If it comes out clean, the bread is ready.
- If the crust starts to get too dark during baking, you can tent the bread with aluminum foil.
Serving & Storage Suggestions
This Honey Oat Bread is delicious served warm with butter, jam, or honey. It’s also excellent for sandwiches, toast, or as a side to soups and salads.
- Storage: Store the cooled bread in an airtight container at room temperature for up to 3 days. For longer storage, wrap the bread tightly in plastic wrap and freeze it for up to 2 months.
- Reheating: To reheat frozen bread, thaw it completely at room temperature. You can then warm it in a preheated oven at 350°F (175°C) for a few minutes, or toast individual slices.
Nutritional Information
Note: The following is an estimate, and actual values may vary based on specific ingredients and portion sizes.
| Nutrient | Amount per Serving (1 slice) | % Daily Value |
|---|---|---|
| Calories | 250 kcal | 13% |
| Total Fat | 8g | 10% |
| Saturated Fat | 1g | 5% |
| Cholesterol | 0mg | 0% |
| Sodium | 300mg | 13% |
| Total Carbohydrate | 40g | 15% |
| Dietary Fiber | 3g | 11% |
| Sugars | 6g | |
| Protein | 6g | 12% |
Variations & Substitutions
- Vegan Version: Substitute the honey with maple syrup or agave nectar. Ensure the oil you use is plant-based.
- Whole Wheat Variation: Substitute up to half of the high-gluten flour with whole wheat flour for a nuttier flavor and increased fiber content.
- Spice it Up: Add a teaspoon of cinnamon, nutmeg, or cardamom to the dough for a warm, aromatic twist.
- Seed Addition: Incorporate 1/4 cup of flax seeds, sunflower seeds, or pumpkin seeds into the dough for added texture and nutritional value.
- Herbaceous: Add fresh herbs like rosemary or thyme for a savory bread.
FAQs (Frequently Asked Questions)
Q: Can I use instant yeast instead of active dry yeast?
A: Yes, you can. If using instant yeast, you can add it directly to the flour mixture without proofing it in water first.
Q: My dough isn’t rising. What could be the problem?
A: Several factors can affect rising. Make sure your yeast is fresh and not expired. The water temperature should be warm, not hot. Also, ensure the environment is warm enough for the dough to rise properly.
Q: Can I freeze the dough instead of baking it right away?
A: Yes, you can. After shaping the loaves or rolls, wrap them tightly in plastic wrap and freeze them. When ready to bake, thaw them overnight in the refrigerator and then let them rise until doubled in size before baking as directed.
Q: The crust of my bread is too hard. How can I prevent this?
A: Try brushing the loaves with milk or an egg wash before baking for a softer crust. You can also tent the bread with aluminum foil during the last part of baking.
Q: What if I don’t have a stand mixer?
A: You can easily knead the dough by hand. It will require a bit more elbow grease, but the result will be just as delicious.
Final Thoughts
Harriet Lewis’s Honey Oat Bread is more than just a recipe; it’s a testament to the simple pleasures of home baking. The combination of sweet honey, hearty oats, and the satisfying chew of high-gluten flour creates a loaf that’s both comforting and delicious. I encourage you to try this recipe and experience the joy of making your own bread. It’s a rewarding process that will fill your home with warmth and the irresistible aroma of freshly baked goodness. Share your creations with friends and family, and let them savor the taste of homemade happiness.