
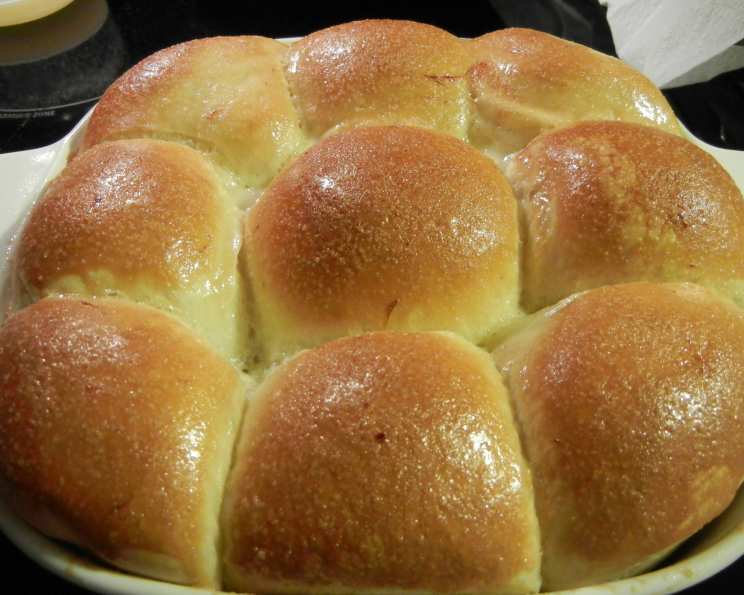
Golden Honey Pan Rolls: A Taste of Home
The aroma of baking bread always takes me back to my grandmother’s kitchen. I remember standing on a stool, mesmerized as she kneaded dough with a practiced hand. The sweet scent of honey would mingle with the yeasty warmth, promising a treat that was both comforting and irresistible. These Honey Pan Rolls capture that same magic, filling my own home with the warmth and love I felt in her kitchen. This recipe, adapted from a well-loved magazine clipping, has become a cherished tradition in my family, a little bite of nostalgia that I’m excited to share with you.
Recipe Overview
- Prep Time: 25 minutes
- Cook Time: 20-25 minutes
- Total Time: Approximately 1 hour 15 minutes (includes rise time)
- Yields: 24 rolls
- Dietary Type: Not specified, contains dairy and eggs
Ingredients
- 1 cup milk (70 to 80 degrees Fahrenheit)
- 1 egg
- 1 egg yolk (reserve white)
- 1/2 cup vegetable oil
- 2 tablespoons honey
- 1 1/2 teaspoons salt
- 3 1/2 cups bread flour
- 2 1/4 teaspoons active dry yeast
For the Glaze:
- 1/3 cup sugar
- 2 tablespoons melted butter
- 1 tablespoon honey
- 1 egg white (from above)
Equipment Needed
- Bread Machine (optional, can knead by hand)
- Measuring cups and spoons
- 13″ x 9″ baking pan
- Non-stick cooking spray
- Mixing bowl
- Whisk or fork
Instructions
-
Prepare the Dough: If using a bread machine, place the milk, egg, egg yolk, vegetable oil, honey, salt, bread flour, and active dry yeast into the bread machine pan in the order suggested by your manufacturer. Select the “dough” cycle and let the machine do its work.
-
Kneading by Hand (Alternative): If you don’t have a bread machine, warm the milk to between 70-80°F. In a large bowl, combine the warm milk, yeast, and honey. Let stand for 5 minutes until foamy. Add the egg, egg yolk, vegetable oil, and salt. Gradually add the bread flour, mixing until a shaggy dough forms. Turn the dough out onto a lightly floured surface and knead for 8-10 minutes, until smooth and elastic.
-
First Rise: Place the dough in a lightly oiled bowl, turning to coat. Cover with plastic wrap or a clean kitchen towel and let rise in a warm place for about 1 hour, or until doubled in size.
-
Shape the Rolls: Once the dough has finished its first rise, gently turn it out onto a lightly floured surface. Punch down the dough to release the air. Cover the dough and let it rest for 10 minutes. This allows the gluten to relax, making it easier to shape the rolls.
-
Divide and Form: Divide the dough into 24 equal pieces. Shape each piece into a smooth ball by gently tucking the edges underneath. This creates a rounded top.
-
Second Rise: Place the dough balls into a 13″ x 9″ baking pan that has been lightly sprayed with non-stick cooking spray. Ensure the rolls are evenly spaced in the pan. Cover the pan with plastic wrap or a clean kitchen towel and let rise for 30 minutes, or until doubled in size. The rolls should be nice and puffy, almost touching each other.
-
Prepare the Glaze: While the rolls are rising for the second time, prepare the glaze. In a small mixing bowl, combine the sugar, melted butter, honey, and reserved egg white. Whisk together until well combined and smooth.
-
Glaze the Rolls: Once the rolls have completed their second rise, gently drizzle the glaze evenly over the tops of the rolls.
-
Bake: Preheat your oven to 350 degrees Fahrenheit (175 degrees Celsius). Bake the rolls for 20-25 minutes, or until they are golden brown on top. To ensure even baking, rotate the pan halfway through the baking time.
-
Cool and Serve: Remove the baked rolls from the oven and let them cool slightly in the pan before serving. These rolls are best enjoyed warm.
Expert Tips & Tricks
- Milk Temperature: Ensuring the milk is the correct temperature (70-80°F) is crucial for activating the yeast. If the milk is too hot, it can kill the yeast. If it’s too cold, the yeast won’t activate properly.
- Flour Measurement: Be careful not to over-measure the flour. Spoon the flour into your measuring cup and level it off with a knife. Adding too much flour can result in dry, dense rolls.
- Proofing in a Hurry: If you’re short on time, you can speed up the rising process by placing the dough in a warm oven (turned off) with a bowl of hot water. The humidity will help the dough rise faster.
- Golden Brown Perfection: If the rolls are browning too quickly, you can tent the pan with aluminum foil to prevent them from burning.
- Making Ahead: You can prepare the dough ahead of time and store it in the refrigerator overnight. Just punch down the dough before refrigerating and let it come to room temperature before shaping and baking.
Serving & Storage Suggestions
These Honey Pan Rolls are delicious served warm with butter, jam, or honey. They also make a wonderful addition to any meal, from breakfast to dinner.
- Serving: Serve warm from the oven or gently reheated.
- Storage: Store leftover rolls in an airtight container at room temperature for up to 2 days.
- Refrigeration: For longer storage, refrigerate the rolls in an airtight container for up to 5 days.
- Freezing: Freeze the rolls for up to 2 months. Thaw overnight in the refrigerator before reheating.
- Reheating: Reheat the rolls in a preheated oven at 350°F (175°C) for 5-10 minutes, or until warmed through. You can also microwave them for a few seconds, but be careful not to overheat them.
Nutritional Information
(Estimated values per roll)
| Nutrient | Amount per Serving | % Daily Value |
|---|---|---|
| Calories | 147 kcal | 7% |
| Total Fat | 6.5g | 8% |
| Saturated Fat | 1.6g | 8% |
| Cholesterol | 19mg | 6% |
| Sodium | 165mg | 7% |
| Total Carbohydrate | 20g | 7% |
| Dietary Fiber | 0.6g | 2% |
| Sugars | 5g | 10% |
| Protein | 3g | 6% |
Variations & Substitutions
- Dairy-Free: Substitute the milk with almond milk, soy milk, or oat milk. Use a dairy-free butter substitute for the glaze.
- Whole Wheat: Replace up to half of the bread flour with whole wheat flour for a nuttier flavor and added fiber.
- Spice It Up: Add a pinch of cinnamon or nutmeg to the dough for a warm, comforting flavor.
- Herbaceous: Incorporate finely chopped fresh herbs like rosemary or thyme into the dough for a savory twist.
- Citrus Zest: Add the zest of an orange or lemon to the dough for a bright, refreshing flavor.
FAQs (Frequently Asked Questions)
Q: Can I use instant yeast instead of active dry yeast?
A: Yes, you can use instant yeast. There’s no need to proof it in the milk first; just add it directly to the dry ingredients.
Q: Why are my rolls not rising properly?
A: Several factors can affect the rise. Make sure your yeast is fresh, the milk is the correct temperature, and the dough is in a warm place. Over-mixing or under-mixing the dough can also impact the rise.
Q: Can I make these rolls without a bread machine?
A: Absolutely! The instructions above provide detailed steps for kneading the dough by hand.
Q: How do I prevent the rolls from drying out?
A: Avoid overbaking the rolls. Tenting the pan with foil during the last few minutes of baking can also help prevent them from drying out.
Q: Can I freeze the unbaked dough?
A: Yes, you can freeze the dough after the first rise. Punch down the dough, wrap it tightly in plastic wrap, and freeze for up to 2 months. Thaw overnight in the refrigerator before shaping and baking.
Final Thoughts
These Honey Pan Rolls are more than just a recipe; they’re a warm embrace, a taste of home, and a reminder of simpler times. Whether you’re a seasoned baker or just starting out, I encourage you to give this recipe a try. Share them with your loved ones, and let the sweet aroma and soft, pillowy texture create memories of your own. I’d love to hear about your baking experience and any variations you try! Enjoy!