
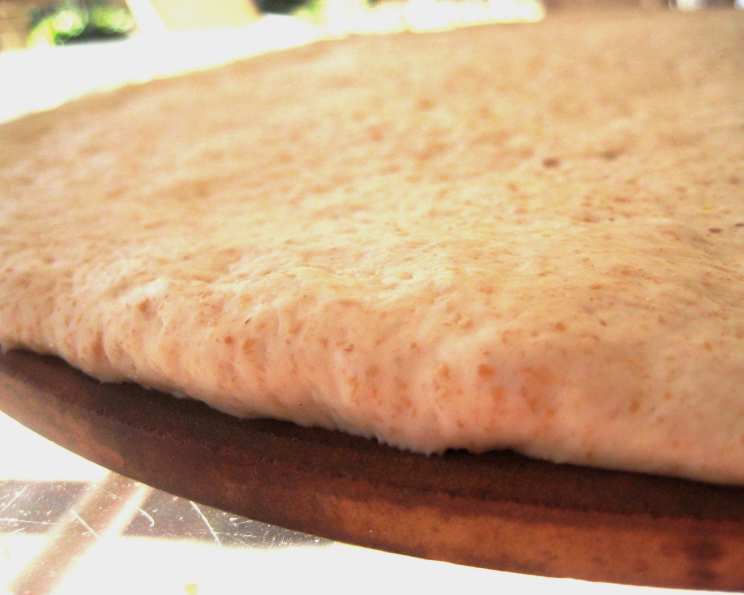
Honey Pizza Dough: The Secret to an Awesome Homemade Pizza
The scent of warm, yeasty dough has always been a comforting aroma in my life, instantly transporting me back to my grandmother’s kitchen. She had a magical touch with bread, and while her recipes were closely guarded secrets, I remember the distinct sweetness that always lingered – a whisper of honey. This honey pizza dough recipe echoes that sweet memory, creating a crust that is slightly sweet, perfectly chewy, and unbelievably delicious. It’s a staple in my kitchen, and I can’t wait to share the magic with you.
Recipe Overview
- Prep Time: 20 minutes
- Cook Time: 12-16 minutes
- Rest Time: 1 hour 15 minutes
- Total Time: 1 hour 47 minutes
- Servings: 4
- Yield: 2 large or 4 small pizzas
- Dietary Type: Vegetarian
Ingredients
- 2 1⁄4 teaspoons active dry yeast (or 1 package)
- 1 teaspoon honey
- 1 cup warm water, 105 to 115 degrees
- 2 1⁄2 cups all-purpose flour (might need to add 1/4 to 1/2 cup more)
- 1 teaspoon salt
- 1 tablespoon extra virgin olive oil
Equipment Needed
- Small bowl
- Stand mixer with dough hook (or large bowl and spoon)
- Clean work surface
- Lightly oiled bowl
- Plastic wrap or damp towel
- Pizza pan
Instructions
-
In a small bowl, dissolve the yeast and honey in 1/4 cup warm water (105 to 115 degrees). Ensure the water is not too hot, as this can kill the yeast. Let it sit for 5-10 minutes until foamy – this indicates the yeast is active.
-
In a mixer fitted with a dough hook, combine the flour and the salt. Alternatively, you can do this by hand with a large bowl and spoon.
-
Add the olive oil, the yeast mixture, and the remaining 3/4 cup water to the flour mixture. Mix on low speed until the dough comes cleanly away from the sides of the bowl and clusters around the dough hook, about 5 minutes. If mixing by hand, stir vigorously until the dough forms a shaggy mass, then turn it out onto a lightly floured surface.
-
If the dough is still sticky, gradually add more flour, a tablespoon at a time, until it pulls cleanly away from the hook or your hands. Be careful not to add too much flour, as this can result in a dry, tough crust.
-
Turn the dough out onto a clean work surface and knead by hand for 2 or 3 minutes. The dough should be smooth and firm.
-
Place the dough in a lightly oiled bowl, turning to coat. Cover the bowl with plastic wrap or a damp towel.
-
Let the dough sit for about 30-45 minutes in a warm place. It should almost double in size. (When ready, the dough will stretch as it is lightly pulled).
-
Take the dough out of the bowl and divide it into either 2 or 4 balls, depending on whether you want 2 large pizzas or 4 small ones.
-
Work each ball by pulling down the sides and tucking them under the bottom of the ball. Rotate the ball and repeat this process 4 or 5 times. This helps to develop the gluten and create a smooth, round shape.
-
Cover the dough balls with a damp towel (or loosely fitted plastic wrap) and let them rest for 15 to 20 minutes. This allows the gluten to relax, making the dough easier to stretch.
-
At this point, the dough balls can be used immediately or wrapped individually in plastic wrap and refrigerated for up to 2 days. If refrigerating, allow the dough to come to room temperature for about 30 minutes before stretching.
-
To make pizzas, stretch out the dough onto a greased pizza pan. You can use your hands or a rolling pin. For a crispier crust, stretch the dough thinner.
-
Top with your favorite sauce and toppings.
-
Bake at 450 degrees Fahrenheit for 12-16 minutes, until the crust is golden brown and the toppings are cooked. Smaller pizzas will take less time, so keep a close eye on them.
-
For a slightly crispier crust, slide the pizza off the pan for the remaining 2 minutes of baking directly onto the oven rack.
Expert Tips & Tricks
- Temperature is key: The warm water activates the yeast, but too hot and you’ll kill it. Aim for 105-115°F. A kitchen thermometer is a handy tool for this.
- Don’t over-knead: Over-kneading can lead to a tough crust. Knead just until the dough is smooth and elastic.
- The windowpane test: To check if your dough is kneaded enough, try the windowpane test. Stretch a small piece of dough between your fingers. If you can stretch it thin enough to see light through it without tearing, it’s ready.
- Proofing in a warm spot: To speed up the proofing process, place the dough in a warm spot. A slightly warmed oven (turned off!) or a sunny windowsill can work wonders.
- Pre-bake for a crispier base: For an extra crispy base, pre-bake the crust for 5-7 minutes before adding the toppings.
- Get creative with flour: Experiment with different types of flour, like whole wheat or bread flour, for a unique flavor and texture.
Serving & Storage Suggestions
Serve your freshly baked honey pizza immediately for the best flavor and texture. Leftover pizza can be stored in an airtight container in the refrigerator for up to 3 days. To reheat, you can use the oven, microwave, or a skillet on the stovetop. For the oven, bake at 350°F until warmed through and the crust is crisp. You can also freeze cooked pizza for up to 2 months. Wrap individual slices tightly in plastic wrap and then place them in a freezer bag.
Nutritional Information
| Nutrient | Amount per Serving | % Daily Value |
|---|---|---|
| Calories | 327 kcal | 16% |
| Total Fat | 4.3g | 6% |
| Saturated Fat | 0.6g | 3% |
| Cholesterol | 0mg | 0% |
| Sodium | 586mg | 24% |
| Total Carbohydrate | 62g | 20% |
| Dietary Fiber | 2.7g | 10% |
| Sugars | 1.6g | 3% |
| Protein | 9g | 18% |
Nutritional information is an estimate and may vary based on specific ingredients and portion sizes.
Variations & Substitutions
- Gluten-Free: Use a gluten-free all-purpose flour blend in place of regular flour. You may need to adjust the amount of water.
- Vegan: This recipe is already vegan!
- Herb Infusion: Add 1-2 tablespoons of dried herbs like oregano, basil, or rosemary to the flour for an herbed crust.
- Spicy Kick: Add a pinch of red pepper flakes to the dough for a touch of heat.
- Different Sweetener: While honey adds a unique flavor, you can substitute it with maple syrup or agave nectar.
FAQs (Frequently Asked Questions)
Q: Can I use instant yeast instead of active dry yeast?
A: Yes, you can. If using instant yeast, you can skip the step of dissolving it in water with honey. Simply add it directly to the flour mixture.
Q: Can I make the dough ahead of time?
A: Absolutely! In fact, the dough benefits from a longer, slower rise in the refrigerator. This develops more flavor. You can refrigerate the dough for up to 2 days.
Q: My dough isn’t rising. What could be the problem?
A: Several factors can affect the dough’s rise. The yeast might be old or inactive, the water might be too hot or too cold, or the environment might be too cold. Make sure your yeast is fresh, the water is at the correct temperature, and the dough is in a warm place.
Q: Can I freeze the pizza dough?
A: Yes, you can freeze the dough after the first rise. Divide the dough into balls, wrap them tightly in plastic wrap, and then place them in a freezer bag. Thaw the dough in the refrigerator overnight before using.
Q: What kind of toppings go well with honey pizza dough?
A: The slightly sweet flavor of the dough pairs well with both savory and sweet toppings. Try classic combinations like Margherita or pepperoni, or get creative with toppings like prosciutto and fig, goat cheese and caramelized onions, or even a dessert pizza with Nutella and fruit.
Final Thoughts
This honey pizza dough is more than just a recipe; it’s an invitation to create memories in your own kitchen, just like my grandmother did. The subtle sweetness of the honey elevates the flavor of the crust, making it a truly special treat. So, gather your ingredients, preheat your oven, and prepare to experience the joy of homemade pizza. Don’t hesitate to get creative with your toppings, and share your creations with friends and family. I’m confident this recipe will become a beloved staple in your home, too. Happy baking!