
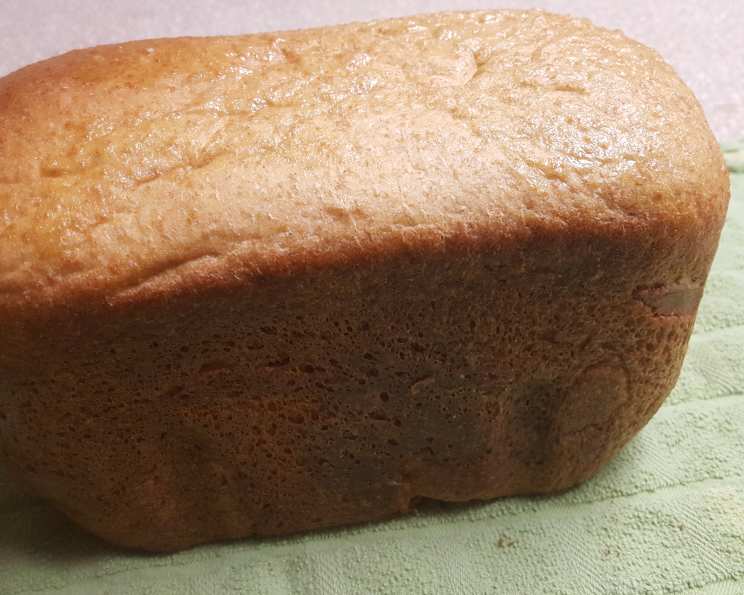
Honey Spelt Bread Machine Bread
The aroma still lingers faintly in my memory, a warm, nutty fragrance that permeated my grandmother’s kitchen every Sunday morning. It wasn’t just the scent of baking bread; it was the promise of family, of long conversations over steaming slices slathered with homemade butter. My grandmother, always ahead of her time, used spelt flour long before it became trendy. This honey spelt bread machine recipe is my attempt to recapture that comforting essence, a tribute to her wisdom and the simple joys of home baking.
Recipe Overview
- Prep Time: 5 minutes
- Cook Time: 3 hours 5 minutes
- Total Time: 3 hours 10 minutes
- Servings: 18 slices
- Yield: 1 loaf
- Dietary Type: Vegetarian
Ingredients
- 1 1/4 cups water (warm, for rapid setting)
- 1 1/2 teaspoons salt
- 2 tablespoons canola oil
- 3 tablespoons honey
- 3 1/2 cups whole grain spelt flour
- 1 3/4 teaspoons bread machine yeast
Equipment Needed
- Bread Machine
Instructions
-
Add all ingredients to your bread machine pan in the following order: water, salt, canola oil, honey, spelt flour, and finally bread machine yeast. Note: It’s crucial to add ingredients in this order, especially when using a bread machine, as it helps prevent the yeast from activating prematurely.
-
Make a slight depression or well in the top of the spelt flour with your finger. Gently pour the bread machine yeast into this well. This helps keep the yeast separate from the wet ingredients until the mixing process begins, ensuring optimal rising action.
-
Secure the bread machine pan into the bread machine.
-
Select your bread machine settings. Choose the light crust setting, and the 1.5 pound loaf size.
-
For the bread cycle, select either the rapid wheat or whole wheat setting. The rapid wheat setting will bake the bread faster, while the whole wheat setting typically allows for a longer rise time, potentially resulting in a slightly lighter and airier loaf. Choose based on your time constraints and desired texture.
-
Press Start on your bread machine to begin the baking cycle.
-
Once the baking cycle is complete (usually after approximately 3 hours and 5 minutes), carefully remove the bread pan from the machine using oven mitts. The pan will be very hot!
-
Invert the bread pan and gently shake or tap to release the loaf onto a wire rack. If the loaf sticks, use a heat-resistant spatula to loosen the sides.
-
Allow the honey spelt bread to cool completely on the wire rack before slicing. This is essential for preventing a gummy texture. Resist the temptation to slice it while it’s still warm!
Expert Tips & Tricks
- Flour Power: Spelt flour can sometimes be thirsty. If you notice the dough is too dry and not forming a smooth ball in the bread machine, add water one tablespoon at a time until the dough comes together. Conversely, if the dough is too sticky, add more spelt flour, one tablespoon at a time.
- Honey Harmony: The quality of the honey matters! A good quality, flavorful honey will impart a richer taste to the bread. Consider using local honey for a unique regional flavor.
- Yeast is Key: Ensure your bread machine yeast is fresh for the best rise. If you are unsure about the age of your yeast, you can proof it by dissolving it in a small amount of warm water with a pinch of sugar. If it foams up within 5-10 minutes, it’s good to use.
- Boost the Flavor: For an extra layer of flavor, consider adding a teaspoon of vanilla extract or a pinch of cinnamon to the dough.
- Autolyse Method (Advanced): For even better texture, try an autolyse. Mix just the water and flour together in the bread machine pan and let it sit for 20-30 minutes before adding the remaining ingredients. This allows the flour to fully hydrate, leading to a more extensible and flavorful dough.
Serving & Storage Suggestions
Once cooled, this honey spelt bread is delicious served warm with butter, jam, or honey. It makes fantastic toast and is also perfect for sandwiches.
- Room Temperature: Store the cooled bread in an airtight container or a bread bag at room temperature for up to 3 days.
- Refrigerator: For longer storage (up to a week), store in an airtight container in the refrigerator. However, refrigerating bread can cause it to dry out slightly.
- Freezer: For optimal long-term storage, slice the bread and freeze it in a freezer-safe bag or container for up to 3 months. Thaw at room temperature or toast directly from frozen.
- Reheating: Reheat slices of bread in a toaster, under a broiler, or in a dry skillet. You can also wrap the entire loaf in foil and warm it in a low oven (around 300°F/150°C) for about 15-20 minutes.
Nutritional Information
Please note that these values are approximate and may vary based on specific ingredients used.
| Nutrient | Amount per Serving | % Daily Value |
|---|---|---|
| Calories | 150 kcal | 8% |
| Total Fat | 3g | 4% |
| Saturated Fat | 0.5g | 3% |
| Cholesterol | 0mg | 0% |
| Sodium | 150mg | 7% |
| Total Carbohydrate | 28g | 10% |
| Dietary Fiber | 4g | 14% |
| Sugars | 5g | – |
| Protein | 5g | 10% |
Variations & Substitutions
- Sweetener Swap: You can substitute maple syrup or agave nectar for the honey, though the flavor will be slightly different.
- Oil Options: Feel free to use olive oil instead of canola oil for a slightly richer flavor.
- Nutty Addition: Add 1/2 cup of chopped nuts (walnuts, pecans, or almonds) or seeds (sunflower, pumpkin, or flax) to the dough for added texture and nutritional value.
- Spiced Up: Enhance the flavor with spices like cinnamon, nutmeg, or cardamom. Start with 1/2 teaspoon and adjust to your liking.
- Savory Spelt: For a savory version, omit the honey and add herbs like rosemary, thyme, or oregano.
- Dairy-Free: This recipe is naturally dairy-free.
- Gluten-Free (Experimentation Required): This recipe is not gluten-free as written. Spelt does contain gluten, though some people with mild sensitivities can tolerate it. To make it gluten-free, you would need to replace the spelt flour with a blend of gluten-free flours, such as brown rice flour, tapioca starch, and potato starch, along with a binding agent like xanthan gum. However, this would require significant recipe adjustments.
FAQs (Frequently Asked Questions)
Q: Can I use regular whole wheat flour instead of spelt flour?
A: While you can substitute whole wheat flour, the texture and flavor will be different. Spelt flour has a slightly sweeter and nuttier taste and often results in a lighter crumb.
Q: My bread is sinking in the middle. What could be the problem?
A: This could be due to several factors, including too much yeast, too much liquid, or insufficient gluten development. Ensure your yeast is fresh and you’re measuring ingredients accurately. Try reducing the liquid slightly next time.
Q: Can I make this bread without a bread machine?
A: Yes, you can! You’ll need to knead the dough by hand or with a stand mixer, let it rise in a warm place, punch it down, shape it into a loaf, and bake it in a preheated oven at 375°F (190°C) for about 30-40 minutes, or until golden brown and the internal temperature reaches 200°F (93°C).
Q: My bread is too dense. How can I make it lighter?
A: Make sure you are using fresh yeast. Also, try using the “whole wheat” setting on your bread machine, as this often allows for a longer rise time. You can also try adding a tablespoon of vital wheat gluten to the dough (if you can tolerate gluten).
Q: Why is it important to let the bread cool completely before slicing?
A: Cutting into warm bread releases steam and can result in a gummy texture. Allowing it to cool completely allows the internal structure to set, making it easier to slice and improving the overall texture.
Final Thoughts
I truly hope you’ll give this honey spelt bread machine recipe a try. It’s more than just a loaf of bread; it’s a connection to simple pleasures, a reminder of the comfort that homemade baking can bring. Experiment with the variations, adjust the flavors to your liking, and share your experiences. Serve it with a bowl of warm soup on a chilly evening or alongside a simple salad for a satisfying lunch. This recipe is an invitation to create your own cherished memories, one slice at a time.